The Cameron Files: Pharaoh’s Curse Walkthrough
The CAMERON FILES: PHARAOH’S
CURSE
By Galilea
Walkthrough by
MaGtRo November, 2002
Gameplay: The game can be
fully installed on the hard drive but needs either disk in the drive for
gameplay. After the introduction cinematic, the main menu is seen – New game,
Load, Save and Quit. The Main menu can be accessed later by pressing the ESC
key. There are 16 saved game slots that can be overwritten. There are several
cursors that are used in gameplay – no action, directional, back away, pick up
inventory, conversation, active inventory and examine cursors. Left click of the
mouse is for general gameplay, right click is for inventory menu, ESC accesses
the main menu and Space bar stops animated scenes. In Inventory menu, documents
are stored in the ‘wallet’ and the diary (red book at bottom right of inventory)
keeps the cinematic seen throughout gameplay. To exit the diary or other
frames, click on arrow at bottom left of screen. To combine objects in
inventory, click on first item which will change to be the cursor and then click
on the second item to combine with to make a new inventory item. To prevent
mouse slugginess on active spots and freeze ups, lower video and/or sound
acceleration. If that doesn’t work, select the software renderer as oppose to
hardware renderer under display settings in the Pharaoh’s curse configuration
frame. The configuration frame can be accessed in the start, program and then
Cameron Files.
The sealed power… The forgotten name…
The name ought to be whispered… The power not to be awoken.
See a gloved man recites the
hieroglyphs on a sarcophagus. The hieroglyphs on the sarcophagus light up –
the power is awakened.
Cairo
Hotel
Exploration
Mokteos Hotel:
Egypt, 1936: You are in a hotel courtyard in Cairo and the morning call of
the Muezzin is heard. Go forward, enter the hotel lobby and talk to receptionist
behind the desk. The receptionist greets Allan Parker Cameron, His Excellency.
Ms. McFarley has left for the Antiquities Museum. The receptionist gives the
room 17 key. Cameron climbs up the stairs. Go left to hallway, left, left
and right on white tiled hallway. Turn left and use key on room 17, second door
on the left.
Room 17 (Cameron’s room): Enter the room. Read the note
and take the key to the Cairo Museum service entrance from side table by
door. Moira’s research is about the strange enigma concerning 2 statuettes and
is the reason she needs Cameron’s help. She collaborates with Mehdi Al Salem,
the curator. Cameron drops his luggage on the bed. Open the luggage and take the
flashlight and a set of skeleton keys. Take the hotel brochure
found on the other side table and read it in the wallet. It says you can ask
Abdelaziz, the waiter (receptionist, bartender, etc) for
about everything and the back cover talks about the Antiquities museum. You can
also use the brochure to go to hotel and museum in one click, just by clicking
on the picture of either place. Go down to the main lobby.
First floor: Read the newspaper on the table to the left
of the main entrance about a madman chanting phrases from the sect of the
Followers of Toumchetki. Her image was worshipped as a sacred icon. The sect of
Princess Toumchetki is led by a grand master, protector of evil
powers.
Bar: Go to the right hallway while facing the reception
desk. Enter the Bar, first room on the right. Turn right and read the June 10,
1936 newspaper on the table by the side alcove. The Tomb of the ‘unknown
princess’ was broken into on May 15.
Reception desk: Go back to the lobby, behind the
reception desk and read the registration book. Olga Fezrossof from Moscow
arrived June 4th and is in room 20. Moira arrived June 5th and is in room 18.
Doctor Von Bossardgheist of Berlin arrived June 7 and is in room 15. Herr
Blitzstrum of Berlin arrived June 7 and is in room 21. Edmund de la Destriere of
Paris arrived June 5 and is in room 16.
Now, Cameron says it’s time to
find Moira. Exit the hotel and open the door of the taxi. Cameron rides to
the Museum.
Looking for Moira at
Museum
Museum:
The waiting taxi drops you by the side entrance of the museum. Use the
museum key on door and enter. Go to the right, left, forward 3x, left and enter
the first door on the right.
Moira’s
office: Look inside the handbag on top of the small file
cabinet and note the hanging small key. It is Moira’s, so she must be close by.
Look at desk and take Moira’s note on Isfet. Read about Tomb KV 65 and
the 2 statuettes (male and female) of Ka. Go to right corner and examine the
index file cabinet. This is a good source of information on Egyptology. It
easier to check the index files by placing the lens icon on the drawer front and
move/click the lens icon. Read A – Ankh, B – Ba and beetle, K – Ka (one’s
essential energy or spiritual double, represented by statuette with arms lifted
up towards heaven) and M- Maat (card taken and is in the wallet), Menat
collar and Mokteos (hmm.. the Hotel’s name).
Curator’s
Office: Use the skeleton keys on the locked door at
opposite side of the room. Enter, turn right and look at chest with an ankh
lock. Go to bookcase, turn around and look in drawer of the desk. See tiger
head, neckwear, clothes and some other artifacts. See a spiral staircase going
to the second floor. Exit through other door using the skeleton key. Hear
footsteps. Turn right, right, right and forward until the middle of the hallway.
Look close on display case by wall. Cameron thinks the cross of life (ankh)
can be useful. Use skeleton keys on display case, open case and take
ankh. Go back to the curator’s office. Use the ankh on locked chest and
take key. Exit the room.
Basement: Go to the hallway by the service entrance
door you came in and enter the last door away from service entrance at the end
of the hallway. The room is full of crates. Go forward and enter the wood door
on the left. Go down the stairs and take the wire cutter from the metal
shelves. Use wire cutter on padlock of metal box on floor and take
crowbar. The double doors to the warehouse cannot be opened
yet.
Top
floor: Go upstairs using the left stairs at rear of
museum. Look around and look close at 2 statues in display cases – Isfet, a
serpent entwined around a globe at middle of left hallway and Maat, a sitting
Goddess with a feathered head at middle of right hallway. Go to closed
door at end of right hallway with the rear stairs on your back. Use the key with
diamond on the door. Enter.
Room with
red curtain: Go through the red curtain. Look at empty
small cabinets with red-doors on alcoves at left and right wall and an empty
chest by back wall floor.
Meet the curator: Exit the room and hear
those footsteps again. Go down by front stairs and go towards Moira’s office.
Meet the curator carrying a bowl like artifact. He frowns when Cameron mentioned
Moira and then Cameron gets thrown in the locked room at the basement.
Basement
locked room: Use the flashlight in inventory and turn to
left wall. Behind the crate is a switch. Click on it and see that the cord is
cut. Go forward and look around. See that Indy left his hat and whip here.
Go to the back of the room, while facing the statue, pan left to crates and pick
up a piece of green cord behind one crate. Go back to the broken switch
and click the green cord on the cut cord. Click to close the cover and switch
the lights on.
Near
encounter with German Archeologist: Now Cameron wants to look
around. Check out the sarcophagus and the sitting black statue across it.
Save Game! Move forward once, turn left and look close at the crate on
the left wall. Note that it is from Ernest Pinkerbottom who found the tomb of
the unknown princess to Mehdi Al Salem, the curator. Once you move out of the
crate view – time bar start – find a place to hide. Pan a little to the
left and click-hide on the side of the sitting black statue. Watch the large
man, Maximilian enters halfway inside and get called away by another German
accented man. They are looking for Moira’s 2 statuettes. Cameron watches the 2
men talk – the large man and a blonde man (seen in the introduction).
Finding Information about
Moira’s Disappearance
Hotel:
Back at the hotel courtyard, enter the lobby and go behind the reception desk.
Take the room 18 key from the wall cabinet behind the reception
desk.
Moira’s
room: Climb stairs and turn right to go to right hallway.
Go forward the tiled hallway and use key on last door on the right – room 18.
Enter and look around. Open drawer of side table and read the letter of the
museum curator to Moira. Open the cabinet by far wall. At top right shelf,
take Moira’s red diary. Look in wallet at Moira’s diary and find out that
it needs a key to open it – must be the key in Moira’s handbag. Go forward
towards the door and hear a sweet-talking Frenchman wanting Moira to open the
door. Cameron takes the cartouche translation Moira wanted from the
Frenchman, Edmond de la Destriere. Read the cartouche translation on the
sarcophagus in the diary. The opened tomb is that of Princess Toumchetki’s.
The Princess Toumchetki, the beloved of Maat defeated the vizier…. Guardian
of the eye… and the Temple of Maat. The female statuette is that of
Princess Toumchetki. Exit the room and the hotel. Take the taxi to the museum.
You can also use the hotel brochure to go to either hotel and museum in one
click, just by clicking on their picture.
Museum:
Unlock the service door, go to Moira’s office and open her handbag to take the
small key. Click on small key in inventory and automatically unlocks
Moira’s diary. Read Moira’s diary about the men following her and Edmond and her
opinion about the curator. Go back to the hotel.
Hotel:
Bar: Go to the
bar at room at first floor right hallway. Talk to the large German you saw at
the museum basement – Maximilian Von Bossardgheist, an archeologist. He brags
and was stopped from further conversation by the blond man, Herr Blitzstrum.
Cameron’s
room: Go to Cameron’s room. While on the top of the
stairs, hear Maximilian’s voice say ‘He’s coming’. Go to your room and see it
ajar. Enter and hear a voice coming from the air vent on top of right wall by
the door. See that the suitcase has been opened. Take the chair by the window
and place it below the air vent. Climb on the chair and click on air vent. Hear
Maximilian and the other man talk about following Cameron to find Moira and the
2 statuettes. Herr Blitzstrum asks if he has found the codes. Cameron decides
to check out the museum discreetly and look for those codes.
Check the Museum More
Closely
Museum:
Enter and go to the Curator’s office.
Curator’s
office: Take a pencil from holder on the desktop.
Look in the desk drawer and see that the costume is gone. Take the red notebook
and see some writing indentations. Use pencil on notebook three times to trace
the writing indentations. It seems that the curator believes that Moira is under
the influence of Toumchetki. He is to go to the Temple of Maat via the ‘Wonder
of the Nile’ cruise ship. It leaves on June 11 and arrive at Lougsor-Luxor on
June 14. There is a note about June 9 at 21:00 hr about Moira at the hotel. Exit
the room and go to the Red curtain room upstairs.
Red
curtain room and preparation of Essence of Maat: Exit
through the curator room’s door, right, right, climb right stairs, right and
enter first door. Go to center table and see the artifact that the curator was
carrying earlier. Following the Essence of Maat recipe on the index card of Maat
(read it in the wallet), take ostrich feather, blue jug at center,
clear bottle at right and pestle. Place the clear bottle (turpentine) on
the arched bowl, then the feather and then use the pestle (scepter of Oudj) on
them. Click the blue jug to take the mixture. Turn around and open the
small cabinet in the alcove. Take the statue that was on display outside at the
hallway. Do the same for the other cabinet across the room. Now you have 2
statues – Isfet, the serpent wrapped glass globe and Maat, the sitting
statue with a feather on the head. Look in the chest on the floor and see
that now the clothes and other things that were in the drawer at the curator’s
room are in there. Go back to the curator’s office.
Curator’s
office and balancing of Good and Evil: Look close at open chest
with ankh lock and place the 2 statues just taken on the indentations, Isfet on
left and Maat or right. Click on front side of the chest to open a hidden
drawer. Click on the left stick – stand and place it in front of the front panel
of the drawer. Take the bar and click it on the stand. Take the 2 wires and
click it on horizontal bar. Take the 2 pans and click it on the wires to make a
balance. Hmm – uneven more evil (Isfet) than good (Maat). Place the blue jug
with the essence of Maat on right side to even the scale – very symbolic!
Another secret compartment opens. Take the museum warehouse key and the
Toumchetki parchment. Go to the warehouse where you were locked in by the
curator.
Museum
warehouse at the basement: Go to the hallway by the
service entrance door, forward to last door and enter to go down to the
basement. Use the warehouse key on locked door. Enter, go forward and use the
wire cutter on the wire around the sarcophagus. The museum watchman is dead!
Turn left and go to the crate that was delivered to the curator from
Pinkerbottom. Use crowbar to open the crate – ha! Found it. Take the ‘code’
from the war ministry in Berlin for Herr Blitzstrum. ‘Logical
Continuation of figures. The letters in their place’. Go back to the
hotel.
Hotel: The
receptionist excitedly gives Cameron a letter from Edmond and 2 tickets, one for
Cameron and one for Moira for passage on the Wonder the Nile cruise ship.
Cameron is invited by Pinkerbottom to join him in Valley of the Kings. Edmond
invites Cameron for a drink later in the afternoon at the ship.
Wonder of the Nile
Cruise Ship
The inventory has only the cabin 15
key, flashlight and skeleton keys.
Upper
deck: See Maximilian having a nap at upper deck. Go down
the steps on the left and Cameron wants to look for Edmond. Go forward or
turn around, pass the tables in the middle of the ship and enter the first door
after the inward stairs going down.
Looking for
Edmond:
Bar: Talk
to the bartender, this will trigger the entrance of Countess Olga Fezrossof. She
does some mind communication. She wants you to find dear Edmond. Take a
cruise ship brochure and eat some Turkish delight from the coffee table.
The brochure says that there 4 cabins with a safe. Exit the room, go towards the
middle of the ship and go down the inward stairs (not the outside steps) by the
tables to the lower cabin deck.
Linen
room: Turn right, forward and use skeleton keys on
louvered door. Take a look at the list of passengers on paper tacked on wall.
Cabin 1 – Countess Fezrossof has safe usage. Cabin 2 – Maximilian Von
Bossardgheist has safe usage. Cabin 15 – poor Cameron, no room service
breakfast. Cabin 17 – Karl Blitzstrum has room service the whole day. Cabin 18 –
Edmond de la Destriere. Cabin 19 – Moira McFarley. Cabin 20 – the curator, Mehdi
Al Sale has room service the whole day. Open the drawer to the left and take
stethoscope. Turn left and study the cabin layouts of the ship.
Maximilian is on the main deck. Edmond is across Cameron’s cabin and the curator
is at the end of the hallway.
Exit the linen room, turn left,
forward, right, left and forward to cabin 18. Knock on door and nobody answers.
Turn around and use cabin 15 key to enter Cameron’s room.
Cabin 15
(Cameron’s): Go forward, turn left and enter the small
washroom. Look at right side of the washbasin. Look close and click at smoke
coming from below deck – Cameron says what’s happening down there? Go out
of the room to hallway.
Trap door: Turn
right and go to the end of the hallway. Pan to the left and open the small
cabinet on right of cabin 20. Take crank. Turn around and look down on
trap door. Use crank on trap door to open it. Turn to the left and take ladder
and place it in hole. Go down.
Cargo
deck: Use flashlight, turn left and take hammer from top
of barrel. Turn right, pass the meshed gate and forward to green chest on floor.
Look close at locked green chest with German Eagle insignia. Turn right and
forward to another meshed gate. Look close at item on carpet behind the
padlocked meshed gate. It’s the statue signifying Isfet with incense burning.
This is the cause of the smoke coming through the washbasin in Cameron’s room.
Use the hammer on the padlock of the meshed gate twice only — Do not use
hammer third time or try to open the gate after Cameron says the statuette is
dangerous, I’d rather not touch it. If you do, you die. Turn left and
see a ramp with a bar blocking the trap door. Turn around, go forward and up the
ladder to the hallway.
Checking out the
passengers:
Go forward to the other end and
climb up to main deck. Watch the cutscene of Edmond shooting at somebody and
passing out – the cutscene is triggered by seeing the Isfet statue. Standing now
on lower deck by stairs, turn around and go to Edmond’s cabin 18. Hear –a
monster and Cameron will say he needs to see inside. Go back up to
main deck using the left stairs, take the left outside stairs down and look
close at Edmond’s cabin window. See the curator hypnotizing Edmond. Cameron says
it’s the opportunity to visit the curator’s cabin.
Bar: Go
back up, forward and enter the bar by the first door on the left. Look close at
book – Gesundheit! and cigar left there by Maximilian. Take some more Turkish
delight from coffee table. Go to the bar and see a sleeping bartender. Take the
passkey and another metal key. Exit the bar and go to the
curator’s cabin 20.
Curator’s cabin
20: Use passkey and enter. Look close side table drawer
and take the red book with an ankh on the cover – Toumchetki’s Believers
Book. Read it in the wallet. Open the closet at other end of room. Take
Maat statue from the chest. Exit cabin. Note that the trap door crank has
been cut off thus sealing the cargo area.
Edmond’s cabin 18:
Use passkey and enter. Find Edmond in a
bad state. Look close on red suitcase by closet and open it. Study the insignia
on the lid of the suitcase. Go back to Edmond on the bed and look close at his
hand. He has a ring with the same insignia. Try taking it off and Cameron will
say it is really stuck. Needs something to slide it down. Go to the
washroom and get the soap. Notice the makeup paraphernalia. Use the soap
on Edmond’s ring, take ring and then use the ring on the insignia on the
lid of the suitcase. Hear a click and then open the lid. Take goggles and
file. Read the passport and take the mission ‘Neighbor’s Eye’ report.
What stowaway?
Other entry to cargo
deck: Exit the cabin and go to the main deck using
the right stairs. Go down the outside stairs and enter door. See a metal cabinet
and the blocked door to the ramp. Use metal key taken from the bartender on
cabinet. Turn the crank to remove the bar below deck and then open trap door. Go
down.
Cargo deck in search of the
stowaway: Use file on padlock of meshed gate, go forward and
see a sarcophagus. Is this the same sarcophagus with the dead museum guard? Open
the sarcophagus and see the statue, carpet and incense burner. So this is how
Edmond thinks he can influence the stowaway. He didn’t really control-influence
it, did he?
Maximilian’s cabin
2: Go back to main deck, turn right and go to cabin 2. Use
passkey and enter. Look at mirror on entry table, look at bottle of rum and then
move cursor to the left of the bottle in close up view. Click on wood, move out
of close-up view and see the safe.
Opening the safe – Use the
stethoscope on safe. Look close at dial. Move the cursor clockwise or
counterclockwise to hear a low clunk sound denoting the right number for the
combination. The normal sound is higher tone. To reset the puzzle, click at
the center and the red arrow will go back to zero.
Move cursor to right to get a clockwise arrow and
then click twice to hear a clunk sound at 20.
Move cursor to the left to get counterclockwise arrow
and then click once to 10.
Move cursor to the right to get clockwise arrow and
then click 4xs to 50.
Move cursor to the left to counterclockwise arrow and
then click 3xs to 20.
Click at the center and it will open the
safe.
Take metal box, gun and rolled
letter. Read the letter in the wallet. Turn left from out close up view of
safe. Open the closet and take the metal key with eagle insignia from the
pocket of the coat. Go to the table at far end of room. Open the decoder box and
click on any key. Take the coded message and study it in the
wallet.
Decipher coded message – Remember the clue on
the message from the war department found in the crate at the museum – Logical
Continuation of figures. The letters in their place. The letters stays the
same and the numbers are to be changed to letters. To start you off the last
set of code /1-R-R-5-V-1-L is decoded to be ARRIVAL.
KV Mission, Highest priority, Bring back the eye of
Isfet, Get rid of the Vizier if he, interefers with our plan, confirm explosiv
arrival
Cargo deck: Go back to cargo
deck by way of the just opened trap door. Use the German eagle key of Maximilian
on green chest and open chest. See enough dynamites to explode the
pyramids. Go back to main deck.
Curator’s cabin 20 and the close encounter with the
evil kind: Enter and read the letter on the headboard. So
the curator is keeping the evil energy of the vizier with him. Save game
here! See the door shake and hear the mind communication of the Countess.
Open the door and see the evil vizier’s mummy – the one that Princess Toumchetki
must have defeated. He attacks Cameron – time bar starts – take the
statue of Maat from inventory and click it on the vizier. The vizier cringes
away from Maat.
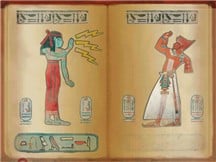
Look in the red book in the wallet. This action is
based on the second depiction in the red book – Toumchetki’s Believers Book.
Note the cartouche at the bottom of Princess Toumchetki. Cameron wakes up and
curses the curator. The countess says that the curator risks his life to protect
Moira.
Valley of the Kings’ Waterfront
Area
Ship: The
inventory now has a flashlight that has no batteries, goggles, hammer
and metal box.
Cameron’s
cabin: Go to the door and pick up the letter inserted under the
door. Read it in the wallet. The letter from the Curator warns Cameron to stay
out of the situation for the safety of Moira. Exit and go to the curator’s
cabin.
Curator’s
cabin 20: The chest that holds the Maat statue is gone. Go
to the closet, turn around and pick up the gun on the left side of the
bed.
Go to main deck, out to the railing
and look at the small island just off the ship. See and hear an explosion at the
mountains. Cameron will say to check if the explosives are still here. Go
to cargo area.
Cargo
area: See that the sarcophagus is gone. Turn right of the
sarcophagus box and pick up the rope. Go back out and see that the green
German chest of explosives is gone. Take the pipe under the ramp close to
where the green chest was.
Small island:
Go back to the main deck and down the outside stairs. Cameron says it
looks like we’ve got company. See a flashing reflection from atop the
mountain. Cross the bridge to the small island. Take the path left of the pole
and look close at the cartouche with beetles carved on the stone. The cartouche
is similar to the one at the bottom of the Toumchetki parchment. Go back and
take the path to the boat. Enter boat and click forward to propel the boat to
the mountains and the Valley of the Kings.
Water shore area
exploration: Take
the path to the left and go forward on a twisty, zigzagging path to the very top
of the mountain. See a similar stone with the Toumchetki cartouche and beetles.
Go back down the mountain and take the path around and back of the ruined
building. The path is blocked by a recent rock fall – maybe made by the
explosion heard earlier. Go back and forward to the intact building.
In search for the Dig
Site:
Excavation storage
building: As soon as you take a step inside the building,
somebody locks you in. Go forward the aisle by the window and then turn around
at the end. Look behind the barrel close to the window and pick up a metal
wire. Go to the next aisle between the shelves, turn around and face
the back wall from the entry door. Look close at box on middle shelf of the
right (second from wall) storage rack. Open and take 2 rappels. Go
to aisle by the windows at other end of the building. Look close at bucket and
pick up a mirror shard. Turn left and go to the other door.
Closed door to office: Look close on hole at bottom
right of door. See Hans, the blond Nazi officer out there. Use mirror on hole
and see Hans on a ladder searching a book shelf. File cabinets have also been
searched. Now, the door has active spots on the lock and at the base of the
door.
Opening the
door: While facing the door or in close view of the base
of the door, take-click the Wonder of the Nile brochure from wallet and click
it on the base of the door twice to push it in further. Look close on the lock
and use the metal wire found behind the barrel on the hole of the lock. Look
close at brochure under the door. Easy.. And there we go. Now,
pull the brochure out with the key and take both of them. Use
key on door (not lock). Shades of Nancy Drew!!
Excavation Office and lounge:
Enter, go forward and look at the Kings Valley North May-June
1936 registrations map on the wall. Note the registration and directional
numbers. Turn left, forward, right and look up to the bookshelf that Hans
was rifling through. Read the Kings Valley North Registrations ledger. Note the
registration number and directions of the entry. Note that Von Bossardgheist has
an expedition also. Turn to the second page and see that Pinkerbottom’s data
were torn off. Go back to the wall map and note that only the middle bottom
expedition did not match any that was on the ledger – No: FGB – 0325, 35 deg SE,
5023-5026. This must be the area of Pinkerbottom’s dig.
Turn around and go to the sofa –
table area. Look close at the cigarette stubs. Go towards the other door by the
sofa area. Look at paper on shelf by door and see a picture of Pinkerbottom,
Moira and Edmond. Note the 2 statuettes. Exit the building.
Mountain
Trail: Go forward on path to the
water’s edge, turn left, forward, left and up the mountain until the path
diverges into right and left.
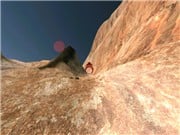
Climb up the mountain top:
Walk up the left path and see that it is a dead end. Go back and take the
right path. Go forward pass the metal steps on the mountainside and look up to
see missing steps to get up the mountain. Look down from top of steps, turn
right and see a hot spot. Place the rope on the hotspot (trigger for rappel).
Turn back to the mountain cliff, look close on wall and place the rappel on
the wall. Use hammer on rappel. Take the now accessible rope and click on the
rappel. Go up and then click on the lowest metal step to tie the rope on it.
Climb to the top.
Mountain
top: See the telescope that caused
the reflection seen at the cruise ship. Look through the telescope and watch an
event happening at the cruise ship – Moira being pulled by the curator, she
throws a necklace from her neck and it is picked up by the curator. The vizier
mummy arrives holding a statue, touches Moira on the shoulder and looked up to
Cameron. It seems that Moira is now under the influence of the vizier.
Look down, see cigarette stubs and
flask – the Germans must be the ones spying on the ship. Turn around and go to
the other side of the mountaintop. See the excavation dig site below and steps
going down on the mountainside. There is a wood structure with rope that goes
down but is inaccessible right now.
Another vizier
confrontation: Go back to the telescope area and down the
mountain. Save game here!!! Go forward until you see the vizier coming
– time bar starts – Turn around and see that you are in the
diverging path seen earlier (picture above). Go to the left path. Cameron will
go to the left path and hide. If the vizier catches you or you fight him, he
will lift you to the sky, an obedient Moira arrives and you are dropped to crush
on the ground. Turn around and go down the mountain.
Excavation
building: Go down to the excavation storage building (door
you entered and then get locked in) and hear noises inside the building. Go
around to the back. Time to check on the curator and enter through the
door of the excavation office. Go to the storage area door and enter. Watch a
crazed Maximilian carrying a bunch of tools to make a big, no – an enormous
hole in the sand. Go back to the office exit door and pick up a key
on the ground by the door. In inventory, use the key on the metal box to open
the box (click on key and then click key on box). Ride the boat back to
ship.
Collecting
beetles:
Ship – Curator’s
room: Go to the curator’s cabin 20, enter and see the
curator in bed – he’s in a bad shape. Take the black beetle in multicolored
setting on a chain (taken from Moira) by his hands – I’ve seen this
beetle before and the ankh key from his neck. Look at the black
beetle in inventory and see the cartouche etched on the back. Take another
key from the left side of the plant on top of the side table.
Go towards the windows and see the
suitcase on the floor. Use the key taken from the side table to open the
suitcase. Use the key with ankh sign from the curator’s neck to open the inner
lock inside the suitcase. Take the female statuette of Ka.
Go to the washroom and see that the
curator had some Essence of Maat made. Dip the black beetle on the essence and
then click to place it in inventory. Look in the red book in the wallet. This
action is based on another depiction in the red book – Toumchetki’s Believers
Book. Go to the stone with the carved cartouche and beetles at the small
island.
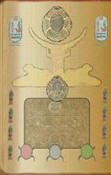
Small island and beetle
carvings: Take the left path up to the beetles and
cartouche carved stone. Place the essence-dipped scarab-beetle at the bottom
etching. A blue beetle appears on top. Take the blue beetle from the top
and then the black beetle from the bottom carving.
Boat and
pulley: Get in the boat. Look close behind the barrel that
is in the front part of the boat (triggered by taking of statuette). Take the
pulley. Look in inventory and combine pulley with the metal pipe (click
on pipe and then click pipe on pulley) to make a pulley with handlebar.
Beetle stone carving on mountain
top: Take the left
path by water edge after alighting from the boat and climb up the twisty
mountain path to the other carved stone. Place the black beetle at the bottom of
the stone and a red beetle appears on top. Take the red beetle first and
then black beetle. Climb down and go to the mountain top with the
telescope.
Excavation
Site
Mountain top overlooking the dig
site: Go to the wood stand overlooking the dig site. Use
the pipe with handlebar on the rope that is strung from here down to the
mountains side. Boy, did Cameron’s baby blues bulge. It’s hot! After the
rope ride, take the metal steps down.
Dig Site mountain metal
steps: As soon as you get off the metal steps, pan right
on the ground and pick up the black beetle that you dropped while jumping
down. Go forward once. It’s really too hot, I’m thirsty. If you don’t get
a drink soon – you die. There are 4 paths from here – to the rock fall on the
left, to the tent on the right, to a mountain wall by the tents ahead and metal
steps on mountain wall.
Pinkerbottom’s
tent: Take the right path to the tent, left and enter the
middle tent. Open the wood chest outside the tent. Take a drink from the flask
at right side of chest. It’s hot. Fresh Water. I feel better. Take
lighter at center and gasoline can on upper left. Enter tent and
see Pinkerbottom in the same state as the curator. Pinkerbottom! What a
massacre! Just like the curator and Destrierre. Look in his briefcase, take
and read both sides of the letter from the curator in the wallet. This
explains a lot – the feminine statuette that you have is Toumchetki, guardian of
the balance and this is her tomb they are excavating. The eye of Isfet that the
Nazi’s are interested in and holds the evil power of the God of Chaos is in the
temple here. Take the topographical map of the area from the desk. Note
the blue scarab in the small island, the red beetle in the mountain pass on the
left of the clearing, green beetle and yellow beetle. Exit the tent.
Green beetle: Go forward
2xs to the center of the intersecting paths. Pan the cursor to the left of the
metal steps seen on the mountainside. Forward 2xs, turn left and see another
beetle and cartouche carved stone. Look close and place the black beetle at the
bottom. Take the green beetle first and then black beetle. The
yellow beetle is not found in the game.
Cave entrance:
Go back and go down the main excavation
site. Take the ladder behind the loaded cart on the rail.
Ladder: This
ladder can be used on the rock fall as a way to go to waterfront area –
excavation site building and the ship if needed. See also the dynamite green
chest by rock fall if you ever go that way. The Germans were trying to stop
you.
Go to the cave gate. Look close at
padlock and use the gun on it. Open the gate, enter, go down the steps and turn
right. Look close at lantern, use gasoline can on it and then use the lighter to
get light.
Beetle
Puzzle: Go down to the cartouche
and beetle chamber. Go to the middle top cartouche of Maat, sitting feathered
goddess. Clue is in the Ankh covered red book in the wallet.
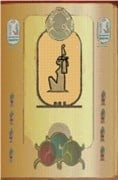
Place the black beetle on slot – cartouche turns
black.
Place blue beetle on top of black – cartouche turns
blue.
Place red beetle on top of blue – cartouche turns red
purple.
Place green beetle on top of red – cartouche turns
light green.
Sound of door opening. The black beetle is back in
inventory.
Turn left and enter the now open
passage. Eeeek!! We’re sealed in! Go forward to the Ankh key chamber.
Ankh key
puzzle: In the chamber are 4 posts
at the center of the chamber with a white door with a Maat cartouche with an
ankh slot at the bottom by each post. Go to the opposite door from the passage
and take the ankh key from the bottom of the Maat cartouche. Turn around
and do the puzzle by placing the ankh key on each door opposite a god in a
specific order. The clue is in the Ankh red book in the wallet. Save Game
here!
Clue:
Osiris said: My key will open the chamber and within:
the ultimate key.
Horus said: You must open the chamber of Horus before
opening the ultimate chamber.
Isis said: My key shall open the chamber of
Horus.
Re said: Horus shall provide you with the key that
opens my chamber.
Each of the gods offers you a key. Each god speaks
the truth. All except the one who is hiding the ultimate key. Yet this is the
one you must attain.
So that in her great splendor, The guardian of the
beloved of Mat shall appear to you. Beside Mat, The gods have placed the first
key. The key which opens the first chamber – The queen’s chamber.
Be cautious in your acts. Respect the order. For no
faults shall be allowed, If what you seek is balance And discovery of the
ultimate secret.
Posts arrangement:
From the sealed door with the ankh key and looking in
the chamber:
Rear left post is Isis in white gown.
Rear right post is Horus, falcon headed
god.
Front left post is Osiris in white mummy wrappings
and holding crook and flail.
Front right post is Re, sun god depicted in human
form with falcon head with sun disc on head.
Solve:
Place the ankh key on door opposite Isis, enter and
take key from statue.
Place the ankh key on door opposite Horus, enter and
take key from statue.
Place the ankh key on door opposite Osiris, enter and
take key from statue.
Place the ankh key on door opposite Re , enter and
take key from statue.
Place the ankh key on original door opposite the
passage.
Move back and the door opens and the other 4 doors
closes.
Go back to each door and pick up the ankhs from all
doors.
Enter the sarcophagus chamber.
Black sarcophagus chamber
puzzle: This is the chamber that is seen in the
introduction, where the power was awakened and where the vizier must have been
kept. Look close at sarcophagus. Click on the figures in the order shown in the
cartouche. Icons numbered from left to right: click on icon # 7, 6, 5, 3, 4, 2
and 1. The black sarcophagus moves away and stairs going down are revealed. Go
down.
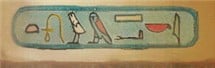
Smoked filled Chamber
puzzle: Save Game here!! You have to find you’re way out
of here. As soon as time bar start – click on goggles (taken from
Edmond’s suitcase).
When wearing the goggles, you
will see lines that show the headings in degrees of the circumference of the
room. Navigate by choosing a heading and walk to that heading using specific
number of steps to get out of the room. The clues for the headings and number
of steps are in the parchment taken from the ankh locked chest in the
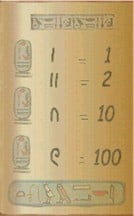
curator’s office – study it in the wallet. The curved icons are the headings
and the number of men are the number of steps that need to be taken. The
derivation of the headings to numbers is in the red ankh book.
Using the goggles, move the
screen to center the heading on the arrow, click to count a step, select the
heading again and click to count another step, etc. The color of the view seen
through the goggles changes when the correct steps and headings are done. When
done go forward to another chamber.
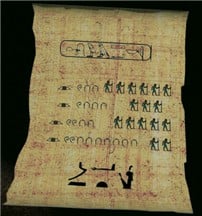
Headings in degrees:
120 – select and click 6xs
130 – select and click 3xs.
220 – select and click 5xs.
270 – select and click
2xs.
Circular stairs chamber:
Watch Hans, the Nazi assistant to Max
fly off the enormous pit at center of the chamber. Listen to the voice – the
Vizier mummy recites all the evil deeds he has done. Is he bragging or
praying? To get down to the bottom, place the correct ankh key on the slot
at certain landings to extract recessed steps. While going down you can see and
hear the Vizier chant and Moira sitting down at the bottom of the
pit.
Look close on ankh icon. Place the correct ankh key
on slot. The other steps extend out. Click to get the ankh key back. Walk down
until the next ankh slot to extend the next set of steps.
Place key in same order as in the door ankh puzzles:
Isis’ key (2nd slot in inventory), Horus’ key (3rd slot in inventory) and
Osiris’ key (4th slot in inventory).
Climb down to next ankh slot. Cameron will say I
have to stop that if I could. To stop the vizier – Look at pit and
use gun on male statuette.
Save Game!! Be sure that the metal box taken
from Max’ safe is opened with the key picked up from the floor by excavation
office’s door.
Place Re’s key (5th slot in inventory) in slot.
Time bar starts. Go down to the bottom ramp.
Move to the right of the central stand and with the mummy on your left.
I know that ..history – There is a way to
control the mummy. Take the scarab inside the box taken from Max safe.
Click the scarab on the vizier mummy – he is immobilized!!!
Another time bar starts. Take the female
statuette of Toumchetki from inventory and click it on the vizier.
Cameron will place the female statuette on the stand.
Your name will not be heard anymore… Not in Thebes… Not in Rome...
The vizier disintegrated and only the items he was wearing is left.
Give the black beetle necklace to Moira, who is
holding the statue of Isfet. She comes out of her
trance.
Watch Cameron and Moira holding hands sail
away!
This document may not be
distributed without express written permission of the author and the content may
not be altered in any way.
For Questions or Comments on
this Walkthrough,
Please write to: MaGtRo
Copyright © 11/2002
MaGtRo