Safecracker Walkthrough by MaGtRo
Safecracker (2006)
The Ultimate Puzzle Adventure
by Kheops Studios
Hints and Solutions
by MaGtRo August 2006
NOTE: Please use these solutions only as a
last resort. The fun of solving the puzzles will diminish.
Read the manual in .pdf form found in the Safecracker
folder after installation.
Pull back from close-up resets the puzzles.
This is not a
walkthrough. The Hints are arranged by rooms. Do what you can in a room. Some
puzzles need a necessary clue or item to open them from another room or level of
the mansion.
HINTS
The Ground Floor
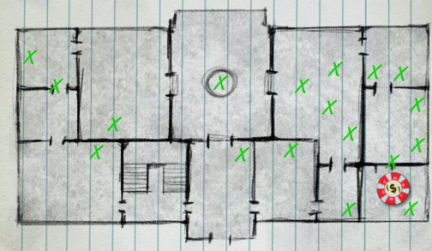
The Small Corridor:
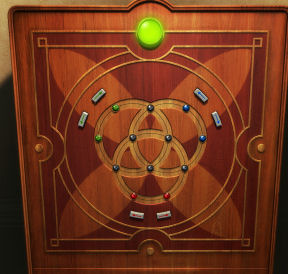
Aim: To place under the same
colored arrows: green balls at top
left, blue balls at top right and red balls at bottom.Solution: Click
here. Take resistor and paper with 4298.
The
Small Sitting Room: Read a diary page of Duncan
Adams on the box. The key used here is
taken from the laser locked safe from the workshop. Take the piston.
The Hall: Enter the number
taken from small corridor safe paper.
The Winter Garden:
There’s a key in a glass stand at the center of the garden. Insert the fountain plug taken from the snookers safe
on the hole by the door to the main hall.
Aim – To raise the water level in the glass case and get the key.
Standing on the metal squares on the floor changes
the flow of the water directions. Walking clockwise turns the direction once to
the right and counterclockwise turns once to the left.Solution:
Click here. Take the double key.
The Museum:
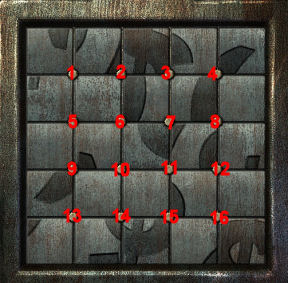
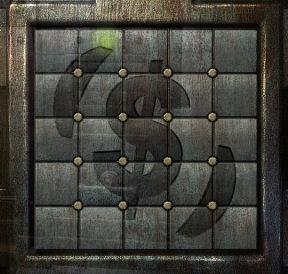
Slider safe:
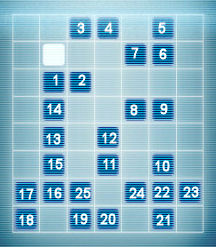
Aim – Turn the small buttons to rotate the squares.
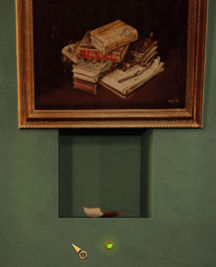
Move the squares to make the picture seen in the clue.Clue – Look at the picture below the telephone at
the Main Menu screen.
One Solution:
Click here. Take the L=E paper. Pull the lever to raise
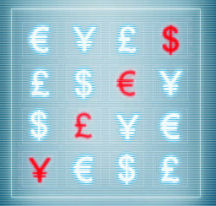
3 stands at the center of the room.Currency:
Aim – To place currencies on all the blank squares
and not have any duplicates on the diagonal, rows and columns.Click on the blank squares to cycle the different
currencies.One solution: Click here.
When correctly done, the red button turns green and part of a metal piston
rise.White squares:
Aim – To move the white square through all the blue
squares in direct path and turn them all to white.Click on the dark blue square that you want the
white square to move to.One solution: Click here.
When correctly done, the red button turns green and a part of a metal piston rise.Number keypad:
Enter the code taken from the driving machine in the
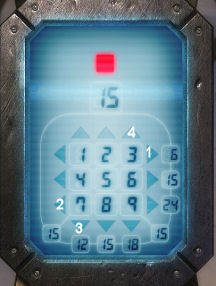
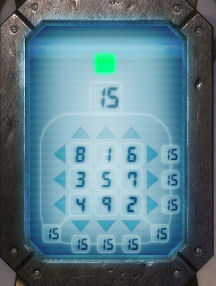
Games Room at the second floor. See a new puzzle on the screen.15 keypad:
Aim – To get 15 as sum of the numbers horizontally,
vertically and diagonally.Click the arrows to move the numbers about.
One solution:
Click here. See the last piston move to the ceiling
and the locked door at the Game Room opened.
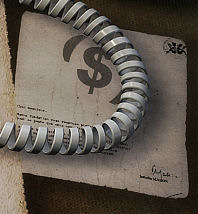
Main sitting room: Read the
paper on the sofa’s arm rest.
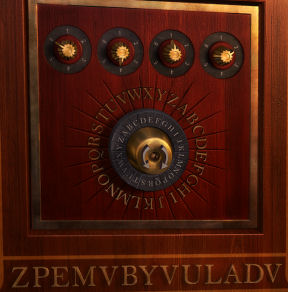
Aim – To decipher the letters below the letter
wheel.Clue – The L=E paper.
Solution:
Click here. Take
the 8 pin circuit and the photo of the young girl. Read Duncan W. Adams’ note
on the door of the safe.
The Study: Read the postcard sent
by Sarah to her great uncle found on the chair by the doorway.
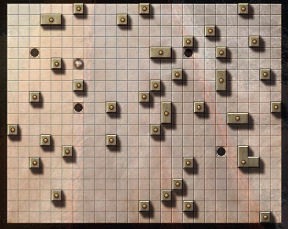
Magnetized metal
ball:Aim – To move the metal ball from top left to the
hole at bottom right.Click on the arrows at the 4 walls to activate the
electricity to magnetize and attract the metal ball.Solution:
Click here. Take the 4 pin circuit.
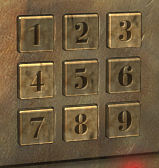
Keypad: Use the magnetic pass taken from the broken
lock safe in the workshop on the slot.Clue: Note that there are 3 keypads
that are smooth or frequently used.Solution: Click here.
The Dining Room:
Clue –
The photo of the young girl taken from the main sitting room safe.Solution:
Click here. Read the
letter that talks about 8 nm under the upper limit of the buttercup nm.
The Office: Read the paper on the
desk.
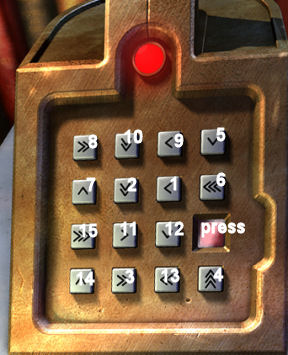
Laser keypad:Aim – To find a path using all the keypads following the directions of the
arrows and end to point to the red button.Click on an arrow and then click on a keypad that
that arrow points to. Do this until the last keypad points to the red button.Solution:
Click here. If done correctly, see a laser beam shoot up from the stand
and bounces on a deflector on the ceiling.Laser beam:
Move the deflector to
bounce the laser to the deflector at other side of the room. Move this
deflector so that the laser points to the globe.The globe opens. Take transistor.
Door keypad:
The keypad is missing parts.Place the
resistor, 8 pin circuit, 4 pin circuit and the transistor on the panel. Door
opens.
The Workshop:
Read the newspaper ad tacked on the corkboard at far right
wall. It talks about 3 safes that are for sale: a 1943 safe, antique safe and a
1905 safe.
Laser locked safe:
Clue –
Taken from the paper in the Dining Room safe.Solution:
Click here. Take the small gold key and
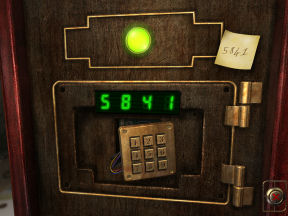
the T shaped key.Broken lock safe: Note the paper that states the
code is 5841 but the numbers on the keypad does not produce the correct number
when pressed.1. When each number is pressed, the numbers shown cycle to 5 numbers
and repeats.
Press the keypad 8 times using one number (2 rounds on the readout).
Number on keypad
Numbers shown when keypad is pressed 5
times.1
2
7
9
4
8
2
6
8
4
3
1
3
5
2
5
7
5
4
2
8
9
2
7
5
6
7
4
3
2
6
7
5
1
2
9
7
3
6
5
2
4
8
9
7
6
5
4
9
6
8
1
3
6
See which keypad will result in 5841 on the readout. Enter the trial code 5
times before trying another set of code.Take note of the correct numbers
and when-where they are off in the 5 times you enter the trial code.If you get a correct number and the
others are off, move that off number to the correct sequence. Click that off
number on the keypad Xs it is off the sequence. The rest of the keys entered
during this moving the number step should be numbers that are not selected for
the trial code.During my replays, I had 3
different numbers.Solution:
Click here. Take the magnetic card.
Antique ornate safe:
Use the chip card taken from the Blue Bedroom puzzle on the slot on the top.Clue –
The clue here is the letter from Margaret taken from the Blue Bedroom puzzle.
What is the secret of Duncan W. Adams?Solution:
Click here. The door slides open.The
Boudoir: Read the letter on the coffee table.Aim – To
clear a path for the key to get to the slot on the right.Take the
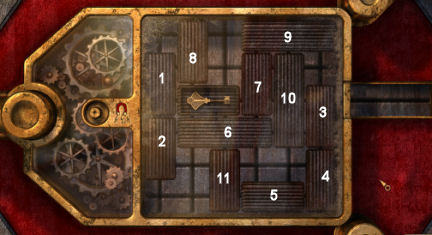
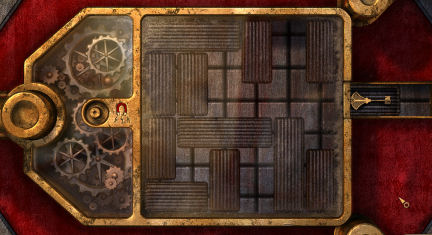
small magnet on the right. To move the bars, click the magnet on any metal
bars.Solution:
Click here. Take another triple key.
The Basement
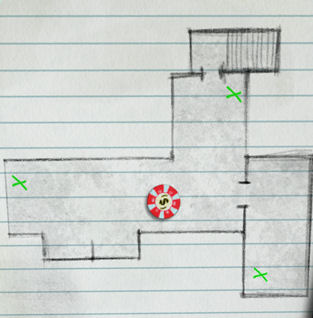
The Entrance to the cellar:
Take the
stairs going down from the hallway off the Dining Room and the Study.
Electrical panel:Aim – To
get light up all the bulbs on the left by making a path from the right
electrical source to the left.Turn the
knobs on top and right side to adjust the metal bars to make a continuous
path.Solution:
Click here. The lights are on.
The Wine Cellar:
Go to the right and see the safe at the end of the corridor.
Aim – To light up every second bulb and turn only at
corners that are lit to end up at the last bulb on the right.Solution:
Click here. Take the GPS keycard and the brass key.
The Store Room:
Go to the left room at the cellar. Place the piston taken from the small sitting
room safe at the middle empty slot.
Aim: To fill up the middle
cylinder to the 4th level (see pointing arrow) from the 2 side cylinders.The left cylinder has 3 levels, the middle has 5 and
the right has 8 levels. The right cylinder is filled to 8 levels.Solution:
Click here. See water fill the fountain at the Winter
Garden.
The Second Floor
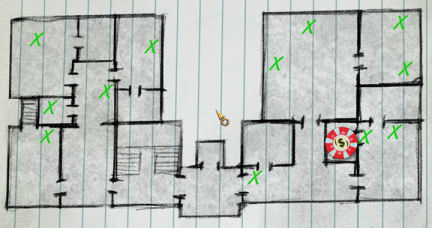
Use the brass key taken
from the Wine Cellar safe to open the side door of the Dining Room. Climb up to
the second floor.
West Corridor:
The Kitchen: Read the
letter from Elizabeth on the kitchen counter.
Dumbwaiter:
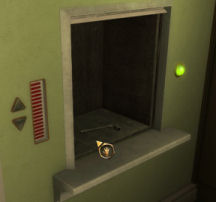
Aim: To get the light on the 12th
level and the dumbwaiter is centered on the opening.Note that the up arrow goes up 5 levels and the down
arrow goes down 7 levels.Solution:
Click here. Take the special pipe key.
Dressing Room:
Note the lines on the top of the door of the dressing room.
Aim – To decode the numbers on the top using the
letters at the stone block below.Place the stone block taken from the metal loop
safe on the frame. Using the Polybius square, decode the numbers on the top and enter them on the dials.
Check here to learn
about Polybius Square.Solution: Click here.
Take another triple key.
Laser Door:
Use the special pipe key taken from kitchen on the screw of the panel.
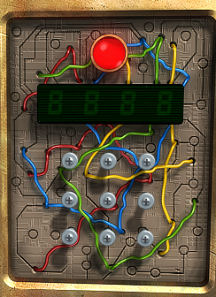
Clue – Take note of the shapes formed by colored
wires and the layers the wires are set.The panel opens to show 4 different colored wires
surrounding the 9 button screws.Solution:
Click here. The laser rays on the door are turned off.
Yellow Bedroom:
Check the lines on top of the yellow bathroom door. Read the letter from
Edward on the window seat.
Look close at the small safe on the table. Flip the
switch on the power strip and the secret compartment opens.Take the magnetic pass and the snooker
rules.
Blue Bedroom:
Read the letter from Edward about Sarah.
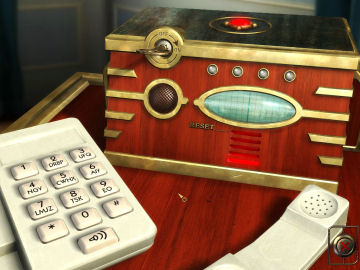
Aim – To find the correct set of numbers based on
the frequency of the phone keypad dial tone.Insert the small iron key taken from the music box
at the Violet Bedroom on the keyhole at top left. Turn the key to on
position.Press the speaker button on the telephone.
Press the number keys for a set of trial numbers. If
one or more green light flickers, it means that out of the 4 trial numbers,
there are numbers that are correct. If there one or more green light that
stays on, it means that the number is correct and is at the correct position
in the sequence.There are only 4 chances to select the correct
numbers before the puzzle resets to a new code. This is shown by the red lit
bars on the radio.This is a random puzzle. MrLipid states that the end
number is always 9.Take the chip card.
The Games Room:
Read the diary page on one of the chair.
Snookers safe: Use the
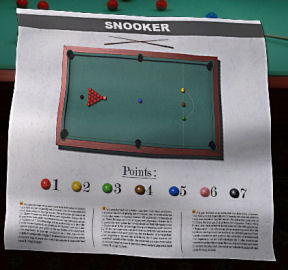
magnetic pass taken from the Yellow Room on the slot.Clue – Read the snookers rule paper taken from the
Yellow Room and check ALL the balls on and under the snookers table. Take note
of the numbers seen on and given to a colored ball from the rule paper. What
is the difference between the balls on the paper and the table?Solution:
Check here. Take the fountain plug and
lever.Driving machine: Insert the
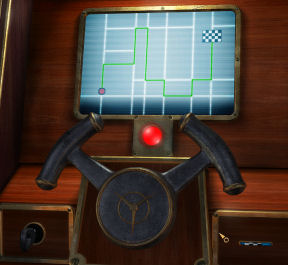
GPS card key on the slot.Aim – To turn the wheel based on the path seen on
the screen and to end at the checkered flag.Clue – Turn the wheel based on the corners. No
forward driving is required, just the corners. This is an imaginary driving and no action on the
screen is seen.Solution:
Click here. Take the 6821 paper.
The Library:
This door is opened after doing the 15 stand puzzle at the Museum. Take note
of the book on the small table by the window – "The Safe through the Ages by
DWA."
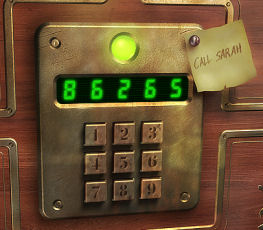
Sarah safe: See a note on the
safe ‘Call Sarah’Clue – Use the telephone to get Sarah’s number.
Solution:
Click here. Take the steering wheel. Read the note on the door left by
Duncan W. AdamsCode detection safe: Insert
the screen and key card reader taken from the box in the Violet Bedroom on the bottom part of the safe.Aim – To find out the code based on the incomplete
readout of the reader.Note the shape of the incomplete code numbers on the reader and
enter the test numbers. The bars will pull back if the number and position are
correct. The numbers of the bars that pull back depend on the number of the
correct entry and correct position.Solution:
Click here. Take the triple key.
Violet Bedroom:
Use the double key taken from the Winter Garden on the door. Read the letter
by Elizabeth. Take note of the lines on the top of the bathroom door.
Music box: Use the small gold
key taken from the laser locked safe on the box. Take the small iron key
and the screen & key card reader.
Wheel Metal Door at East Corridor:
Use the steering wheel from the Sarah safe on the hole of the lock.
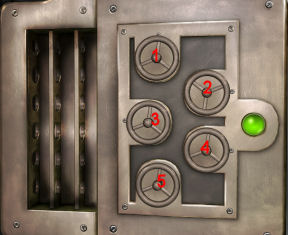
Aim – To get all the side bars recessed to the
right.Insert
the wheel on the lock. Turn each wheel and study which bars it affects. Each
wheel cycles 8 times to produce different bar results.One Solution:
Click here. The door opens
to the Laundry room.
The Loft
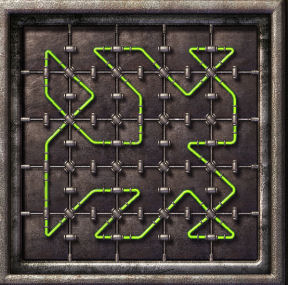
Metal Loop safe:
Aim – To produce a loop of the metal pipes and have
it all lit up.Click to turn the pipes around to join other pipes.
Solution:
Click here. Take the carved stone block.
Read the note from DWA on the door of the safe.
Queen
6 Chess safe:
Aim – To place 6 Queen moves on the chessboard with
NO possible check. (Thanks, Benoit!)A Queen move in chess is diagonal.
One Solution:
Click here. Take another triple key.
(Thank you, Ana!)
Final Safe
Final
Safe room: Use 2 triple keys on the door left of
the Violet bathroom. Then use 2 more triple keys on the second door. Enter the
secret room.
Aim – To find out the
4 numbers for the code of the final safe.Clue – Study the lines
on the top of 4 bathrooms.Solution:
Check here.Have fun!
SOLUTIONS
Click the arrows to move the balls.
One
solution:2xs
right blue1x
left red2xs
right green1x
right blue2xs
left green1x
left blue2xs
right green1x
left blue4xs
left red2xs
right blue3xs
left red
Click:
15,
14, 13 (2xs), 9, 5, 1, 7 (2xs), 6, 5 (2xs), 4 (2xs), 3, 2 (2xs), 6
(2xs).12
(3xs), 7 (2xs), 3, 16, 15 (2xs), 11, 7, 4 (2xs), 8 (3xs), 4, 11, 8, 4
(2xs).15
(2xs), 11 (3xs), 13 (2xs), 9 (3xs), 13 (3xs), 14 (2xs), 15, 14, 16, 12
(2xs), 16 (3xs), 12.13,
14 (3xs), 15, 16, 14 (2xs), 16, 15, 14, 15, 14 (3xs), 13 (2xs), 14, 13,
14, 13.
Turn the inner wheel to get the L under the E of the
outer wheel. Decode the letters below the wheel.Enter 6 4 1 2 on the dials above the wheel.
Click the arrows at:
Top, right, bottom, left, bottom, right, bottom, left, top, right, top,
right, top, right, bottom, right, bottom, left, top, right, bottom.
Mix and match the keypads – 3 4 8. Enter 8 3 4.
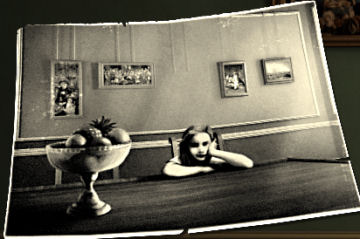
Arrange
the pictures on the wall similar to that of the photo. The wall safe on the
right opens.
Adjusting
the number to the known wave lengths of the visible portion of the spectrum on the panel displays the different colors: Violet (400-425), Indigo
(426- 446), Blue (447-499), Green (500-569), Yellow (570-592), Orange
(593-620) and Red.Enter the
584, less 8 nm under the upper limit of the buttercup nm; to get the light on
top of the safe to yellow and the safe opens.
Broken lock safe: Thank you
MrLipid!
Click on
3 four times.
Click on 2 16 times. (Wait for the readout to fade after every four clicks.)
Click on 6 12 times.
Click on 3 once
Click on 2 twice
Click on 6 once
Electrical panel at basement: Take note that all the
red knobs are pointing UP.
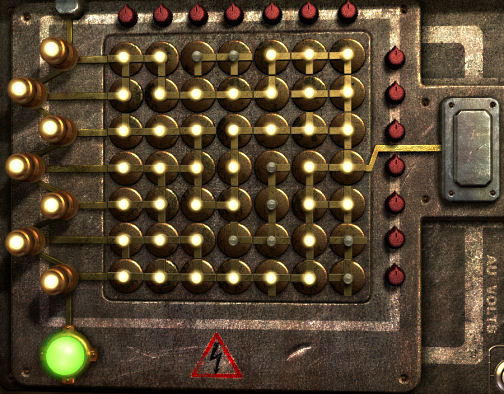
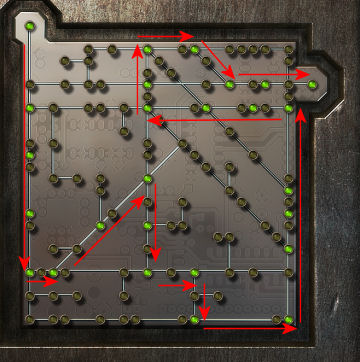
Click on left of bottom arrows, left of top right arrows,
right of bottom arrows, left of top left arrows, right of bottom arrows, left
of top left
arrows, left of top right arrows and left of top left arrows. There are now 4 levels of
water at the middle cylinder.
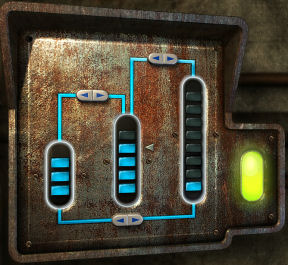
Start with the light on at the 5th level: up (10th),
up (15th), down (8th), up (13th), down 6th), up (11th), down (4th), up (9th),
down (2nd), up (7th) and up to 12th level.
The wires
are in the shape of numbers and the wires are set by layers:Green is
top most and forms #2. Yellow is the next and forms #4. Blue is at third layer
and forms# 9. Red is at the lowest layer and forms #3.Click on
2 4 9 3 screws (keypads).
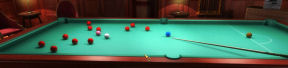
Read the snookers rule paper and note the number
accorded to a colored ball.The paper also shows that there are 15 red balls, 1
pink, 1 blue, 1 yellow, 1 brown and 1 black.Count the numbers of balls on the snookers table: 11
reds, 1 pink, 1 blue and 1 brown.Count the number of balls found on the pocket
baskets under the table on all sides: 2 reds and 1 yellow.There are 4 balls missing on the snookers table:
There are 15 reds but only 13 are found; 2 reds are missing. There are no
green or black balls seen.Based on the numbers correlated on the missing
balls: Red 1 and 1, green 3 and black 7.Enter 1 1 3 7 on the snookers safe keypad.
Turn the
wheel: R L R R L R L L R L.
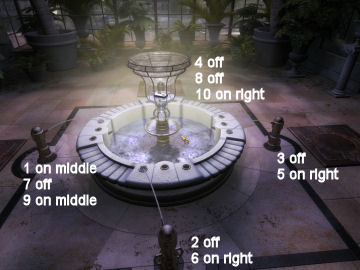
Start
from the fountain plug by the Main Hall. Stand on the numbered position on the
picture below. Stand on 1 and then 2 and then 3…
Click on right top arrow once, left bottom arrow once,
bottom left arrow once and top right arrow once.
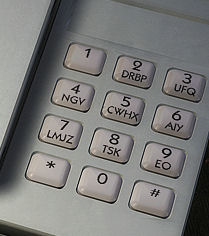
Use the telephone keypad letters to translate
SARAH to numbers – 86265. Enter the numbers on the keypad.
Enter
8796.
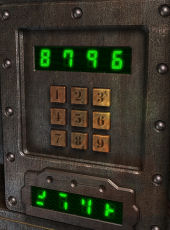
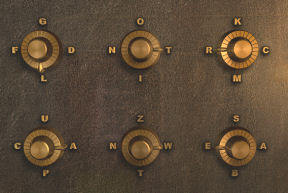
The
letter from Margaret states that Duncan W. Adams’ middle name is Walter.Enter
Walter on the dials in any letter sequence. Turn the dials to point to the correct
letter in the name WALTER.
The Boudoir: Read the letter on
the coffee table.
|
|
1 up 2 3 & 4 5 key & 7 key 8 9 10 up 6 8 key & 7 up 5 4 6 2, 8 5 11 key 1 9 7 up key 8 up 6 10 3 up key |
Wheel Metal Door at East
Corridor:
Numbering
the wheels as seen in the picture: Turn wheel 1 – 4xs, wheel 3 – 3xs and
wheel 5 – 7xs.
Turn the arrow to 1 on the first dial, 2 on the
second dial, 6 on the third dial and 5 on the last dial = 1 2 6 5.
Queen 6 Chess
safe: (Thanks, Ana!)
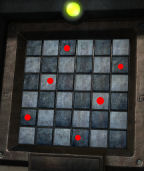
Press the squares at: row 1 – column 4; row 2 –
column 1; row 3 – column 5; row 4 – column 2; row 5 – column 6 and row 6 –
column 3.
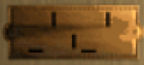
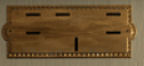
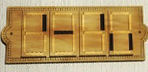
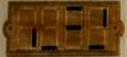
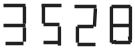
Draw the lines seen on all the 4 plates into one
drawing. Or super impose one plate over another and see that 4 numbers will be
formed by the lines.
|
Dressing room |
|
|
Yellow bathroom |
|
|
East Corridor bathroom |
|
|
Violet bathroom |
|
|
|
|
|
|
|
This
document may not be distributed without express written permission of the
author and the content may not be altered in any way.For
Questions or Comments on this Walkthrough, please write to:
MaGtRo
Copyright © 8/2006MaGtRo
View this guide raw, exactly as the archive holds it