Next Life Walkthrough
Check the creek that flows on the wall beside where
the bottle was.After a while, hear Eva. She went to get Hans.
Hans calls in the get Adam to do something to help
inside the cave.Climb the steps and pick up a rock. Use the rock on
the beam supporting the bark-boat.Pick up the chain and attach it to the rock by the
entrance.Climb up again and get rock. Drop the rock on the
other beam supporting the boat.The boat tilts and the rock is pulled.
Try to take the rope. Use the stick with hook on the
rope. Take rope.Exit and talk to Hans. Dorothy is gone.
Western beach: Go back down
to the cabins.See Edwin and Maria run. Follow them close to cabin 1.
See Simon on the ground. He fell from the cliff above.
Maria is distraught.Go up the hill and in cabin 10. Talk to Eva. Yokoki is
crying.Michelle saw everything. Simon started hitting Yokoki
and Edwin intervened; ending with Simon falling off the cliff.Michelle gives the message found with Simon. The
first message is written by Dieter, an archeologist. It talks about experimental
laboratory, guinea pig, odd creatures and experiments done on them when
sleeping. There is a microchip under skin that makes them sleep.Talk to Edwin at the gap.
Upper plateau: Climb up to
upper plateau.Go to the cliff edge and see coomb-valley below the
cliff wall.See a fallen log at right of cliff edge. Use rope on
fallen log.
Northern plateau: Go down to
northern plateau. Take Hermann’s cap on ground left of screen behind
rock.Small beach: Go to bottom of
screen to small beach.See fish close to the water’s edge. Use the stick with
hook and hit the fish as they swim by. Catch a fish.Try to climb up the slippery descent. Use the stick
with hook on the cliff wall to make foot hold. Climb up.Take the tied rope from the log.
Northern beach: Go to upper
plateau, bell tower and then to northern beach.Use fish on bird trap to make trap with bait.
Go back down to the cabins. At the gap, another
earthquake occurs.Western beach: Go to cabin 2
at western beach. Talk to Hermann about Edwin and hat.Hermann think Edwin is a spy and that he threw a paper
in sea. The paper was from Simon concerning a microchip inserted on a bird.Eastern cliff: Go back up to
upper plateau via the gap. Go to Bell tower, then Eastern cliff.See and talk to Hans. He gives another cracker wrapper
– third message about the microchip taken can not be thrown away because
the creatures will think the subject died. The bell tolls.
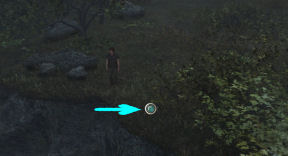
Nightmare: Adam wakes up in a
supply room.
Supply room: Pick up the pipe,
the rag from bed and take the light bulb from lamp.Place the rag on the floor under the dripping water
from the ceiling. Exit the room.Hallway: Check the exposed
wire left of supply room door and the bulletin board right of door.Check the switch and gas meter. Check the lid of the manhole on the floor.
Check the door across from the supply room and then
look at window. It’s dirty.Go back to supply room and pick up wet rag from
floor.Exit and use wet rag on the dirty window. Look through
window and see someone in there.Hit the window and the door several times with the
pipe to wake up the person inside.Edwin will finally answer. Talk to him completely. He
is very suspicious. It is dark in there and no light.Check the vent on top of the wall. Use the pipe on the
vent.Talk to Edwin again. He drops a string through. Attach
the light bulb on the string.Talk to Edwin again concerning the string and find out
that he has a key. Talk about the key.Edwin throws the key out through the vent. Pick key
up.Morgue: Use the key on the
door of the morgue down the hallway.Freezer room: See 2 bodies on
the carts. Adam doesn’t want to check on them.Check the freezer. They are working. Go through to
next room.Dissecting room: See the dissecting
table and pail of blood.Office: Go through to office. Look around. Take the key on the board beside
the desk.Edwin’s cell: Go back to
Edwin. Use the key on his cell. Talk to Edwin completely.Morgue office: Edwin tries the
lock on the office door.Morgue freezer room: Go to freezer
room and open the 2 bags.See 2 women corpses. Hear something.
Dissecting room: See Edwin on the
other side of the glass.Talk to Edwin and learn that he locked Adam in. He
still is suspicious of everything.The phone rings in the office.
Office: Answer the phone and
a woman calls to talk to Edwin.Talk to Edwin through the office door. Place the pipe
on the desk.Edwin comes in and talks on the phone.
Freezer room: Follow Edwin to the
other room. Edwin is upset. He hits Adam with the pipe.Adam wakes up on the dissecting table.
Go to the freezer room and see that the 2 carts with
the bodies are gone.Edwin’s cell: Follow the trail of
blood to the hallway. See that it leads to Edwin’s cell.Right click the door and see that he locked the door.
Adam wonders why he did that.Hear the phone ring.
Office: Go back to the office and
answer the phone.It is Edwin. He is very upset. After a while, realize
that the corpses are his wife and daughter.He thinks Adam killed them. He is coming to get Adam.
Dissecting room: Prepare for
Edwin’s coming. Go next door to dissecting room.Click on the window blinds-louver and see that Edwin
wrote ‘I kill you’.Read the book in front of the window. Learn about
spastic corpse.Adam wants to prepare a surprise for Edwin.
Freezer room: Go next door
and open the 3rd from left bottom freezer.Take the corpse and place it on the cart.
Corpse: Push the cart next
door to the dissecting room.Go to the office and take the scalpel from the
tray at bottom of screen.Use scalpel on the cord of the lamp on the desk.
Go to corpse and look close. Use the scalpel on
corpse. Place the cord on the corpse.Click on corpse again and hear Edwin come.
Edwin arrives carrying an axe. He enters the room and
moves towards the corpse.The corpse spasms and Edwin runs away.
Corridor: Exit the office
through the door.See where Edwin got the axe. The fire alarm cabinet is
destroyed.Push the door and after some groaning Adam finally pushes the
lab door open.Laboratory: Look around.
Open the drawer at left wall to get matches. Take the dissecting tool from the center work
bench.Close the door so that Edwin can not follow. That was
a long groan. Click to push the cabinet in front of the door.Edwin comes and bangs on the door. A photograph falls
on the floor.Pick up the photograph and look at it close. See that
there is an entryway at right wall.Click the picture on cabinet at right wall. Adam pushes it off
where the entryway is supposed to be.See that the entryway is boarded up. Use the
dissecting tool on the board.Secret room: Enter and see
that it is dark. The switch left of door does not work.Go to the kerosene hanging on the left post. It has no
wick. Take the cover off.Use the scalpel on the rope hanging down from that
post to get rope.In inventory, use scalpel on rope to get a piece of
rope. Use piece of rope on kerosene lamp as wick.Use matches on kerosene and get light.
Go outside and take the litter right of entryway to
clean it up.Look at the wooden foot of the pushed cabinet. Use the
rope on the wooden leg.Go back inside the secret room. Take the rope to pull
the cabinet back in place.Take the surgical mask from the basin holder
close to the covered corpse.Use the scalpel on the back of the cabinet to make a
peephole.Hear Edwin come in. He is looking for Adam.
Adam peeps through. Click on the head of Simon on the
work bench.Click the mask on Edwin. Hear Adam scare Edwin with
Simon’s head.See what happened after Edwin used the axe.
Sixth Day
Adam wakes up on the sixth day. Take the packet of cookies and plastic
bottle of water from the table.
Exit the cabin. Pick up sticks and stones
where you can find them.
Up the hill: Enter cabin 9
and talk to Hans and Michelle.Between cabins: Talk to Eva
at cabin 7, see Yokoki at cabin 6 and find an empty cabin 5 of Edwin’s.Western beach: Talk to Maria.
Enter cabin 8 and meet Jadwiga.Upper plateau: Go up to the
upper plateau and then to northern beach by the bell tower.Take the bird caught by the trap.
Gap: Go down to the gap and
talk to Hermann trying to catch fish.Between cabins: Enter cabin 7
and talk to Eva.She dove down the water and got the second message.
It says that during 15th century, the Portuguese went to the adjoining island
during low tide using only the current. The microchip is inserted between the
collarbones.Adam has to remove his microchip and place it on
another warm blooded creature.Southwestern beach:
Look up and click on the shiny thing up on the right part of the cliff. It is Danica’s
glasses.Up the hill: Go to western
beach and then go up the hill. Talk to Hans.Southern shores: Go to
big block and then southern shores. Wait until Michelle stops running.Talk to her and get an elastic band.
Western beach: Talk to Eva.
Southwestern beach: In
inventory, combine stick and elastic band to get slingshot.Use slingshot on glasses. Pick up the broken glass.
Cabin 8: Go right and enter
cabin 8. Take the flippers from the floor.Eastern cliff: Climb to the
upper plateau. Talk to Hermann.Then go right to Eastern cliffs. Use the broken glass
on Adam to get microchip.Use microchip on bird and Adam releases it to the
wind.Climb down to the tree at the cliff wall. Use broken
glass on root holding tree.See Adam works hard to cut the tree. Yokoki, Eva and
Maria says goodbye.See Adam on the log floating in the sea. He dives in
when a hovercraft arrives.Volcano Island
Adam wakes up in the other island. His pockets are
empty again.
Pick up 3 sticks from under the shrub close to
the exit up. Climb up to the plateau.
Village:
Hut: Check the canoe at left.
Climb up to the walkway and up to the hut.Enter the hut. See a hook on the window shutter.
Use stick on hook. Pick up hook.In inventory, combine sticks and hook to get a stick with hook.
Exit the hut.
Climb up to the next rise.
Village: Go left and see the warriors would not let you
go in.There’s a totem on the left. Go back to the plateau.
Well: Go forward to the well.
Check the well.Pick up 5 stones close to the corner of the church at right.
See a coconut tree behind the ruins at the back of the well.
Use stone on the coconut. Take the coconut that dropped on the ground.
Church ruin: Go right and see a female native run away.
See rope hanging inside the church. We can use that
rope.Climb up the rope and be at the steeple top.
Take the rope hanging from the wooden beam.
Go down from steeple: Now, how do we go down?
In
inventory, combine the rope with stick with the hook to make a makeshift
grapple.Climb down to the lower level. Face the arch across the way.
Use the grapple on the arch. While it swings, immediately move your cursor at
bottom center and see that it is active. Click to go down.If you miss or not time it right, you fall down and get a second chance.
Tile: Look at the tile on the ground in front of the
ruins right of church.One of them is active. Try to remove that tile.
Use the stick with hook on the active tile. Get a necklace with glass beads.
Edge of plateau: Go right to the Edge of plateau.
Pick up some yellow berries from the shrub at
right. Don’t eat it. It’s poison.
Underground: Go back to the church. Then go to the
well.Climb the well and while standing on the rim, use rope on the wooden beam.
Climb down to underground. Look around.
Take the old flag on the wall. See a safe revealed by the removal of the
flag.
Safe: Look at the gravestone in the alcove.
It says Magnus Benedico. The Roman numerals in that name are: MDIC. They even
have an X underneath them.Go back to the safe and enter: 1599.
Click the center safe dial and see the numbers scroll through the frame at
bottom.Once the correct number is reached, click on the next frame and then
enter that
frame’s correct number.Then click on the third, enter the number and then do
the last one. The sequence doesn’t matter.The safe opens. Take the statue of a native god.
Go back up through the well entrance at left. Take the tied rope. Climb
down.Go back to the village and the hostile natives.
Entrance: Place the native god statue on top of the
totem.One warrior kneels down and the other runs away.
Cliff side: Enter the village. Look at the cliff wall.
Give the necklace to the woman or child.
They said: Dieter, run, Tahina.See a fruit tree at left. Eat fruits to bring your
energy level 100%. Then pick up 5 fruits from the fruit tree.
Gap: Go to bottom left – Gap and see a disturbed
cornered warrior.Throw a stone at the warrior. He falls off the ledge.
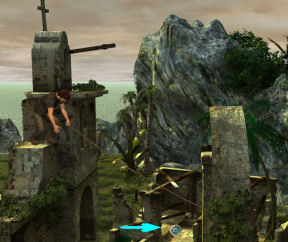
Cliff:
Ledge: Use the rope on the branch at right. Use the rope to go
down to the gully.
Gully: Climb up to the high ledge.
Jump to the ledge at opposite cliff side.
Waterfall: Go to waterfall and drink some water to have
more energy.Climb back up and go the other way – to the slope.
Slope: The jump is too far. Go back to the waterfall.
See a rent on the wall by the vine.
Use the stick with hook on the rent on the wall. Climb up.Go up to the cross roads.
Edge of slope: Go left to the edge.
See a log that is stuck in the ground on the cliff edge above the way to the
slope.
Crossroads: Go back to the cross road and then forward.
Look down at the log that has thorns.
See a feral pig. It will not let Adam pass. He can kill Adam.
In inventory, combine yellow berries and coconut. Give the berries in coconut to
the pig.If berries alone are given, the pig will not like the smell.
The pig is poisoned. Climb over the log.See a rock on the left. Push the rock and it will block the waterfall seen
earlier. The water will be diverted.
Edge of slope: Go back to the left until the edge of
slope and see the water is diverted close to the log.Pick up several rocks beside the lock and drop it on the water to make a dam.
Use the flag to plug the hole on the dam. The water spreads and pools by the
log.Use stick to push the log down to the slope.
Pick up the flag used on the dam.
Gully: Go back to the right and climb down to the
gully.Take the stick with hook used as a step.
Go forward until the slope.
Slope: See the waterfall that is diverted here.
Drink water to replenish energy.Jump to the leftmost shelf. See a rent on the cliff wall.
Use the stick with hook on the rent on the wall.
Glade: Climb up to the glade.
If you notice there’s a post on the left that has thorns. If you go forward,
those thorns will shoot out and kill Adam.See steps on the right that needs to be climbed up on. Run or double click
to go there and be faster than the shooting thorns.Go forward and then left to the top of the cliff.
Top of the cliff: Se a bog like area below.
Move the cursor just above the banana leaf and see that the 3 things on
the bog are snakes.Use the old flag on snakes. Adam walks over them.
Go forward and climb the steep coomb until the top.
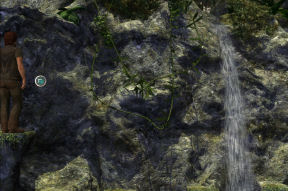
Jungle: Go right and enter the jungle.
Enter the hut. Read the papers on the shelf written by Dieter Schwarz.
It describes the experiences of Dieter at the island and how he came here to the
second island.
That explains a lot.Meet Dieter. He will take Adam to the crater. He gives
the discharged pistol.Pick up the potable water bottle from the
floor, rope and axe from wall. Exit the hut.
Crater
Way to crater: Dieter says to stay
in his tracks.
Rock: Walk where he walks. If
you don’t you get killed.Lava Creek: He gives 2
fruits to get you by. He will bring the others from the other island to this
island. He will listen for the bell.Climb the rock at the foreground and use axe on the
dried palm log. Cross the lava flow and go to path.Path: Go forward until the
foothill.Foothill: Climb up until
under the peak. If you continue to right screen, there’s a part of the ledge
that has lava underneath.
Under the peak: Continue to
climb up. Use the axe on the last rise to get to above cliff.Cliff: See a crashed
container.Enter the hovercraft and Adam automatically charges
the weapon.Go right to the edge of the ledge and push the rocks
to cover the lava on the ledge below.Go to the left and see a fault on the rock. In
inventory, combine axe and rope.Use the combined axe and rope on the fault on the left
rock. Climb down the rope to above slope.Slope: Go right to the slope
and see the lava shelf is now covered by the rocks thrown from above.Gap: After the last rise, see
a robot on the pad. Use the charged pistol and shoot the robot.Foothill: Go back down, pass
the rope and pass the way up to under the peak.Go back to the foothill.
At the left edge of the foothill, start climbing up
until the crater and station.
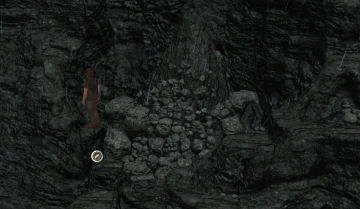
Station: Climb the metal box
and then go to the station.
Landing pad: Climb up to
landing pad. Climb up on the right ladder.See the robot you shot earlier. Go to the robot and
take his charged pistol.Go down the ladder and hear a hovercraft coming.
Automatically, Adam hides under the landing pad.Climb back up and enter the hangar.
Hangar: See the door of the
ship open. Immediately, go right and hide in the dark behind the crate.Shoot the robot as soon as he opens the big metal
doors. Now, the doors are opened.Hallway: See the deactivated
robot. There’s another robot charging itself on the wall at left.Shoot at the charger wall behind the charging robot or
at the robot twice.Check the door to the quarters on the left. See that
it needs identification also.The water fountain can be used to replenish energy.
Central workplace:
Go to the door at end of hallway at left.Look at the garbage can right of the door. Read the
letter from Sandra.Go to the control panel and see that the keyboard
needs a code.Take the pocketknife at right table.
Press the red button and see that the wall holograph
also needs identification.Exit the room.
Staircase: Go to the right at
staircase.Smell something bad. Try to open the vent on the wall.
Go down and see a dead researcher. He must have broken
his neck.Use the pocketknife on the dead man and get his
finger.Take the digital puzzle beside him.
Digital Puzzle: Put
together the jigsaw puzzle.Left click to pick up and right click to turn the
puzzle pieces.Once the pieces are in place it will not move anymore.
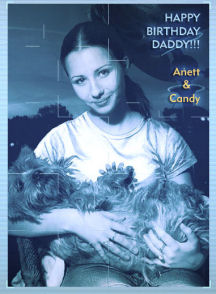
Read that it came from Anett and Candy.
Quarters: Climb up and go to
the quarters door.Use the researcher’s finger on the door lock of the
quarters.Use the finger again on locker 6 of Capt. Thomas. Take
the personal computer-laptop.Check the coat and get a letter. Learn that the
project is compromised and that they are ordered to destroy materials, as well
as raw material.Computer: Open – right click
the computer in inventoryIt wants a password. Using your own keyboard, enter
CANDY and then press enter key.Click on the top e-mail icon on the main screen of the
computer.It needs a password. Using your own keyboard, enter
SANDRA and then press enter key.Click on the trash and read the deleted mail.
It states that the code to destruct the facility is:
97GETOUT43BKW.Exit the PC. Exit room using the finger on the door
lock.Central workplace:
Now that you have the code, go back to the control room.Press the red button. Go to the left wall screen. Use
the finger to get access, Capt. Thomas.Enter the code using your keyboard that is asked –
97GETOUT43BKW. Press enter key. Enter it again.Adam accesses the coordinates where he was taken
before the accident. He programmed it for the crossroads and one hour later.The teleporter is being powered now. Exit the room.
Hangar: Go to bottom screen
to the hangar.Go left behind the space ship. See Eva. Talk to Eva.
She was taken from the island and woke in the space ship.Get the screwdriver.
Staircase: Go back to the
staircase.Use the screwdriver on the vent. It is too short.
Go down the stairs and go down the hallway.
See a repaired pipeline. Use the screwdriver on the
repaired pipeline. Take loose piece of pipe.In inventory, combine pipe and screwdriver to get a
screwdriver with stick.Go back up to the vent. Use the lengthened screwdriver
on the vent.Adam calls Eva to come once he got the vent off.
Teleport room: See that the
teleport room is here.The panel is on the wall at the back. You might need
to wait until the teleporter is charged.Use the finger on the wall panel to activate the
teleporter when the holographic screen shows ‘teleport start’.
Home!
This document may not
be distributed without express written permission of the author and the
content may not be altered in any way.For
Questions or Comments on this Walkthrough,
Please write to:
MaGtRoCopyright ©
11/2007
MaGtRo