Just Adventure original
Hype: The Time Quest Walkthrough
The unaltered guide: no contents list, no checkboxes, no page breaks. This is what the archive holds. Back to the reading view
ERA OF TASKAN I
Manor
1
This is the training level.
Objective: Complete
the training level to get the key.
Action: Walk straight ahead
towards the mannequins. There is a cinematic sequence with the Wizard, Gogoud.
You must learn to use your first three weapons: the sword, the crossbow, and magic.
Upon
acquiring the key, you must cross the suspension bridge. Use the key to open the
gate to the city of Torras.
Brigand 1
This is an area of the
forest.
As you enter the forest, you will be confronted with a number of
enemies including bats, wild boars, and Malik (a Robin-Hood type character). Once
you have baffled each of these enemies, you will have further enhanced your ability
to use your weapons. You will soon see the drawbridge. Cross it as it leads into
the village of Torras.
Objective: Enter the village of Torras.
Action:
You have to kill the guard and talk to Galadrielle.
Note:
If you destroy the ten beehives hidden throughout the forest, your inventory
will expand to include an upgrade of 10 green herbs.
Bonus: You
can enter a race by talking to Wellet near Torras. If you win, you will expand
your inventory once again to include an upgrade of 10 red potions.
Torras
1
This is the village of Torras.
Objective: Reach
the fortress to battle first boss.
Hint: Use the End key to
look at your map. The red flashing "X" indicates where you need to be.
Action:
Find the well and jump into it by pressing on the button. Once in the
well, find the blue button located below the elevator platform and press it. This
will activate a small footbridge, which descends to the other end of the well.
Hurry to get onto it and go up with it. Follow the path, which goes towards the
fortress.
Note: If you destroy the ten beehives hidden throughout
the city, you will expand your inventory to receive an upgrade of 40 blue arrows.
Bonus:
You can enter a race by talking to Jamous near the fortress. If you win,
you will receive an upgrade of 500 plastycks.
Fort 1
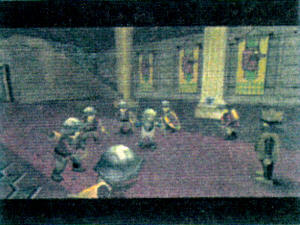
This
is the entrance of the Fortress.
Objective: Break in to the
Fort.
Action: Get onto the footbridges on either side of the
fortress to operate the two crank-handles, which enable you to enter the fort.
Go on upwards, following the path. Cinematic sequence of imprisonment.
Dungeon
1
This is the first level of the dungeon.
Objective: Reclaim
your weapons.
Action: Peer through the keyhole and push on
Action when the executioner passes by to steal the keys. Open the cell with the
key. Open the bar on Talboth’s cell and press on the blue button. Follow the path
until you arrive in the room where a magician is held prisoner. In this room,
you will find Hype’s weapons. Take them.
There is also a crank-handle you
should activate to free the magician. Continue along the path as far as the exit.
Boss
#1: Granslak
Objective: Defeat the first boss and return
to the village of Torras.
Action: Climb onto the mezzanine
floor and hit him with your sword until he falls down, then jump onto him. Go
and get the item (First Dragon Breastplate) near the throne. You should go back
the way you came in.
Cinematic sequence of Talboth.
Return into the
well to proceed to Torras.
Torras 1: Return to Brigand
Objective:
Return to the monastery.
Action: Go where Malik was
and turn left in the direction towards the monastery.
Boss #2: Sumo Monk
Objective:
Take possession of the first of four Royal Jewels.
Action:
Cinematic sequence of Talboth. Kill him. Take the right-hand direction
and go into the monastery by the door to your right. On each floor there is a
crank-handle to operate in order to go to the top.
Note: From
the first floor, you can jump into the hole to try to get the Electricus Magnicum:
Trinity Magic.
You should climb to the top of the monastery in order to
fight the Sumo Monk who has the jewel in his possession.
Hint: To
defeat the Sumo Monk, hit him in the head with your sword to make him fall down
from the mezzanine.
Once beaten, the cinematic kicks in and you see Hype
going to pick up the first Royal Jewel. Then, head towards the Sky to recharge
its power. Once recharged, return to Brigand.
Brigand 1
Meet
Zatila, your Dragon friend.
Objective: Go to the Sky to recharge
the Royal Jewel.
Action: Go and see Zatila. He is waiting
for you in the Brigand just after the collection box you pass in the interior.
Show him the item (First Dragon Breastplate) that you picked up after defeating
Granslak. Zatila will then agree to go to the Sky.
Sky 1: Recharging
the Royal Jewel
Action: You should collect 40 Globulus
(power pellets). Once recharged, return to the Manor.
Note: Enemy
dragons will begin attacking you once you have finished charging the Royal Jewel.
This is optional gameplay. You can stay and shoot at them or you can escape their
attacks by directing Zatila towards the forest (using your compass).
Manor
1: Time Travel
Objective: Travel to Era of Taskan 2, the
next level of the game.
Action: Go up to the sundial and knock
on it until a beam of light appears. Go onto it and knock on it again to go to
Era of Taskan 2 (symbolized by the moon).
ERA OF TASKAN II
Manor
2
You arrive in this time period by the sundial located in Gogoud’s
manor. There are two soldiers that he can choose to fight. (An example of the
optional gameplay in the game.)
Objective: Enter Gogoud’s
the secret room.
Hint: To enter Gogoud’s secret room you must
find three buttons in his manor. The first can be found when you go up the ladder
and turn to your right. The second is inside the library. The third is inside
the mezzanine when you climb the stairs.
Once you have found all three buttons,
you will open Gogoud’s secret room. Read Gogoud’s journal that mentions the laboratory.
Follow
the path into the cave where he picks up the Electric Trinity magic spell.
Leave
the map. Go off towards Brigand 2. On the way, there is a soldier to defeat as
well as some bats, which you may or may not choose to fight.
Note:
If you defeat the bats you will be rewarded with a potion.
Exit
the map through the cave.
Brigand 2
Objective: Reach
the city of Torras.
Action: Head towards the city of Torras.
On the path, there are two wolves that you can fight in the open grassy area.
You
will enter Zatila’s Glade. Speak with your dragon friend.
You will be able
to enter the thieves’ forest through the hollow tree-trunk (which is blocked for
now). Once you pass through the tree you will meet a bandit. You can either choose
to fight him or simply run past him and avoid the combat. (Optional gameplay.)
Walk
along the log path. Here you will encounter two ghosts. You must defeat them.
You
enter the next area of the forest where there are bats to be killed. (Optional
gameplay.)
Next you will come to the Torras outpost. A guard and a woman
will be waiting there to greet you. Once you have spoken with them you need to
enter the city of Torras.
Torras 2
Action: Talk
to the townspeople.
Note: You can choose to play the optional
beehive game in this area. If you destroy the ten beehives hidden throughout the
city, you will receive a reward of 40 red arrows. You can also enter a race by
talking to Jamous near the fortress. If you win, you will receive an upgrade of
500 plastycks inventory expansion.
In the city you must talk to the townspeople
who will tell you about (i) Ragoth, (ii) the Casino, (iii) a magical suit of armor,
and (iv) a three-headed dragon.
You should look on the map to find and enter
the Laboratory area.
Lab 2
Objective: Save Gogoud.
As
you enter there will be two guards waiting to fight. You can choose to fight them
or run past them. (Optional gameplay.)
You will enter the prison where you
will find and liberate the three Magicians. Once you have freed the Magicians,
they tell you about Ragoth. In order to continue you must successfully complete
the sound puzzle.
Hint: You must press the button by the exit
and then using the three buttons on the wall press them in the same order to recreate
the pattern. This will open the door.
Hype goes into Ragoth’s room. Ragoth
runs away. Fight the suit of magic armor. Shoot the scepter to open up the gate.
Hint:
Use the Ice Trinity magic spell to destroy the scepter.
Action:
Enter the library and head up to the Astrolabe.
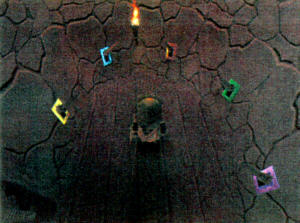
Astrolabe
2
Objective: Defeat Ragoth and collect the next magic
spell.
Action: Confront and battle Ragoth.
Complete
the colored handles puzzle. Look at the planets above to get a hint of how to
do it. Once you have completed this puzzle you will be rewarded with the Ice Javelin
magic spell.
Answer: Blue … Purple … Green … Orange
… Yellow. Once you have the magic spell you must return to the laboratory.
Lab
2
Objective: Save Gogoud.
Hint: Use
the Ice Javelin magic spell to save him.
You need to follow Gogoud and cast
the Ice Javelin magic spell once more as you approach the wall of fire. Press
the button in this area and follow Gogoud once again.
Gogoud will explain
the next mission that needs to be accomplished. This mission involves Karon and
his Bandits.
Leave the laboratory and exit the city of Torras.
Brigand
2
Objective: Receive new armor and the second Royal Jewel.
Action:
Head towards the forest with the bats where you will find a new passage
has opened. You will meet Karon, who will ask you to take her bracelet back in
time to her father to prove your trust and gain access to the Casino.
Hint:
In order to enter the arena to fight Gladiator, you must have a signed
pass provided by Karon. Travel back in time to the City of Torras in the first
time period using the Torras 2 sundial.
Visit Karon’s father and show him
the bracelet. Once accomplished, return to Torras 2 and the secret place near
the bat tree. A bandit will be waiting to speak to you.
Go up to the blocked
tree and press the button (you have to talk to a bandit to open the tree); this
will lead to the Bandit’s Village.
See Karon and return the bracelet at
which point she will give you a Bandit Badge.
Return to the two bandits
from the beginning. They will give you an access pass for the Park of Brave Men.
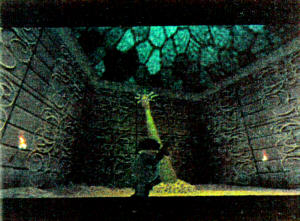
Casino
2
Objective: Defeat the Gladiator and the Three-headed
Dragon.
Action: Give the signed pass to Senekal to gain access
to the Casino. You need to fight the mighty Gladiator.
Note: The
Gladiator is immune to magic so you must hit him with your sword in order to defeat
him.
Once the battle has finished the Casino announcer will speak with you
and point you towards the path to the Three-headed Dragon.
You will enter
the hidden path and find the next magic spell the Fire Oracle magic. Enter the
Jewel Room and fight the Three-headed Dragon. Look in this passage and you will
find new armor and the next Royal Jewel.
You will then exit the Casino area.
Brigand
2
Objective: Recharge the Royal Jewel.
Action:
Visit Zatila and climb onto his back. He will carry you into the sky where
you will be able to charge the Royal Jewel.
Sky 2
Objective:
Move to Era of Taskan III.
Action: Once you have charged
the Royal Jewel by collecting the power points located throughout the sky, you
can choose to battle the enemy dragons (optional gameplay) or return to the forest.
To
enter the third time period, go to the sundial and you to be able to travel through
time (symbolized by the cloud).
ERA OF TASKAN III
Manor
3
Objective: Free Rave.
Action: When
you enter this time period you need to speak to Gogoud and make your way through
his manor to do the puzzle that opens Gogoud’s secret room (same puzzle as Manor
2). Go down below and smash the wall of fire that holds Rave prisoner. Speak to
Rave.
Go outside and cross the suspension bridge.
Brigand
3
Objective: Go to the City of Torras.
Action:
Make your way towards the City of Torras, passing through the tree mink
tunnel. Cross the forest and the glade, then you will come to the City of Torras.
Note:
You can do a race by talking to Wellet near the fortress. If you win,
you will receive the speedy boots.
Torras 3
Objective:
Cross the town of Torras.
Action: Reach the next map
using the roof passage.
Fort 3: The Search for Senekal’s Weapons
Objective:
Speak to Senekal and the young Prince.
Action: Pull
down the two levers at either end of the two wooden footbridges in order to lower
the drawbridge. Enter Fort 3 and climb the staircase to reach the throne room.
A
cinematic sequence begins and a conversation between the king, Enost, and you
will take place.
Next climb up to the mezzanine to speak to Senekal and
the young Prince. Then the time comes to leave Fort 3 for the City of Torras.
Torras
3
Cross the town to reach the sundial and travel back in time to the
second time period.
Torras 2
Objective: Battle
with Senekal.
Action: Head through the city towards the Casino.
Go to the Park of Brave Men in order to confront Senekal.
Casino 2
Objective:
Bring Senekal to Era of Taskan III.
Action: Confront
Senekal. Retrieve his weapons and take them to him to the Era of Taskan III.
Head
towards the City of Torras where you will be able to travel through time.
Torras
2
Go to the sundial to return to Era of Taskan III.
Torras
3
Leave the town by the large main gate.
Brigand 3
In
order to reach Monast 3 you must go through Brigand 3, through the forest.
Monast
3: Finding and Powering the Royal Jewel
Objective: Deliver
the weapons to Senekal.
Action: Go through the first door
in front of you. Then proceed straight on as far as the wall. Lower the hidden
lever to make the bridge turn round. Climb the ladder and then go on into Senekal-monk’s
and Prince Taskan IV’s hiding-place.
Give weapons to Senekal in order to
then leave the monastery. Once this has been done, head back towards Gogoud’s
manor.
Manor 3
Objective: Return to the City
of Torras in Era of Taskan III.
Action: Cross the bridge as
you approach Gogoud’s manor and complete the puzzle (if it is not already done)
to open Gogoud’s secret room.
Go down and talk to Gogoud who sees to it
that the hidden passage is opened to go to the city of Torras in the third time
period.
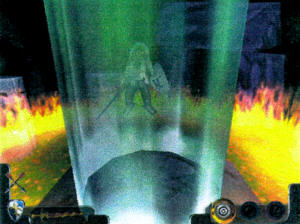
Brigand
3
Objective: Open the game to the city of Torras.
Action:
Advance towards the pictograms situated just after the tree trunk. tunnel.
Do the puzzle to open the gate that leads to city.
City 3
Cross
City to go and follow the arrow on the map. Here you will find and meet your evil
twin, evil Hype. Once he has been defeated, Zatila reappears and gives you the
third Royal Jewel. This will lead you back toward the sky.
Sky 3
Collect
60 power points to charge up the jewel and return to the forest.
Brigand
3: The Search for the Almanacs
Action: Head through the
forest towards Gogoud’s manor, where your faithful friend will be waiting for
you.
Manor 3
Action: Near the sundial, talk to
Gogoud and Nholin, then time-travel to Era of Taskan IV.
Note: This
trip will fail because of an ambush waiting for your expected arrival.
Hint:
You must return to Era of Taskan III where Gogoud will tell you to find
the three Almanacs that detail your legend. The almanacs will prevent the guards
from lying in wait for your arrival in Era of Taskan IV.
Leave Manor 3.
Brigand
3
Action: Head through this map towards the monastery
where you will find the monks’ almanacs.
Monast
3
Objective: Collect the Monk’s Almanac.
Action:
Enter the monastery and climb from floor to floor to ring the bell at
the top. When you ring the bell, all the monks return to their respective quarters
to meditate. You are then able to go into their library to pick up their almanac
without them noticing.
Leave the map when you have acquired the book.
Brigand
3
Objective: Visit Zatila.
Action: Head
to where Zatila is, to go towards the entrance to Tower 3 in Heaven 3. Climb onto
Zatila’s back.
Hint: You must speak to Rave in the fortress
to open the access to the tower.
Sky 3
Action: Advance
towards the tower and go down towards the mist.
Tower 3
Objective:
Collect Enost’s Almanac and make your way to Zatila.
Action:
Defeat the three ghosts in the first room to collect the three sections
of the symbol. When put together, the three sections of the symbol form the symbol
of evil.
Go down through the tower via the different hidden entrances. In
the Teleporter Room, select the symbol of evil to hang on the wall. This will
activate the teleporters.
Get into the red teleporter, then the yellow one,
then the blue one, and you will be taken back to Enost’s room. Be careful not
to be seen.
To distract Enost, you should pull on the suit of armor suspended
in the air so that it falls. Enost goes towards the fallen armor to pick it up.
Meanwhile,
go and get Enost’s almanac. Then leave this room, leave Tower 3 and climb back
onto Zatila’s back.
Sky 3
Head for the passage into Brigand
3.
Brigand 3
Head towards the City of Torras by passing through
Brigand 3.
Torras 3
Cross through the city and enter the well.
Lab
3
Objective: Collect the Alchemist Almanac (to be found
in the fireplace).
Action: Climb onto the sloping length of
piping to go and activate the button, which opens the metal grille to the tapestry
guards room. There is the puzzle sequence behind the lava fountain that will activate
the fourth length of piping.
1. Climb up the ladder to reach the first puzzle.
2. Complete the puzzle (that Zorak tells you to do).
3. Once successful, you
will be provided with the key to open the lab door.
4. Go into the lab, where
there begins another puzzle sequence.
In order for you to be able to collect
the Alchemist’s Almanac, you must solve a sequence of puzzles.
The first
is the lava fountain puzzle. Once you complete this puzzle, the fourth length
of piping is opened.
The next puzzle for you to complete is the one above
the fireplace. Once you complete this puzzle, a secret passage in the fireplace
is opened.
When the fireplace is open, go and collect the Alchemist’s Almanac.
Torras
3
Head for the exit that will lead you to Brigand 3.
Brigand
3
Cross over this area and head towards Gogoud’s manor.
Manor
3
Objective: Go to Era of Taskan IV.
Action:
Go into the manor to talk to Gogoud and give him the tree almanacs. You
will then be able to approach the sundial and travel to Era of Taskan IV.
ERA
OF TASKAN IV
Manor 4
Note: You start off
in Gogoud’s manor but you must head directly to the City of Torras.
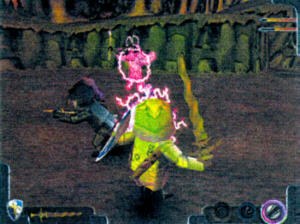
Brigand
4
You meet two guards at the entrance to the city of Torras who you
must defeat in order to open the entrance to the city.
Torras 4
Objective:
Liberate the King.
Action: In the city of Torras,
speak to the blacksmith, who will explain you that you are expected at the Inn.
Once you enter the Inn, you will find Vibe on the second floor, who tells you
to go and free the King from the fortress. She gives you the key to the dungeon.
Head
directly for the fortress.
Fort 4
You must lower the drawbridge
and enter the fortress (or you ca go by the roof). Inside, use the key to open
the door leading to the dungeon that Vibe gave you.
Dungeon 4
Objective:
Liberate the Queen and the guard.
Obstacle: You reach
a passage blocked by a wall.
Note: You must press the button
located at the end of the passage in the water.
Once you have gone through
this door, the passage will close once more. The king is being held prisoner in
a cage. To raise the cage, you must activate the lever.
Follow the King
to the cells where the Queen and a guard are being held prisoner. Free them as
well by using the key to the cells. Then, leave the dungeon by the same exit as
the King and his companions.
Follow the King and you will come to the entrance
of Hype’s room.
Fort 4: Believe in Magic!
Objective:
Get the magic.
Action: In Hype’s room, you must take
the magic. Before going out, you encounter Gogoud’s ghost. He tells you that you
must return to the Lost City.
Leave the fortress through the passage inside
the well or over the rooftops.
Torras 4
You must go to the
sundial to travel to Era of Taskan III in Brigand 3.
Torras 3
Objective:
Light up the gate.
Action: You leave Torras 3 by the
door that leads into Brigand 3. Go to the sacred place that you discovered in
time period three to make this trip.
Activate the buttons in the right combination
and then put out the torches.
The gate will light up.
City 4
Objective:
Collect the forth Royal Jewel.
Action: You must go
to the end of the City but you must also stop at the last stage in your ascent
to take the Ice Magic from the left-hand wall.
When you reach the room of
colors, complete the puzzle.
Hint: The clue to complete this
puzzle is on the sign to the left of the door.
After doing the puzzle, Drareg
appears. You take forth Royal Jewel and Drareg tells you that you must collect
the four Flags and recharge up jewel.
Exit the same way you entered.
Brigand
3
You must go to Torras 3 to travel through time.
Torras 3
Travel
through time back to the Era of Taskan IV.
Torras 4
You should
get out in order to go to Brigand 4.
Brigand 4
Go see Zatila.
He will tell you to get onto his back to recharge the forth Royal Jewel in the
sky.
Sky 4
Objective: Leave the sky.
Action:
Once the Jewel has been charged you will exit the sky by following the
compass.
Brigand 4
Return to Torras to go visit Vibe in the
Inn.
Hint: When you are looking for the four flags, you don’t
have to do it in any particular order.
Torras 4
Objective:
Collect four flags.
At the inn, you talk to Vibe and she gives you
Flag #4.
Action: Leave for the other time periods to find
the three other flags.
Go to the sundial and leave for Era of Taskan I.
Torras
1
Objective: Collect Flag #1.
Action: Go
into the inn to speak to Klouthier. He informs you that Flag #1 is in the Fortress.
Go
to the Fortress via the well.
Note: In the well, you must
press the button to make the platform go down. You go along the length of piping
and appear in the Fort.
Fort 1
Action: Activate
the two levers to make the drawbridge descend. Enter the fortress. Go up to the
throne and take Flag #1 from behind it.
Return to Torras 1 by the same route.
Torras
1
Action: Go to the sundial and travel through time towards
the City of Torras in Eras of Taskan II (the second time period).
Torras
2
Go to the inn and speak to the innkeeper. He tells you to go and see
the bandits in Village 2.
Action: Leave for Brigand 2.
Brigand
2
Go to the big hollow tree to press the button and make the elevator
descend.
Action: Go up to the village.
Village 2
Objective:
Collect Flag #2.
Action: Speak to the bandits and
they tell you to go and see Karon in her hut. You go to her hut where she is waiting
for you. She says that you should go to the Monastery to find Flag #2. She also
gives you the key to the Monastery.
Leave for Brigand 2 following the same
path you used to arrive.
Brigand 2
Action: Head
towards the Monastery.
Hint: Use the key to open the door.
Monast
2
Action: Once you are inside the Monastery take the first
door on the right. Go to the door at the back of the room. Go down below and kill
(well–hurt!) the two guards to make the statue move. You should then confront
two wicked tapestries. Enter the other room and go as far as you can. The Flag
is there.
Retrace the same route, in reverse, to exit the Monastery. Note:
Be careful … there will be new enemies to defeat. Return to Brigand 2.
Brigand
2
Return to Torras 2 for a new journey through time.
Torras
2
Travel through time to Era of Taskan III.
Torras 3
Objective:
The search for Flag #3.
Action: Go to the inn to speak
to Laffyth. He tells you that Flag #3 is in the Park of Brave Men. You can access
the Park through the forest.
Set off for Brigand 3.
Brigand 3
In
the first glade, where there is a large tree, you will find a passage to the right.
Hint:
This is the access point to the Park.
Casino 3
Hint:
This is the entrance is where you saw Karon for the first time in Era
of Taskan II.
Action: Cross the gulf by jumping on the pillars
and heading to the right. Go to the room with the large balls. Burst the barrels
to the left to activate the lever that raises the pillar in the middle of the
balls. Once you have activated the lever, try to get to the center, while avoiding
the balls, before the pillar goes down again.
Once you have taken Flag #3,
return to Brigand 3 by the same route.
Brigand 3
Now that you
have all the Flags, you can set off for the Tower. Go to Torras 3 to travel through
time.
Torras 3
Time-travel to Era of Taskan IV.
Torras
4
Action: Go to see Zatila so that he can take you to
the Tower.
Brigand 4
Action: Ascend into the
Sky.
Sky 4
Destination: The black tower. You
should land on the hole in the cloud.
Tower 4
Objective:
Battle the Black Knight.
There is a scene cut when you enter the
Tower. After Zatila’s death (sob! sob!), take the magic.
Action: Enter
the Tower.
If you climb up straight away, your passage will be blocked by
a door. You should go back down below to give Enost a smack.
Note:
If you kill all the ghosts, a pod will appear and you can charge your
shield if you want.
Go down the ladder. Dodge the death-heads and skeletons.
Go through the secret entrance behind the rocks. Go down once more and enter the
secret passage to reach the teleporters.
Note: The combination
is the same as before. If you face the wall through which you arrived, the combination
is: left, top right, right.
Now go back to Enost’s lab and confront him.
Take the key in the rubble and activate the button on the wall in the adjoining
room.
Go back to the top of the Tower, heading back towards the teleporters.
Once you are on top of the Tower, use the new key to open the metal grill.
You
come to a room with two guards, a metal grill, and a ladder. To complete the Grill
Puzzle, climb the ladder and activate the lever at the top.
Jump down and
operate the new lever to exit.
Back in the barrel-room, operate this lever:
the grill closes and you climb back up the ladder. You are now in a new, round
room, with a single lever. Activate it.
The tray rises. When the tray has
finished rising, you must go up the stairway and kill all the enemies you encounter
on your way to the top to make the middle column rise.
When you are on the
last floor and the column is flashing, climb onto it and it will begin rising.
Note:
If it does not flash, this is because you have not killed all the enemies.
Top
of the Tower
Cut scene with Barnak. You can save this after the cut
scene.
Objective: Defeat Barnak’s Dragon.
Action:
Slash him with your sword on his head while he is laughing–that is, once
he has finished breathing fire.
Note: Watch out for his beating
wings, which stir up a wind that can blow Hype down to the bottom of the Tower.
The
evil Dragon is finally dead …
Conclusion: The Great Battle
Objective:
Defeat the evil Black Knight, Barnak, and restore peace to the kingdom.
Beware
of his magic powers, and good luck!
CHEATS
LEBEN
DRUIDIK
PROTEK
FRIK
LITTLETROLL
LITTLEGOGOUD
YOUNGELF
OLDELF
GROLOT
TOUTUNDEFI
TUNNEL
POULETFRIT Full life
Full magic power
Restore shield
Give 1 to 99 plastycks
Restore life point 1 per second if Hype is waiting
(no key pressed)
Restore magic point 1 per second if Hype is waiting (no key
pressed)
+10 blue arrows
+10 red arrows
One of everything in the inventory
+10 blue arrows +10 red arrows
Destroy shield
Change camera optical (on/off)
Add boots to the inventory