Celtica
By H +
a
Walkthrough by
MaGtRo January, 2003
Gameplay: The Main Menu can
be accessed by the leftmost top icon. It will show Load, Save, Sound and Quit
menus. There are only 5 slots to save games. The middle top 3 rings icon
accesses the map and the game progress. The right book icon shows a frame of the
manuscripts or books taken during gameplay. The books can be read by clicking
the book icon on the left of the book frame. The left scroll bar shows the items
picked up in the game. The list of people who worked on the game is shown on the
right bar shows. Pressing the left mouse key skips the introductions but the
game might crash or freeze if done prior to the end of the ARTECH logo. The game
is linear and the gamer is steered into the next puzzle. Clues are all over seen
on manuscripts, plaques and notes. Except one, the puzzles in the game do not
restart when you move out and play again. The moves done before are kept on the
puzzles. To restart, one must go back to a saved game prior to puzzle solving.
The game always starts with CD1.
The Celts have a myth that speaks
about Otherworld gods that landed on an island off the west coast of Ireland
during the Bronze Age. They found that mankind was still uncivilized. They left
behind The Ascension Amulet that is a source of magic, The Book of Ascension
that chronicles their beliefs and The Ascension Harp that sings when touched by
those discerning enough to make contact with them. Seafaring monks settled in
the island but were driven off by Vikings. In summer of 1889, the Children of
Kerry settled there bringing with them poets and painters. The otherworld myth
remains unsolved.
South and Middle of the
Island
In the map, we are at the south tip
of the island. You see a wonderful view of the sky, mountains and ancient ruins.
The gamers’ position changes every time the game starts here.
Tower: Go
to the tower and climb the ladder to the top. Read the plaque on the wall
in front of the table – Holy man ascend your tower, gather every
precious tome, for the moon is full and flaming Viking godless ride the
foam. Look close at the table. On the table is a small locked chest, a
plate puzzle and a book. Take and read black book 1 from the table. Take
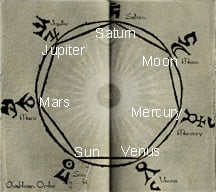
note of the correlation of the days of the week with different planets and the
layout of the Chaldean Order that shows the position and the translation of the
icons of the different planets and the sun.
Chaldean Order
Puzzle: Look close at the plate puzzle on the table. The
object of the puzzle is to connect the planets using the colored lines at the
bottom of the plate in the order of the days of the week. The puzzle is
explained at the bottom of the weekday page of black book 1.
Days of the Week:
Sunday
Monday
Tuesday
Wednesday
Thursday
Friday
Saturday
–
Sun
Moon
Mars
Mercury
Jupiter
Venus
Saturn
Start with Sun (Sunday) at left
bottom. Click on a stick to pick it up, click on sun at lower left and then
click on Moon (Monday) at upper right. Pick another stick, click on Moon and
then connect to Mars (Tuesday) at left of circle. Pick another stick, click on
Mars and then click on Mercury (Wednesday) at right. Pick up another stick,
click on Mercury and then click on Jupiter (Thursday) at top left. Pick up
another stick, click on Jupiter and then click on Venus at bottom right. Pick
up stick, click on Venus and then click on Saturn (Saturday) at top of the
circle. Pick up last stick and click on Saturn and then Sun again at bottom
left to complete the connections. If correctly done a postcard of the
mansion with a key appears. Click on Bernadette’s diary key to place it
in inventory.
We have to find a key for the
locked chest. Click on the telescope on the left and see a hanging bridge and a
gazebo on the cliff edge. Go back out to the meadow.
Gazebo: Go
forward and turn right to the hanging bridge seen on the telescope. Check the 3
ring icon on top bar and note where you are on the map. There is a tile puzzle
on the gate at the end of the hanging bridge.
Gazebo Gate Tile Puzzle:
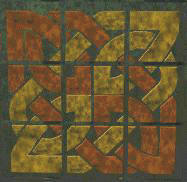
Click on the squares to rotate them. Start at the 4 corners;
arrange them to be corners and to see where the rest of the colored lines go.
Then do the other 4 outer squares and then do the middle.
Gate opens. Go to the gazebo. Look
at plaque – The mother night that ushers in the dark half of the
year, Begins with such a bright light, so sonorous, so clear. Look close
at wind chime.
Wind Chime
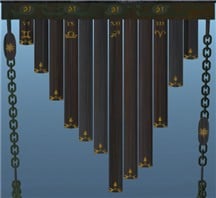
Puzzle: Note that 4 chimes have zodiac signs. Look at
Black book 1 and see that they are Aries, Sagittarius, Libra and Gemini. There
are four 21s on the top bar. 21 is a rotation of the moon. The object of the
puzzle is to arrange the chimes based on when the 4 Zodiac signs appear
through the year and starting on the left based on the clue on the plaque –
ushers in the dark half of the year. Gemini is the Zodiac
sign on May 22- June 22. Libra is the Zodiac sign on Sep. 24 to Oct. 23, Sagittarius is
the Zodiac sign Nov. 23 to Dec. 22 and Aries is
the Zodiac sign on
Mar 21 to April 20. (Note: the dates differ on different reference
sources). The other chimes are spread out from the longest chime, Sagittarius.
Place the 4 Zodiac signs in order
under the 21 on the top bar in correct sequence, starting with Gemini (start the dark half of the year). L-R: Gemini, Libra,
Sagittarius and then Aries. Then arrange the other chimes to make a V shape
with Sagittarius as the point. Check the arrangement based on the sounds of
the chimes from high to low to high.
When correctly done, the drawer
opens. Take the harp string and the progress layout appears. See that a
circle is lit beside the Ascension harp icon.
Turn left and look through
telescope. See a gazebo dome with a key. Cross the hanging bridge, go forward to
the ruined round chapel with stained glass windows. Enter the ruined
chapel.
Ruined
Chapel: Check the map to see location in the island. The
floor has depictions of the constellations. Go forward, turn left and forward to
the 3 kneelers. Click on the top corners of the curtains and the curtains will
open to reveal 3 stained glass. Click on the shining eye of the
swan-cygnet at the top of the right stained glass. This will light up a red
jewel at the center of the progress layout. Back out and follow the ray produced
by the swan’s eye to the right and down on the floor. Click on the floor’s ruled
tile it lights on and it reveals a book. Take brown book 2 and a blue
circle will light up in the Book of Ascension progress square. The brown book 2
reads …for it is a mystery to us why these noble denizens are
transgressed. These threshold guardians have great wisdom to share from their
days confined in this earthly realm and ominous tidings from beyond it. Seek out
these phantoms. Listen to their tales. What is it that you
fear?
Look close at table by door.
There’s a missal and a hymnal. Take the 3 organ rolls – Sun Tears, Shadow
Dancing and Ode to Cygnus. Exit the church.
Cemetery:
Check the map to see location in the island. Turn right and forward 2xs to the
gate of the cemetery. Note the solution for the gate puzzle on the hanging
bridge on the left statue. Enter, turn right and look close at tombstone –
Richard Francis Cahill 1871-1900. Turn left, forward, left and look at another
tombstone – Franklin Morris 1873-1900. Turn right, forward to Celtic cross, turn
right and look at tombstone – Bernadette O’Donnell 1880-1900 And in
the oblivion, East was Fire and by Evening was light. By day by night.
Turn left and go to Celtic cross. Note an active spot on top of the cross. Turn
around and look at tombstone – Herman Otto, Seaman U -309, 1918-1949. Exit the
cemetery and turn right to go to the gazebo seen on the telescope at the gazebo
at the hanging bridge.
Gazebo by
cemetery: Check the map to see location in the island.
Take the Arbor key from the roof.
Tower: Go
back to the tower. Use the arbor key on the locked chest on the table and take
brown book 1. Another blue circle will light in the Book of Ascension
progress square. Read brown book 1 – …and the unworthy petitioner
will have little hope of attending the three whispers we leave on the pale wind.
Neither mettle nor brawn nor logic will avail him. What is required is simple; a
contrite heart, an open mind and a transcendent soul. Only then will the beacon
of enlightenment shine. Only then will we know that the mortal plane has been
rent asunder. Go back to the gazebo by the cemetery.
Gazebo by
cemetery: Enter and see that there are 2 exits on both
sides of the telescope. Take-click on middle eyepiece from the box on the table
and it will automatically be placed on the telescope. It will focus on the
tombstone of Bernadette O’Donnell 1880-1900 And in the oblivion,
East was Fire and by Evening was light. By day by night. Turn left and
exit the gazebo left of telescope.
Mansion:
Go forward until the gates of the mansion. Read the plaque on left of the gate –
From East, South, West and North: Of Air, Fire, Water and Earth; At
Dawn, Noon, Evening and Night; Be Law, Love, Life and Light. Turn to the
gate puzzle.
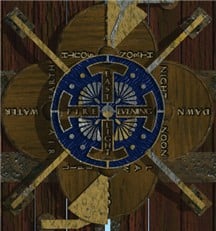
Mansion gate
puzzle: The object of the puzzle is to arrange the
center part of the puzzle to match the words on Bernadette’s tombstone. East
on top, Evening on the right, Light at bottom and Fire on the left to make the
Celtic cross.
Enter and go forward pass the main
door to the mansion. Look over the wall to see a park like garden. Go back and
enter the mansion. To the left is a phonograph. Click on it and hear an
inaudible voice talk about Bernadette. Climb to the upper level and enter the
Music room.
Music
Room: Turn right and see a music box on the
table.
Music Box
Puzzle: This is a random puzzle. The object of
the puzzle is to get the same music played by the left and the right crank.
Click on left panel to open the box and look close at the positions of each
notes set in sliding bars labeling them from L – R as 1-9. Click on right
crank and then the left crank to hear which of the notes are not the same.
Then move the sliding bar to change the position of the notes to make it
similar to the sound made by turning the right crank. Place the arrow on right
side of bar to move the note to the right and place the arrow cursor on the
left to move the note down to the left. The cursor here is picky – be sure
that you have the tip of the arrow on the correct bar you want to move before
clicking. Good luck! When correctly done, the right panel opens. Take the
piano key.
Piano:
Go to the piano and click the piano key on the piano. Click on the postcard of
the park-garden seen outside and take the harp string. The progress
display now shows 2 lights beside the Ascension Harp. Enter the door on the
left.
Bedroom:
Go to the table and look at the crystals on top of a manuscript
with astrological signs.
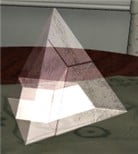
Pyramid
Puzzle: The object of the puzzle is to stack the crystal
to form a pyramid. Click on rotation arrows to turn the crystals. Click on the
biggest one first and it will automatically go to the pattern on the paper.
Click the top left crystal by corner of paper and then rotate it once. Click
on the other two and it will form a pyramid. See a clue scene of the Celtic
cross we saw at the cemetery.
The atelier has
no discernible puzzle or clues. Go back down the stairs. At the foot of the
stairs, turn towards the door to the back of the house.
Foyer:
Go forward and look at both side alcoves before the central
first floor door. To the left is a planetary display. Go the right alcove and
see a prism puzzle.
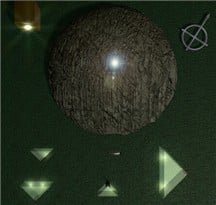
Prism
puzzle: The object of this puzzle is to arrange the 4
prisms so that the light from upper left passes through all the prisms and end
to light the hole on the mound. The prisms can exchange positions when picked
up and clicked on another prism. They can also be rotated using the
directional arrows seen when the cursor is placed just to one side of the
prism. Move the middle prism to bottom left. Rotate it to get light reflecting
on both the top and bottom left prisms. Rotate the right large prism once.
Click the bar to make it horizontal. Then rotate the middle prism to point to
the mound. When correctly done, click at center of mound to take an
addition to the Ascension amulet.
Enter through the white doors to
the drawing room. The kitchen on the right has no discernible clues or puzzle.
Turn left and enter the door at far left of the room.
Greenhouse: At far end is a mixing contraption. Look close
at the 2 drawings at both side of the mixer. At right is an Alchemy linked to
Astrology graphic. At left is the object of the mixer puzzle ‘Harmonize fluids’.
At the center are 3 flasks with liquids that are mixed.
Mixer
puzzle: The object of the puzzle is as the Herb graphic
states – Harmonize the liquid – get the swirl of the liquids in the 3 flasks
to mix at the same rate and at same direction. Above the flasks are tubes that
contain liquids that can either speed up or slow down the swirl of the liquids
in the flask. Use the arrows on top to cycle the different tubes. The tubes
are labeled a, b, g, d, c. The 3 circles are the buttons to push to add the
liquid from the tube directly above the flask to the flask at the same
position below.
Save game and then find out what
tubes affect what flask. Left flask is speeded up by g and b but slowed down by
a. Middle flask
is speeded up by a and b but slowed down by c. The right flask is
speeded up by b and g but slowed down by a. The speed of the flask that I
tried to match for all 3 flask is one speed above the slowest swirl – the
initial speed of the left flask. The rotation that I matched to all 3 flasks
is clockwise rotation.
Leave left flask alone and use it
for comparison. Middle flask – turn the arrow to have the c tube above the middle
flask and click once on the middle button at top bar. Right flask – Place the
a tube above
the right flask and click the right button at top bar 3xs. They should all be
same speed and rotation. Take Golden Key. Exit the room and turn right
to the library.
Library: Read
the notes on the desk by clicking and backing up on the notes several times.
Intimate dreams, Secret Desires, Put into words each day. Personal
feelings, Private thoughts, Put into words each day. I share my heart with no
one. It is safely locked away. My musings give me comfort, More than I can say.
It must mean the diary. Turn towards the window, turn left and see a card
puzzle at table. Click on the picture above the table and see a safe. Look at
cards.
Safe – Cards
Puzzle: (Thank you, MG!) The object of the puzzle is to
turn the 3 cards so that all of them have the same face card. Then make note
of the number of the first card on the left. Notice that the second card will
equal 3 times the first number +3. The third card will also be 3x the second
number + 3. The safe combination number will be 3x the third number (right
card) plus 3. Enter the calculated number on the wall safe by clicking the
buttons, then click on wheel and then click on handle at left. The safe will
open to reveal a box.
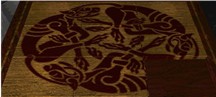
Box Slider
Puzzle: This is an easy slider puzzle. Have
fun!
Once completed
take scroll #3 – To unearth an elixir, A cloudless tincture
that will transmute metals to gold is an ancient ambition. Substance or
superstition? Fancy or can it verily unfold? Read Bernadette’s diary.
Starting on June 1, 1899, the story of the discovery of 7 texts pertaining to
the Otherworld myth by Bernadette and her betrothed Dominic unfolds. Franklin
made a pipe organ hooked up to the windmill, Mavis worked on Alchemy and Eoin
did photography. It continued to show Dominic’s change, the separation of the
amulet into 3 parts and loss of a gear from the windmill. The diary ends in
Franklin’s murder, Dominic’s suicide and Bernadette’s attempt to solve the
Alignment Circle.
Park –
Garden: Go out to the park using the veranda door. Go
forward to the small building and read the plaque – By this month’s
zodiac and sign, align the planets all in a line. Enter the building and
see the Zodiac Puzzle.
Zodiac Alignment
Puzzle: The object of the puzzle is based on the plaque
clue. Arrange the planets based on the gamers’ (that’s you) month one is
playing this game (I’m playing this in January). Use the chart below, to
select the Zodiac sign for that period (Capricorn). Look in black Book 1 to
see the icon for your zodiac sign.
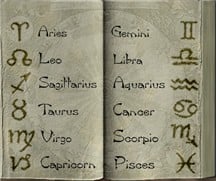
Aries Taurus Gemini Cancer Leo Virgo Libra Scorpio Sagittarius Capricorn Aquarius Pisces | 21 March-20 April 21 April-21 May 22 May-22 June 23 June-23 July 24 July-23 August 24 August-23 September 24 September-23 October 24 October-22 November 23 November-22 December 23 December-19 January 20 January-19 February 20 February-20 March |
|
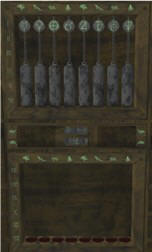
1. Using the bottom arrows on both sides
of the middle panel, enter the present zodiac sign (ex. Capricorn).
2. Using the upper arrows of the middle
panel, enter the months that zodiac sign falls on using the first letter of
the months (ex. D, J).
3. Now align by clicking on the horizontal
icons on the top or at the bottom panels, the circles that show the
planet icons from Mercury at left to Neptune at right to the present month’s
Roman numeral (ex. January is Roman numeral I) shown on the left vertical
frame.
4. Pull the lever on the right and if
correctly done, see the planets at the center of the park outside move and
align.
Go outside and click on the
zodiac sign (Sagittarius) the large metal planets aligned to. Take the Zodiac
key. Turn to the right and go forward to the corner wall of the park.
Door with Face: See a door with a face and keyholes. Use
the just taken Zodiac key on the keyhole that corresponds to the current Zodiac
sign used in the last puzzle (ex. Capricorn). The face opens to reveal brown
book 3. The progress frame shows another lighted blue circle at the
Ascension Book square. Note also the present location in the map. Read brown
book 3 – The amulet will emulate the transcendental
experience of the ascetic. It will give the recipient a brief glimpse of not
just what was, but what could be. But the Amulet is a powerful gift that is to
be employed judiciously. To the petitioner who is deemed undeserving, the amulet
will be a hollow trinket indeed. Use the golden key on the
keyhole on the left. The door swings open.
Stone Passage:
Enter and walk to the stone passage. At the end, see a
structure reminiscent of Stonehenge. Turn right at passage’s end. If all the
needed tasks have been done, a purple light will shine at the end of the
passage.
West Side of the
Island
Go through the purple light.
(CD2) Look at the map and find yourself at west end of the island.
Lighthouse:
Turn right and see a locked door. Click on door several times
and hear something drop. Look down, take key and it will automatically
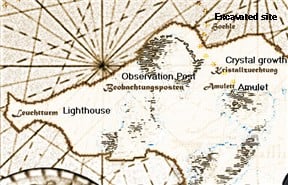
open the door. Enter, turn right and look close at table. Look at the map and
see that there are German notations. The Germans must have been here during
wartime. Note the lighthouse, observation point, amulet, crystal growth area and
the excavation or cave site. A path on the water to the amulet area is seen –
submarine route? Exit the lighthouse.
Tower:
From the lighthouse go forward to the next tower. Go up
to the top level and look through the left eyepiece of the telescope. Click on
the other eyepiece to rotate them to a higher magnification. They are focused on
the tower we started the game on. It has a cygnet weather vane. The highest
magnification shows the cygnet has a shining eye. Go back down to the second
level and see a rifle. Look close, take ammo clips. Look through the
scope and see the Cygnet weather vane of a tower. Back out and insert the ammo
clip on rifle by clicking the ammo right before the trigger area. Look through
the scope again and place tip of pointer on the crossbar that holds the cygnet.
Click to shoot until the cygnet falls to the ground.
Exit tower, turn left and go
forward. Cross the hanging bridge, note a ruined building on the right and cross
another hanging bridge.
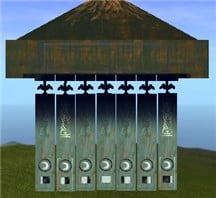
Gazebo: Read the plaque – When the pale dusk falters and day has all but died, the thin black veil
is drawn back and we cross to the other side. Look close at
wind chime.
Wind chime
puzzle: The object of the puzzle is to arrange the
chimes in the order of dusk to the dawn. Click on a chime and then click on
the place you want to move it to. When completed successfully, the wind chimes
and a slot opens. Take Sacred Key and harp string #3. Now, 3 are
lit at Ascension harp box. Go back to the ruined building before the second
hanging bridge.
Observation point:
Enter door, look close at desk, click on
black notebook by decoder machine and get another scroll #3 (?glitch).
Click to read a rolled paper – recall to kiel. unconditional
surrender May 9-1945 Admiral Donitz…british intelligence suspect listening
post near by. supply-repair depot…
Elevator: Turn right and look close at wall panel.
Gezeiten means tides, wasskasten means water box and aufzug is elevator. Flip up
the lower handle and then flip down the upper handle to fill up the water box.
Then flip down the lower handle to raise the elevator. Go to the elevator door
on the right.
Tunnel:
Turn left, click on matches to light one and then click
on lamp to light the lamp. Take hatchet and see a match in
inventory. Take lit lamp. Turn right and go forward to the end. See the
submarine and supplies on the dock. Turn left, forward, left and see a locked
barrel. Use the hatchet on lock 3xs. Use hatchet again on the bottom left of
barrel to drain the water. Click inside the barrel and a chest will be seen. The
chest opens to reveal the Amulet. Take amulet. The upper icon on the
progress bar lights up now.
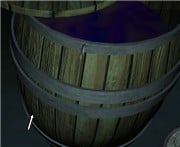
Cavern: Turn right, forward, left into another
tunnel and forward to a cave. The cavern looks like it has been used as place of
worship. There are Celtic crosses and candles. Look close at candle table on the
left and click the match on the one active candle. Take candle. Go to
ornate grilled gate and use Sacred Key on the circle at the center of the gate.
Go forward 2xs, turn right,
forward into a small cave and look close at open crate. To move the compass,
click-hold or just double click on compass and then move the mouse. Note that
the compass is attracted to something on the east. Place the compass on the
upper edge of the small box and then click on its right side.
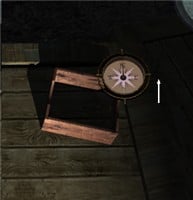
The Evening Light organ
roll and gear will be taken. Go out of small cave, turn right,
forward and left to a water filled cave.
Water filled
cave: Go forward until the end and click on crystal. Take
brown book #4. Read brown book 4 – …where we
systemize the swirling anarchic forces around us that we do not comprehend and
seemingly cannot control. In this quest, the symbolism of numbers cannot be
stressed enough. In the chaotic maelstrom trust that there is a symmetry, there
are patterns, there is order. Exit this
cave.
Turn left, go forward 4xs
and look at 2 grilled windows on the right out to a purple waterfall. Turn left,
forward to exit the tunnel. Turn left and see another stone passage. Enter the
passage and go to the end. Enter another purple light.
East Side of the
Island
Look in the map and see that
we are now at the east end of the island. Go out, turn left and then turn right
to see 3 carved standing stones. Turn right and forward out to the meadow.
Go forward until you pass through between 2 standing statues. Turn left and see
a mirror on a stand.
Mirror: Click on the mirror and you will
see it from one side facing a tower and another mirror in the horizon. Click on
mirror to move it to a position that is facing the tower and the mirror is in a
vertical position. The cursor here is touchy – click on the mirror to hold it,
move cursor to right of screen to turn the mirror and then move cursor down to
get the mirror in vertical position. You will know you got it right when the
mirror at the tower will reflect or light up. Back out and see that the mirror
reflects the tower mirror.
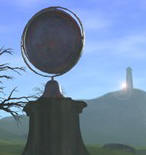
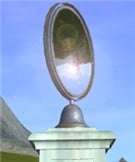
Turn right 2xs and see
another mirror at distance. Forward to that mirror and see it reflect to another
mirror ahead. Forward to the mirror and see it reflect to a dolmen with 5
hanging necklaces with runes on them. Only 3 have light reflecting on it. Take
the 3 lit runes. Turn around and go back to the mirror we adjusted. Turn
right and the forward until the tower.
Observatory
Tower: Click on entryway to enter tower.
Study: Go to second level and turn around. Look close
at table. Read the note at center of table. – Azimuth 293, Altitude 30, The
Harp, The Eagle, Eye of the swan – garnet. Click on the book at right of table
and read black book 2. It correlates with the note. Look at the
kaleidoscope swans, flowers and eagles. See a dead flower and 6 vials of
experimental results on left side of table. To read the labels of the vials,
click on the neck of the bottle and to take vials, click on body of vials. Pick
up the Flower petal vial, second from left and then click it on dead
rose. The powder is sprinkled on the dead rose and it becomes fresh. The vial
goes in inventory. Climb up the ladder to the top of the tower.
Observatory: Look close at telescope.
Setting the telescope:
Azimuth – Look close at middle round knob at center of the bar holding the
telescope. Click the round knob on the right using the left mouse button to
turn the dial forward and use the right mouse button to decrease the setting.
Set 293 at the center of the dial. Back out.
Altitude – Look close at white square on left bar holding the telescope. Click
the number to 30. Back out.
Look at the eyepiece of the secondary telescope at the side of the telescope
and click on the eye of the swan – another red stone lights up at
the middle square of the progress frame. Back out.
Turn right to the lever by the
wall. It will not work. Go back down the stairs and pull the lever that is on
the right of the top of the stairs – this unlocks the shutters. Go back to the
lever and the dial. Set the dial to 270 and then pull the lever. Right click to
decrease the setting. Turn around and look at the main eyepiece of the
telescope. See an eagle fly off a tower roof down to a nest. Back
out.
Go outside through the shutter
opening. Look around to see a marvelous view of the island’s east coast. Turn
left and climb the wooden steps on the dome of the observatory. Take the
harp weather vane. The harp icon lights up on the progress frame. Go back
down the ladder to the first level.
Click on the wood door
behind the ladder or go outside through the open entryway and click on the tower
to get to the other side of the tower. Go forward 3xs to the walled cliffside
that is left of the leafless tree. Turn right and see the eagle’s nest. Take
the harp string #4.
Stone Mound:
Turn right, forward 7xs, look at the map and see that we are at
the north part of the island. Turn right and enter the stone mound structure
between 2 Celtic crosses. See numbered stone heads on a circle on the
ground. Look at the paper at upper right and see the placement of the stone
heads on the circle. Take the cap stone on top left of screen.
Stone Head
Puzzle: Click on the heads to get an overhead view of the
arrangement. The object of the puzzle is to diagonally and vertically align
the middle and outer ring of stone heads. Just move all the middle ringed
heads clockwise until all are aligned to the outer ringed heads. All are
numbered by their position on a clock face. Click on the middle head to reset
the puzzle and click on bottom corners’ 3 rings to move out of the puzzle
itself. Move these heads clockwise by clicking on them and then click on the
slot you want it to move to: One solution is to move clockwise – 9,
1, 3, 7, 5 and 11.
Click at center of
circle. See ashes. Use flower petal vial taken from Observatory Tower on ashes.
Take brown book #5 – …and as a result of this
transmutation the elixir that you produce has powers beyond your imagination. It
can do nothing though unless you believe. If you don’t believe then it is just a
harmless solvent. If you believe, it is so much more.
Take 2 more Viking runes under the book.
Back out of the stone mound,
turn left and go forward until the gate.
Gate: Look close at circle on right of
gate.
Viking runes – Gate
puzzle: The top right slot takes runes and moves the
inner arrow counterclockwise. While the top left slot accepts runes and rotate
the outer ring arrow. Pressing the center button will release all runes at
bottom slot and resets the puzzle. In inventory, there should be a 3, 5, 7, 8,
10 runes. A vertical bar is one, a horizontal bar is also one and the O and
bar across it is 10. This result was obtained in following the clue about
symmetrical pattern of numbers (book #4). Place 3, 10 and 8 on either slot and
then add 7 and 5 on the other slot. This resulted in 21 in one slot and 12 on
the other slot. Symmetry of number 21-12 or 12-21. The gate
opens.
Enter, go forward and
take brown book #6 from the stone – At dusk and dawn,
the bridges to this realm are traversed more freely… secret portals are flung
wide open and hidden doorways magically appear. There are special times of the
year as well when these remarkable occurrences take place… Go forward until the purple mist. (CD1)
Back to South Side of
Island
Cemetery:
Go forward to the far Celtic cross we saw
earlier. Place the cap stone on top of the cross. Take brown book #7 from
the base of the cross – …and so let the sun, the moon
indeed all of the stars chart the progress of your journey… Gaze at the night
sky… marvel at the mysterious bodies that move throughout this celestial
sphere and observe closely… for it is here that the answers to many of your
questions are written…
Tower: Go up to the tower, turn around and pick up the eye of the cygnet
from the weather vane that we shot down from the tower roof. Now all the jewels
at the center square of the progress frame is lit. Go back to the gazebo and go
forward to the windmill.
Windmill: Look at the plaque on far wall –
How can the mortal maker sullied with frailty and sin
compete with the harmony of heaven that is written upon the wind. Start the windmill by pulling the lever by the base of the windmill
machinery. Place an organ roll on the organ and realize that the organ does not
work. Click on the 3 rings at either bottom corners of the frame to move out of
close up. Remember what Bernadette wrote in her diary about Franklin missing a
gear for his windmill.
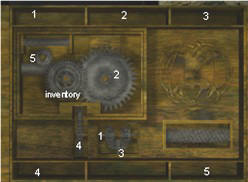
Windmill Control Box
Puzzle: Look close at wood box on the windmill
contraption. Open the wood box by pulling down the lever on the left. The
object of the puzzle is to get all the gears placed in the right order in the
box for the windmill to power the pipe organ. If the gears are placed
correctly, all the rollers and gears will rotate.
Organ: Go to the organ and based on the brown book #6,
insert Evening Light organ roll in the slot. Turn the knob to play the music,
take the organ roll when done playing and the panel in the back opens. Take the
scroll #1 – letter of Franklin to Bernadette – Some
evenings I follow you when you take your solitary stroll by the cliffs. I have
even been favored enough to hear you sing when you think that no one is
watching. As I had imagined, your voice is every bit as angelic and sweet as you
are. Please Bernadette, give some small sign that you share these feelings I
have for you. Franklin. Take harp string
#5.
All the lights are lit on
the Ascension Harp frame, Ascension Book and the Ascension Amulet. Go out and go
to the Mansion, out to the park, through the door with a face and through the
stone passage. The way to the Stonehenge area is now open. Go forward to
the center of Stonehenge and click on the altar. Watch.
The search has
ended.
This
document may not be distributed without express written permission of the author
and the content may not be altered in any way.
For
Questions or Comments on this Walkthrough,
Please write to: MaGtRo
Copyright ©
1/2003
MaGtRo