Barrow Hill: The Dark Path
Please,
note that this walkthrough is copyrighted.
Hence, any attempt to reproduce anything from this walkthrough
will
be severely punished to the maximum extent of the law.
Kindly address all
your comments and questions to
The Walkthrough
Generally
This is a point and click game. The top and bottom of the
screens will go black when you move your cursor over them. As you thus move
your cursor at the top of the screen, it will reveal the “Menu,” at the
upper left-hand corner. Click on this (“Menu”), to return to the
Main Menu where you can Load, Save, etc. Similarly, moving your cursor at the
bottom of the screen will reveal the items in your inventory, from where you
can pick and use the items as you see fit.
Please, note: some of the items you collect in the game will be
deposited in the right portion of the TOP of your screen, while others
either in the right or the left portion at the BOTTOM of your
screen. Generally, though, the items will be deposited at the bottom
left of the screen. So that is where you should look for an item, when I tell
you that it has been deposited in the inventory. I will let you know if an
item has been deposited elsewhere.
A magnifying glass icon with a plus (+) sign in
it [the “plus (+) icon”] means
you can close up on the designated item or area; a similar icon with a minus
(–) sign [the “minus (–) icon”]
will allow you to back out of the close up. Thus, click on these magnifying
icons with the plus and minus signs when the walkthrough calls on you to close
up or back out of the close up, respectively.
* * * * * * * * * * * * * * * * * * * * * * * *
* * * * * * * * * * * * * * * * * * * * *
Welcome to
Barrow Hill! An unexpected stop as your car breaks down, driving through in
the middle of the night, and you find yourself stranded in some thick woods.
Turn around and click on the Open Hand icon. Hmmm. There seems to be some kind
of an invisible barrier that prevents you from going in that direction. So
turn back around and start moving in the direction that the car is lighting
your way. After several (eighteen) steps, you will arrive at the gas
station.
Take four more
steps and turn left to see the words “No Entry” marked on the
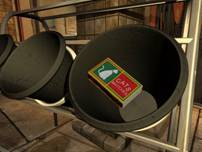
ground. Move forward three steps and come to where three black buckets are
placed in a stand. Close up on the black bucket closest to you and click on
the box of matches inside to deposit it in your inventory.
Move
forward a step, turn right and click on the door to enter the service station.
This is the Lobby. Just as you enter, you will hear someone rambling on. The
sound is coming from the door marked “Office” to your left. Approach
this door and close up on it. Click to knock on the door and a man will open a
small window and talk to you. In addition to telling you something about what
has happened, he will also tell you to get a lantern. After he finishes and
closes the window, knock again and he will also tell you to get some matches
(which you already have) as well as repeating some of the things he had told
you earlier.
You will not be able to do anything until he finishes (you
can’t even skip the dialogue, I am afraid). After the man is done, step out of
the close up, turn around and enter the Café. You will have to click on the
right door to get in, because the one on the left is blocked by a serving
cart. As you enter, take a step forward, turn around and enter the serving
area on the right side of the wall in front of you. Turn right and
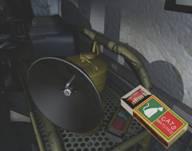
enter the Kitchen. There are no lights but look to your right and find a
yellow-colored lantern sitting there. Click at the base of this lantern
and a black funnel will be “presented” to you. Click on the yellow
lever just above the funnel to turn it. If you have done it correctly, you
will then be able to click on the box of matches in your inventory, to bring it
out and see it opened for you. Click inside the open box to bring out a single
match stick. Click on the side of the box to light up the match, and then
click on the black funnel of the lantern to light it up as well. Now click on
the lantern, which will then be deposited in your inventory.
Now that
you have some light from the lantern, turn to the wall on your left. Click on
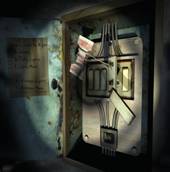
the blue-greenish paneled fuse box in the wall, to open it.
Click on the single black square button at the bottom. You will hear a
click. Now click twice on the second white button from the right, in
the middle of the box, to lift and remove the cover. Next click on the pink
card on the upper left part of the box, to bring it out and reveal a coil of
wire wound around it. Click on this wire twice to attach a piece of it
at the top and bottom of the uncovered slot. (See picture below) Click
on the white cover of the now-wired slot, to cover the slot again; and then,
click on the black square button at the bottom of the panel again, to turn the
Kitchen lights on.
We are done
in the kitchen for now, so step out into the serving area of the café. Close
up on the bulletin board right in front of you, and click on the various items
posted, to bring them up close and read them. We are done in this area too
for now, so step out into the dining area and step toward the door across the
room. Turn left and click on the white envelope, on the right end of the table,
to bring it up close and read it. Next, click on both the top and bottom of
the magazine, right in front of you on the table, to bring up and read the
legend and the puzzle, respectively. Step out of the close up, turn left and
go back out into the lobby and knock at the office door.
As the man
finishes talking and closes the window, knock again to receive some more
information from him. He will mention someone by the name of Conrad, and tell
you to find him because he might help you. As the man finishes this time, turn
right and step forward to examine all the items on the bulletin board in front
of you. Note that there is a black-and-white picture of seven stones at the
bottom center (the right one of the two under the big colored sketch/drawing).
The picture will flip around if you click on it, to reveal the names of these
stones. Step out of this close up and examine the various postcards on the
rack on your left. Next, pick up and click a couple of times to read the
entire information in the pink and yellow flyers at the bottom of the rack.
Now turn around and close up on the table with the food basket. Look up and
close up on the counter, and then on the postcards on it, to find a jigsaw
puzzle of the post card on the Altar Stone. Click to pick up the pieces, one
by one, and then click on the spot where you would like to see them placed.
Let’s see now
if we can find this Conrad and enlist his aid…
So, step
out of the service station. Turn left and take four steps, reaching the bushes
on the other side. Now turn left again, and take two steps. You will see an
icon of a hand holding a wrench, in front of you, indicating the need to apply
an inventory item. So click on the lantern, to bring it out of your
inventory. Take another step forward, and you will see a red telephone booth,
on your left. Take one step more, turn left and enter the phone booth. Pick
up the phone, but all you hear is strange noises. So hang up, and step back outside.
Turn left and take seven steps, to see the left side of a jeep. Take three
more steps forward, and close up on the jeep’s license plate: 4X 68578. Now step out of the close
up, take one more step forward and close up on the items lying on the ground,
to the left of the jeep.
Make a note of the radio station: 15.3. Read the newspaper clipping, to get
some background information. Read the journal entry. Pick up the booklet (20
numbered pages in all) and flip through all the pictures, as well as the two
pages at the end listing the locations of all the photographs. Pick up the
PDR, to deposit it in the TOP right portion of the screen. Now click on the plus
(+) inside this close up, to get yet another close up of a pile of dirt,
to your right. Click on this pile, to produce a card; click on the card, to
see that it is Conrad’s driving license.
Step out of
this close up, turn right and close up on the driver’s seat of the jeep. Pick
up the little radio on that seat. You will see three buttons, arranged
vertically, on the right side. Click on the round button at the bottom, to
turn on the radio. The two buttons above this round button are to change the
stations (the one at the top makes the numbers go higher, while the one below
it makes the numbers go lower). Thus, use the appropriate button to tune to
Emma Harry’s radio station at 15.3. Her narration will tell you more about the
story plot. She will even give out a number to call her but you will be able
to hear only three digits of the phone number right now: 585 –
insufficient to call her, for now.
Step out of
the close up and turn left, step forward, and click on the open hand icon to
find yet another invisible barrier blocking your way in front of the jeep. So
turn around and head back for the service station (fourteen steps, going past a
scarecrow to your left and the phone booth at your right). Take two more steps
forward, turn right and take three more steps. Now turn left and close up on
the items strewn on the ground in front of you. Click on the crayons, to pick
up a blue crayon; and then click on that crayon, to deposit it in your
inventory. Now click on another plus (+) icon appearing to your lower right (to
get yet another close up within this one), of a pile of dirt. You will see the
green edge of a book, sticking out from the top right of the pile. Click on it,
to reveal a book on Cornish fungi. Click on the book, to deposit it in the TOP
right portion of the screen.
Well, it’s
obvious that the manager (the man in the office) is not much help, and Conrad
is nowhere to be found. So it is up to you now to figure out the mystery of
what happened, as well as a way to get out of the place. Start by going back
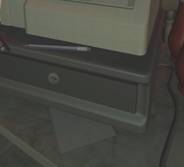
into the serving area inside the café. Turn around and look at the cash
register in front of you. Close up on the piece of paper underneath the
register. Note the code for Room number 2: 372.
Note also that the * and # keys reset the lock (just in case you push a wrong
key and have to start over punching in the right code).
Step out of the café, go through the lobby, and step out of
the service station. Look at the two green doors across the gas pumps in front
of you. Take two steps forward towards them, then click on the bench to the
right, to move one more step forward. Now turn left and take two more steps
forward. Turn to your right then, to face Room Number 2. Close up on the
electronic panel above the doorknob, and click the code you had just found in
the café (on the piece of paper under the cash register): 372, to unlock the door. Enter the
room.
Close up on
the two drawings on the wall to your left. Close up below and you will find a
grating sitting on the ground, against the wall. Step out of this close up, turn
right, move forward and turn to face the wall on your left again. Close up on
the two pictures, and then on the detailed map of the area. Now close up on
the desk below. Pick up the radio. Click on the round button on the left, to
turn on the radio. Now click repeatedly on the round button on the right, to
bring the needle to 15 and hear
some more from Emma Harry. At the end of her narration, she will repeat her
phone number: 58521. But this is still not the complete number, so you will
not be able to call her yet. Switch off the radio (to help you concentrate on
other things, unless you prefer to leave it on and hear the music as you
continue). Now close up on the green toolbox on the desk, open it and pick up
the bricklayer’s trowel, to deposit it in your inventory. Read the letter in
the green basket on the upper right-hand side of the desk. Next, open the top
drawer to your right, and pick up the cell phone. Its battery is weak though,
so you can’t use it yet. Click on it, to deposit it in the top right portion
of the screen. Now read the two letters that were under this phone, in
the drawer.
Step out of
the close up, turn right, and examine the items on the bed. Thus, look at the
two drawings, and then read through the journal in the brown leather bag,
flipping the pages by clicking on the right page of the journal. Step out of
this close up too and close up on the large map on the wall to your right. Now
close up on the little table to the right of the bed. Close up on another
drawing on the wall, above this table. Then, read the letter placed next to
the charger, on the table itself. Finally, click on the cell phone you just
picked, in the top right portion of your screen, to see it placed in the
charger. While the phone is charging, let’s step out of this room, for now.
Click on
the PDR (in the Top right portion of your screen), to bring it out in view.
You will see two blue tabs, marked “Remote
Cameras” and “Local Files.” Click on one of the four green
images, under the “Remote Cameras” tab, to close up on that image.
Click on the tab labeled “Back to cameras,” to bring you back to the main
menu. Thus, examine all four of the images.
Now look at
the two items under the “Local Files” tab. Click on the “Survey
Map,” first; and then, click on the “Notes.” Make a note of the
code for Room Number 3: 327.
Click on
the hand icon appearing outside the PDR, to put it back in your
inventory. Turn left now; step forward and to your left again, to face the
door of Room Number 3. Close up on the panel above the doorknob and click in
the code: 327, to unlock
the door. Enter the room.
There are a
lot of papers strewn about, and put up on the walls, in this room. As
you enter, turn left and close up on each of the three drawings on the wall.
Step out of the close up and return to your starting position, facing the rest
of the room again. The toilet area is to your right. Close up now on each of
the two drawings on the side of the wall sticking out in your view from the
right. Next, turn right and focus on the toilet area below. Close up first on
the piece of paper lying in the shower, to read a journal entry. Step out of
this close up and into the one on the piece of paper between the toilet seat
and its cover, to read another journal entry. Step out of this close up also,
and into the one on the two pieces of paper lying outside the shower – one is
on Cornish ceremonial sites and the other on several electronic gadgets.
Step out of
this close up, turn right, and close up on each of the three drawings above the
sink. Turn around now, to face the rest of the room again. Step forward and
close up on the bed, and then on each of the three diagrams there. Step out of
this close up then, turn left, and close up on each of the five drawings on the
wall. Close up on the floor next, and then on the piece of paper sticking from
under the pillow on the bed to your right, to read yet another journal entry.
Next, close up on the two pieces of paper lying on the floor in front of you,
diagramming and explaining lunar cycles, etc. Close up (within this
close up) on the shoes to your left, to get a close up of a waste paper
basket. Click inside the basket to get the close up of a torn up note. Put all
the pieces together (by clicking on a piece to pick it up and then on the spot
where you would like to see it placed), to reveal the content of the original
note. (See picture below.)
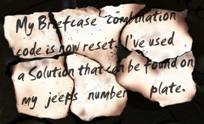
Note:
Don’t waste your time trying to fit the pieces exactly, because they will fit just
enough to relay the message. As we had already noted, the jeep’s number plate
was 4X 68578. Thus, according to this note, the combination should be 4
times 68578 = 274312.
Turn around now, to face the
desk against the wall. Close up on the top of the chest of drawers to your
left. There is another piece of paper under the hat, but you won’t be able to
pick it up (perhaps a bug in the game, or just to “tease” the player).
Close up on the three drawers below and click on each to examine them, one by
one. Step out of this close up and into the one on the tilted picture on the
wall in front of you. Close up on the right of the brief case, just to
see the other items on the desk. Close up further (within this close
up) to see the different bottles full of some minerals. Step out of this close
up now and into the one on the top drawer on the right side of the desk. Click
to open this drawer and find a small tape-recorder. Click to bring the
recorder into view, and then click on the green screen directly, to start
playing it. Note: there are five messages in all, in this tape-recorder.
Listen to all of them. Press the + button to advance to the next message, and
the – button to go back and listen to an earlier message. Both of these
buttons are on the right side of the recorder. Once you have heard all the
messages, click on the blue round button, to switch off the recorder. Click on
the open hand icon outside the tape-recorder, to step out of the close
up.
Now close up on the brief case. Click in the combination
you had just figured out: 274
(on the left side) and 312
(on the right). Close up inside the brief case and examine all the
contents – the two pictures in the yellow manila envelope; the letter on top of
that envelope; a spiral notebook (the scientific report) in the center; and the
letter on the right.
Based on
all the information received in this room alone, you should have a much better
idea of what’s going on now. [Sorry, but I shall not indulge in a
“spoiler” here, in this respect.] The information in the brief case
itself gives you a list of seven items/compounds that you will need to
collect. You are done in this room now. So go back into Room Number 2, and retrieve
the cell phone, to find that it is completely charged now. Click on it, to
deposit it in the top right portion of your screen.
Go back to
the service station now, and into the kitchen. You will find many things that
you can examine. Feel free to explore. There are three things that you
must do, however, at this point. As you enter the kitchen, turn right and move
forward to the end of the room. Turn left then, and move towards that end of
the room as well. Turn right now and close up on the box of egg cups on the
counter. Click on the box, to open it and find seven such cups inside. Click
on the cups twice – first to pick one up and then to deposit all seven
of them in your inventory. Now step out of this close up and click on the
cabinet door (above the box of egg cups), to open it. Click twice on
the basket sitting in the lower shelf then, first to bring it in view and then
to deposit it in your inventory.
Close the
cabinet door, turn around and move forward along the wall to the left of
the box with the egg cups. Take only one step in this direction, however; then
turn right, and find a green radio sitting on the window sill above the sink.
Close up on the radio, click on the left knob to turn it on, and then
click repeatedly on the right knob to bring the needle to 15 and hear more from Emma Harry. It will
be a short message, but you will be able to get her complete phone number, this
time: 5852131. As she
finishes talking, turn off the radio and bring out your cell phone. Unfortunately,
however, you still can’t call her, because there is no signal.
Step out of
the kitchen now and turn left to face the cash register (on the counter in the
café’s serving area). Close up on the register, and click on the trowel in
your inventory, to see it applied on the register drawer to pry it open. You
will automatically be given a close up of the contents of that drawer, and find
some loose change as well as some bills. Click on the coins twice, first
to bring some of them into view and then to deposit them in your inventory.
Let’s see now
if we can fix that No-Signal problem in your cell phone. Step out of the
service station. Turn left, and take four steps forward, reaching the
bushes at the other end. Turn right, and take three steps
forward. Turn right again, and see the red mailbox. Close up twice,
and you will see a postcard sticking out of the slot at the top. Click on this
postcard to bring it in your view. Read it.
Step out of the close up, turn right and take four
steps forward. Turn left. Take a step forward in the direction of the white
fence in the back. You will see one lone picket in the middle, in front
of you, with two pickets missing on either side. Click on this middle picket
and it will move aside, allowing you to go through. Go in, turn right, and
take a step forward. Turn left then, and take two steps forward. Turn
right, and take a step toward a chain-linked enclosure in front of you. Close
up under the padlock, and step inside. Take a step forward, turn
around, and close up on the metal box to your right. Click on the cover, to
open it and reveal the controls inside.
Close up on
the controls, and then on the label on the inner gray cover in the lower
left portion of the box, to find that this base station operates between
830 and 865 MHz. Step out of this close up and
click on the gray cover now, to open it. As you do, a number will pop up in
the little screen at the top right corner of the box, and a line will start to
run on the larger white screen under it. The starting number is 717 (MHz)
and the objective is to turn it to some number between 830 and 865, in order to deliver the signal to
your cell phone. In the gray box you just uncovered, there are two vertical
rows of five yellow-brownish square buttons each. Each of the five
buttons on the left increases the number up in the little screen, by a predetermined
value. Thus, if you press the top left button now, it will
add 200 to the starting number of 717, making it 917.
Similarly, each of the five buttons on the right decreases the number
showing up in the little screen, again by a predetermined value. Thus,
if you press the top right button, after having pressed
the top left button, it will decrease the number by 50, turning 917
into 867. Again, if you press the button at the bottom
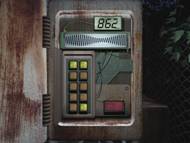
right now, it will bring up the number 862 in your little screen at the top. This number will
work, since it is within the range we sought (i.e., between 830 and 865). So,
just press the large red rectangular bar (in the lower right portion of the box)
now, and the cover of the inner gray box will close automatically, indicating
your job here is done. [Note: Feel free to experiment and try out other
combinations. Any combination will work, so long as the end result is a number
between 830 and 865. My particular solution is shown below.]
Step out of
the close up, and click on the cover of the metal box, to close it now. Then,
bring out your cell phone, from the top right portion of your screen. Click in
(i.e., dial) the number for Emma Harry: 5852131,
and then click on the black image of the phone receiver (right under the blue
screen), to put your call through. Listen and watch. As the screen goes
blank, press the image of the phone receiver (apparently the SEND and
END button) again, to disconnect the call. Click on the open hand icon outside
the phone then, to put the phone away. Based on what you have seen and heard,
you must now try to locate Emma Harry.
Step
towards the chain-link door, close up at the lower part, and then click to step
outside again. Take two steps forward. Wait for the end of the cut
scene. Then turn right, and take one step forward. Turn left, and close up on
the window to see Ben the manager inside the Office. Let’s see if he
can help us figure out where to find Emma Harry. So step out of the close up,
turn left, and take a step forward. Turn left again, and close up on the gray
trash bin in front of you. Click on the newspaper sticking out of the middle
of the bin, to get a close up of the news article. Read it. Next, close up on
the ash tray sitting on top of the trash bin.
Step out of
the close up. Take one step forward. Turn right, and take two steps
forward. Turn right again, and take a step forward. Now turn left, and click
on the lone middle picket in the fence to move it aside. Step through. Turn
right, and take two steps forward. Turn right again, and take three steps
forward. Turn right again, open the door, and then enter the lobby. Step
forward, and wait for the end of the cut scene. At the end of the scene, you
will find yourself staring at the closed window on the door. Click on the
window, to see nobody inside. Better find out what happened to Ben.
So step out
of the lobby, turn left and take three steps forward. Turn left again,
and take two steps forward. Turn left yet again, to find yourself
facing that lone fence picket. Click on it to move it aside, and step
through. Turn right, and take a step forward. Turn left then, and take two
steps forward. Step forward now, in the direction of the large new opening in
the wall where a window had been just a while before. Turn left and enter the
Office.
Turn left
and close up on the table, to find four videocassette-players stacked on top of
each other on the right and a monitor screen on the left. Click on the
players, one by one and starting from the one at the top working your way down.
Each time you click on a player, you will be directed to the screen for a short
clip of what happened, at least from Ben’s point of view. After you have
watched all four of the clips, step out of the close up and turn right. Step
forward now and turn left. Close up on the door handle, and click on the
little knob under the handle, to unlock the door. [You will now be able
to go in and out of the office through this door, without having to come
through the broken wall.] Turn right, and approach the desk in front of you.
Close up on
the desk. Click on the left desk drawer, to open it; and then, click twice on
the batteries inside – once to bring them in view, and a second time to deposit
them in your inventory. Click on the drawer again, to close it. Similarly,
open the right drawer, retrieve the blank pieces of paper from inside, and close
that drawer as well. Close up now on the black paper trays on the top left
of the desk. Pick up and read (the cover as well as inside) the brochure
called “Fruity Goodness,” from the topmost tray. Step out of this
close up then and into the one on the right, where a phone and an answering
machine are sitting. Pick up the phone, only to hear some strange noises.
Hang up and click on the answering machine, on the right of the phone, to hear
the message.
Step out of
the close up and turn right, to see a door – apparently the back door. But
let’s ignore it, for now. Instead, turn right again and close up on the center
of the room, down on the floor. Hmmm… Step out of the close up, move forward one
step, and then close up on the filing cabinet to the left. Click on the
top drawer, to open it. Click inside, to get the close up of a note. Make
note of the code for Motel Room 1: 673.
Close the drawer, and open the one under it. Click inside, to bring out a
bottle. You will have to click on the bottle twice, first to see its
side, and then to put it away. Close this drawer as well, and finally open the
one at the bottom. Again, click inside, to bring out another note in view.
Read it, and then put it away.
Well, we
couldn’t find anything in the office to help us locate Emma Harry. So let’s
strike out on our own to do so. Let us also use the door to the lobby to leave
the office, rather than that awful hole in the wall. So turn around and click
on the door, to step out into the lobby. Then, step out of the service
station. Turn left and take four steps again, to reach the bushes on
the other end. Turn left again, and take two more steps forward. Click
on the lantern in your inventory. Take six more steps, and then turn
right, to see the scarecrow. Take one step forward, and then click on the red
motorcycle that appears to the left of the scarecrow, to get over the
plank leading into the area on the other side. Close up to the right of the
motorcycle to see a pile of ashes and a dog-tag with the word “WINCEY”
on it.
Step
forward, close up on the plank jutting out from the other side, and then step
forward to find yourself at the base of a ladder. Take three steps up
this ladder, to arrive at a swamp with planks laid out for moving around in the
area. Step forward, turn right, and keep going forward until you arrive in a
clearing with a trailer in front of you. Enter the trailer.
Close up on
the floor, in front of you, to find two objects: a pet food tray with the words
“Wincey” on it, and a box for a metal detector. Click on the box, to
bring it in view. Read it, and then put it away. Turn right, and close up on
the bed. You need to assemble this contraption now.
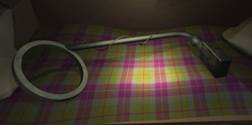
First,
click on that little rubber piece that looks like two balls attached to each
other, the one under the long silvery L-shaped bar. As you click on it, with
your thumb still pressed against the left mouse button, move that piece
to the right end of the bar. Release the mouse button, to see the piece attach
to that end of the bar. Pick up the little black piece (under the squiggly
wire) and similarly attach it to the left end of the silvery bar. Take the
squiggly wire now and place it over the length of the bar, to attach it at each
end of the bar. Take the black box with the needle-reading showing, and attach
it to the right end of the silvery bar. Finally, take the circular
piece to your right and attach it to the left end of the bar. Your
finished product should appear as follows.
Click on
this finished product, and the box with the needle reading will appear before
you. Click on the lower part of the box, to expose the battery compartment.
Click on the two batteries in your inventory, to see them placed in the box.
Click on the cover then, to replace it and put the metal detector in the top
right portion of the screen.
Turn around
now, to face the other end of the trailer. Take one step forward, turn left,
and close up on the computer. Type (on your own computer’s keyboard): Wincey. Be careful to type the first
letter in capital, and the rest in lowercase, because the password is case
sensitive. After typing the password, click on OK. [Note: Don’t even think of pressing Enter,
because it will just “mess up” and you will have to start all over
again.]
As you get
into the system, you will see two icons on the left side of the screen. Click
on and read “Personal Blog” first, using the bar at the right to
scroll through the document. Click on the X at the top-right corner of the
screen, to return to the Desktop. Now click on “Internet Browser.”
Although you will be told that you have no Internet connection, note the two
new choices at the top left of your screen. Click on “Home” first,
and then on “Enter,” to read some more from Emma Harry. Again, use
the bar at the right, to scroll through to the end of the document.
Click now on “Favorite” at the top left of the
screen. You will get a set of five choices now. Try each of them, one by one,
and explore the links within each topic, whenever possible. The top choice is
actually the same as the one you just explored under “Home.” The entries
on mountain cake (be sure to click on the picture of the cakes, once you
enter this link, to be able to read the article on the cakes) and weather
are fun. The one on e-bidding covers three topics, two of which are informational
– on the whiskey as well as on the metal detector you just assembled. [Note:
You can click on the large star, on the top left of the screen, to return to
the e-bidding menu, as you explore the three items within this
category.] Undoubtedly, the most useful entry, however, is on common-scientific-names,
providing you with information as to some of the seven “items” you
will eventually need to collect or concoct.
Step out of
the close up on the computer. Turn right now, and close up on the three
shelves filled with pots of plants. Close up on the bottom shelf, and click twice
on the plant at the extreme left, first to bring up a mushroom in view and
then to deposit it in your inventory. [Note: You will not be able to
actually see it in your inventory, because it will be in the basket
there. Please, note also that there are several kinds of mushrooms in the area
that you can pick. You can click on the book in the top right portion of your
screen to read up on the varieties that you find. Only one of the several
mushrooms you pick is actually going to be used, however, in the concoction we
will eventually make. I will point out the few “extras” that come up
along the way. Feel free to go on a “scavenger hunt” to find others,
just for the fun of finding them.]
We are done
here in the Winnebago, so step outside now. Step up on the plank now and take five
steps forward. Turn right then, and take four steps forward,
reaching the end of that plank. Turn left and take two steps
forward. Turn right now, to find the ruins before you. Click on the
metal detector, to bring it out in view. Click on it, and it will settle in
the lower right-hand corner of the screen, with the needle dial showing. Take two
steps forward, and you will “feel” as if you have just climbed
over something. Take one more step forward, approaching a large black
hole in the wall in front of you. The metal detector will start to hum, the
needle will start swinging, and a green light will start to blink on the dial’s
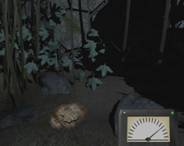
upper right-hand corner. Close up, to find three large leaves on the ground.
Click on them, to remove them; and then, click on the trowel in your inventory,
to reveal a broken piece of metal under the dirt. Click on the metal twice,
first to bring it in view and then to deposit it in the inventory. [Note:
This is the first of the three pieces of the Artifact you will eventually
need.] Click on the piece of paper that was under the Artifact piece, read it,
and then put it away.
Put away
the metal detector by clicking on it twice, first to bring it in view
and then to deposit it in your inventory. Step out of the close up and turn
around. You will see a large cross standing on the other side of the plank you
had used to come in this area. Go over to the cross and come around it,
to face its back. Close up on the base on which the cross is mounted. Click
on your trowel, to remove a cover from the back of the base, and expose the two
compartments hidden behind. Click on the red book first, and read the two
pages inside (by clicking on the right page, to flip through the pages). Click
on the metal stand-like object in the lower compartment, and deposit it in your
inventory. Click in the lower compartment again, and look at the drawing that
comes up in view.
Step out of
the close up. Take two steps towards the plank, to get back on it
again. Turn right, and take two steps forward. Turn right again, and
take four steps forward, to reach a crossway. Turn right and
take three steps forward. Turn left now and take two steps,
to find yourself back on that ladder that had originally brought you into the
swamp. Go down three steps, to return to the area where the red
motorcycle is parked. Take three steps forward, to arrive at the road.
Based on
everything that you have read, you must now know that the seven
“items” are actually seven offerings that we need to make, in
order to appease the god(s) and calm whatever evil has been stirred up by
modern man. So it is time now to collect or prepare those offerings. Let us
start by heading back to the service station. So as you reach the road, turn
left and take six steps to return to the service area.
Note:
In playing and replaying this portion, I once ran into what looked like one
huge block of something, to the left of the phone booth. I was
“invited” to place my hand on it, which proved to be my death. I was
instantly “brought back to life,” to face the same scene again. Not
to be burnt twice, of course, I immediately turned around and walked away –
only to turn right around and come back again, to find the way clear now.
These apparitions are apparently randomly generated, as are Emma’s phone calls
one of which you may or may not receive, upon your return to the
service area. So just be prepared to deal with these random occurrences as
they arise. In case you receive a call from Emma, you have to answer
before you can proceed further in the game. So just click on your cell phone,
to bring it in view, and click on the image of the phone under the screen to answer
the call. Hear what she has to say, wait to be disconnected, and then click on
the open hand icon outside the phone to put it away.
Take thirteen steps
forward. [You might be interrupted by another call from Emma. Just answer the
call, listen to what she has to say, and then put the phone away after she
hangs up.] Turn left, and take two steps. Turn left, to find yourself
facing a dark entrance. Click on the lantern in your inventory, and enter.
Turn left, and close up on the round box of biscuits. Open it, and read the entries
inside. Step out of the close up, turn right, and take two steps
forward to come in front of five differently colored candles sitting above a
pool of water. Turn left, and take one step forward. Feel free to
click on different portions of the rock in front of you, to get a close up of
each. Step out of the close up then, and turn left; turn left again, and take two
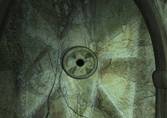
steps forward to face a peculiar dark circle, with a black hole in the center, etched
in the face of the rock. Click on the metal
stand-like object in your inventory, to bring it out; and then click on it
again, to see it applied to the opening like a key. Turn right now, and close
up on the little brown box sitting in a newly revealed opening in the rocks.
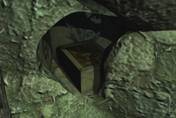
Click to
open the box, and then examine the three documents inside. Feel free to close
up on the coins, and on a large round metal object on the left. Step out of the
close up, turn right, and take one step forward. Turn right again, to
face the five differently colored candles. Close up on these candles, and then
click on the box of matches to bring them out of your inventory. Click on a
match stick, to bring it out of the box; and then, click on the side of the
matchbox, to light up the match. Click on the BLUE candle then,
to light it up. Similarly, light the BROWN candle next.
You will automatically be brought out of the close up then,
to see a kind of fog appear in the pool of water below, as a singing begins in
the background. Click on the egg cups in your inventory, to bring one out. Watch
the cut scene. Click on the cup then, to put it in the top center of
your screen. This is your Water offering.
Turn right;
then right again, and take three steps, to bring you out of the Anneka
well. Turn left, and take one step. Turn left, and click on
the lantern in your inventory, to shed some light on the tree in front of you.
There seems to be some kind of writing on it. Click on the blank pieces of
paper in your inventory, to place one on the tree. Click now on the crayon in
your inventory, to see the blue shading reveal an image of the writing on the
tree. Click on the piece of paper, to bring it in view. Read it; and then,
click on it again, to deposit it in the top right portion of the screen.
Turn right,
and take a step. Turn right again, and take one step. Turn left now, to
face a gray set of stairs. Go up two steps, and then click on your
lantern to light your way. Take two steps forward, turn right, and then
close up on the red-topped mushrooms (Amanita Saponaceum) below. Click
on these mushrooms twice, to bring one in view and then to deposit it in
your basket/inventory.
Step out of
the close up, turn right and take two steps forward. Close up on
the ground below and then take two more steps down the stairs, to bring
you on the main path again. Turn left, and take six steps
forward. Turn left again, to find a thin gray tree in front of you. Close up
on the ground, to the left of this tree, and find a clump of red
berries. Click on these berries twice, to pick up a handful and deposit
them in your basket/inventory.
Turn right,
and take two more steps, to arrive at the service station area – and
possibly receive another call from Emma Harry. Answer the phone, listen to
what she has to say, and then click on the open hand outside the phone
to put it away.
Take two
steps forward. Turn left, and take a step forward. Turn right now, to see
the back of the car out in the station. Close up twice on the pile of
dirt, on the ground to the right of the car. Click on the bottle lying to the
left of the pile. Read the label. Now click on the egg cups in your
inventory, to see one appear in view. Click on the top of the bottle, to flip
it open. Watch the cut scene. Click on the cup, to deposit it at the top
center portion of the screen. This is your FISH offering.
Step out of
the close up. Go into the service station, and enter the café. Approach the second
table to the right (the one to the right of the back door). Close up on it and
click on the Menu, to remove it. Click on the shaker in the back. It will
assume a tilted position. Click on the egg cups in your inventory. Wait for
the cut scene, and then click on the egg cup, to deposit it at the top center
portion of the screen. This is your SALT offering.
Step out of
the close up, turn left, and click on the handle bar of the back door to open
it. Step outside. Take a step forward, turn left, and take another step
forward. Click on your lantern to light the way ahead. Take twelve
steps forward. [You will see Conrad’s jeep in front of you, but that is not
where you are going this time.] Turn left and take four steps
forward, to approach a barn. Turn left and take two steps forward, to
find an empty wooden crate lying in front of you. Click on it, to pick it up.
Turn right, and click on the large blue barrel, to place the crate on it. Take
a step up, to enter and arrive in the barn.
Turn left,
and close up below to find some of the protestors’ signs. Turn right, and close
up in front of you, to see evidence of more signs in the making. Take two
steps forward, only to have the floor collapse and bring you crashing down with
it. Have no fear though – this is only the way it is supposed to happen.
Click on your lantern, to get some light. Turn left, and close up below,
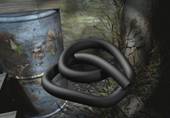
to the right of the large blue barrel, to find a piece of rubber hose.
Pick it up and deposit it in your inventory. Step out of the close up, turn
left, and close up on the wooden crate in front of you (on some kind of a wheel
barrow, between two big blue barrels). Pick up the object inside – some kind
of a blow torch – and deposit it in your inventory.
Step out of
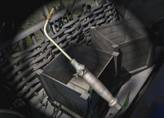
the close up, turn left twice now, and close up on the gas cylinder.
Click on the piece of rubber hose in your inventory, to see it attach itself to
the top hole in the cylinder. Click on the blow torch now, to see it attach
itself to the far end of the rubber hose, leaning over the padlock on the door.
Turn on the gas now, by clicking on the cylinder’s valve in the center (just
above the spot where the first end of the rubber hose had attached). You will
hear the sound of gas coming out. Click on the box of matches, to bring it
out. Click on a match stick, and then on the side of the matchbox, to light up
the match. Click on the far end of the blow torch now (the one right above the
padlock). Wait for the cut scene, as the padlock is thus heated and falls off.
You will be
brought out of the close up automatically. You can click on the door any time
now, to open it and step outside. Before we do that, however, we need to do
some more exploring in the barn. So get up on the gray ladder, to the right
of the door you just “unlocked,” and go up three steps, to
arrive on the other side of the floor that had collapsed. Step out of
the close up then, to actually get off the ladder. Turn left, and close up on
the desk in front of you. Feel free to examine one of the “Stop the
Dig” flyers, as well as the pictures in the camera lying in a pot in the
back. [Note: In order to do so, close up on the pot behind the flyers.
Click on the camera twice then, once to bring it up in view and then to
turn it around. Press the little round button in the top center, to
turn on the viewer screen on your left; and then, use the < and >
buttons, on the right side, to go back and forth among the pictures.]
Step out of
this close up, and into the one on the left side of the desk, to see the
protestors’ supply of food. Step out of this close up also, turn left, and
close up first on the right window sill. Click on the yellow-brownish
journal, lying on the right side of the sill, to bring it in view. Read it,
flipping through the pages by clicking on the right pages successively. Step
out of this close up and into the one on the left window sill now.
Click on the acorns lying there, to bring one in view; and then, click on this
acorn, to deposit it in your basket/inventory.
Step out of
the close up, turn right twice, and then close up below to see the
ladder. Go down the ladder, to arrive before the door you had
“unlocked” earlier. Click on this door now, to open it, and then
step outside.
Turn right,
and take five steps, to arrive back next to the jeep. Turn right again,
and take twelve steps, to return to the service station area. Take two
more steps forward, turn right, and take four steps more. Turn
right now, to find yourself facing the door to the Lobby inside. Enter. Go in
Ben’s office now, and use the back door to step out in the yard.
Turn right,
step forward, and then turn around. Close up on the slot machine in front of
you. Click on the gold coins in your inventory. Pull the handle. You may
well hit the jackpot on the very first try. If not, keep trying until you do.
You will not have to put any more coins to do so. When you do hit the jackpot,
collect the silver coins from the slot below.
Step out of
the close up now, step forward and turn right. Step forward, turn right, and
take another step forward. Turn right, and close up below. Click on the
Halogen lens, to pick it up; and then, click on it, to deposit it in your
inventory. Step out of the close up, and turn left twice. Step
forward, and click on the ladder, to pick it up. Turn left, and click on the
open hand icon in front of you, to place the ladder against the eaves of the
building on that side. Step on the ladder and go all the way up. Turn left, and
take two steps forward. Turn right then, to find a shorter ladder in
front of you. Go up this ladder as well, to find a latched cover on the roof.
Close up on the cover, click on the latch to open it, and then step inside.
Apparently,
you will crash down to the floor below. Turn right, and click on the doorknob,
to open the door. Enter. Close up on the calendar in front of you. Step out
of the close up, turn left, and feel free to close up on the map on the wall.
Step out of this close up and into the one on the desk. Feel free again to
close up on the chess board, and fiddle with the black knight lying down.
After you are done with all this, close up now on the red oil can, sitting in
the back of the desk and under the map on the wall. Click on this can, to see it
rise and hold its position up in the air. Click now on the egg cups in your
inventory, and then on the little lever right above the oil can’s
handle. Watch the cut scene. Then, click on the egg cup, to place it in the
top center of your screen. This is your OIL offering.
Step out of
the close up, turn left, and step outside the door. Turn right, close up on
the ladder, and then go all the way down. [Note: your descent will be
interrupted by a brief cut scene, just before your last step down.] You will
find yourself in some kind of a gloomy garage. [Note: Feel free to
explore and examine the papers and objects in this area. The following
directions for leaving the room, however, are based on the assumption that you
have just come off the ladder.] Turn right twice and, with the ladder
at your back now, take two steps forward. Turn right. Close up
on the latch above the doorknob, and click on it to unlatch the door. Click on
the door then, to open it. Step outside, to find yourself back in the yard.
Turn right,
take two steps forward, and then step through the door to return to
Ben’s office. Step outside the service station now, through the Lobby, and go
to the Motel across the street. Approach Room Number 1, close up on the code
panel and click in 673
(the code you had gotten earlier from the filing cabinet in Ben’s office).
Step inside, and take a step forward. Turn around now, to see the
entrance door across the room, to your right, and just a small portion of an
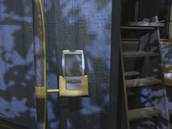
inner wall sticking out in your view, from the left. There is a charger
attached to the right of this dividing wall in the middle of the room. Close
up on this charger, and find a GPS unit placed in it. (See the picture on the
next page.) Click on the GPS unit, to bring it in view; and then click on it
again, to deposit it in the top right portion of your screen.
Step out of
the close up, and then out of the room. Turn right, step forward, and
then turn right again. Take another step forward, and close up on the
vending machine in front of you. Click on the silver coins in your
inventory, to put one in the machine’s coin slot. Counting left to right,
click on the second round button on the machine, and collect a can of
Pear juice from the opening to the left of the coin slot. Similarly, put
another silver coin in the slot, press the third round button, and
collect a can of Gooseberry juice. Finally, put another silver coin in the
machine, press the fourth button, and collect a can of Blackberry juice.
Return to
the service station now, and go into the Kitchen. Step forward, and turn
right. Click on the basket in your inventory, to see it placed to the left of
the cutting board, as you are automatically brought into a close up on this cutting
board.
Click on the red-topped mushroom (Amanita
Saponaceum), and then on the mortar to your right, to place the mushroom in
the mortar. Similarly, place the acorn and the red berries in the mortar as
well. Now click on the pestle, lying under the mortar, and it will grind the mortar
contents for you. Notice the white light in the mortar, indicating that you
have all the necessary ingredients. Click on the egg cups in your inventory,
and watch the cut scene. You will be automatically brought out of the close
up, as the egg cup remains suspended in the air before you. Click on it, to
put it in the top center portion of the screen. You now have what we will call
the PLANT offering.
Turn right,
step forward, and turn left. Take another step forward, turn right, and close
up on the blender. Click on the blender, to open its lid; and then, click on
the can of Pear in your inventory, to see the juice poured into the blender.
Similarly, pour a helping of Gooseberry juice into the blender as well. Finally,
click twice, one after another, on the Blackberry can, to pour two
helpings of its juice into the blender. [Note: This is in accordance
with the scientific report found in Conrad’s brief case – that there was
evidence of twice as much blackberry as that of the pear and the gooseberry, in
this offering.] See the white light forming in the blender, indicating that
you have the correct ingredients as well as the right amount of each. Click on
the egg cups in your inventory, and watch the cut scene. Click on the egg cup
in the air, to deposit it in the top center portion of the screen, as you are
automatically brought out of the close up. We will call this the FRUIT
offering.
Go back
into the Lobby now, and step outside the service station. Click on the GPS
unit, in the top right portion of the screen, to bring it out in view. Click
on the “Activate” button on it, to see it settle in the lower left
portion of your view. Take one step forward then, turn left, and close
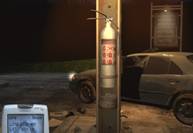
up on the Fire Extinguisher on the pillar. [Note: the GPS delivers a
clear reading, and this is the only place where it does so, according to Conrad
as well.] Click on the Fire Extinguisher now, to see it raised high enough to
reveal a metal piece (the second piece of the Artifact) below. Click on
the Artifact piece, to deposit it in your inventory.
Step out of
the close up now. Click on the GPS unit, to bring it out in view again. Click
on the button that now says “Deactivate,” to put the unit back in the
top right portion of your screen. We now have six of the seven offerings we
needed, as well as two of the three pieces of the Artifact.
Turn right,
step forward, and turn right again. Step forward, turn left, and take three
steps forward. Click on the lantern in your inventory, to light your way
ahead. You will see the protestors’ “Stop the Dig” sign in front of
you. Close up below, and click on a flyer on the ground, to pick it up. Read
it, put it away, and then step out of the close up. Turn right now, and take two
steps forward. Look up and you will see a wooden post indicating that you
can go either left or right. Turn right, and step forward, to find
yourself in a clearing with three large blue stones lining the way on your
left. Take a step forward, and you will see that there is actually a set of four
such blue stones lining the path to your left.
Take one
step forward, turn left, and close up on the blue stone now in front of
you. Click on the piece of paper, and then on the blue crayon, in your inventory.
Pick up the piece of paper, and you will see that the shading has revealed
something of a bare sketch. Click on the paper, and it will now go to the top
right portion of the screen. Step out of the close up, turn right, step
forward, and turn left. Close up on the second blue stone now, click on the
paper that had just been placed in the top right portion of the screen, and
then click on the crayon in your inventory. Pick up the paper, to see that
more details have been added to the image taken from the first stone. Click on
the paper to replace it in the top right portion of the screen. Again, step
out of the close up, turn right, take a step forward, and turn left again.
Repeat the above procedure with the third stone. Step out of the close up
again, approach the last stone, and repeat the procedure, to find that the
drawing is now complete. Look at it, and then click on it, to put it back in
the top right portion of the screen.
Step out of
the close up, turn right, and take six steps forward. Turn right and
enter the tent. Click on the newspaper (right behind the dirt from the fallen
pot) on the make-shift table. Read about the Dig Controversy (as well as about
the cakes, if you like), and then put the paper away. Click on the metal detector
in the top right portion of the screen, to bring it out in view. Click on it
again, to see it settle down in the lower right portion of your view.
Turn left now, step forward, and close up on the metal swing-like object to
your left. The detector will start squealing, and the needle start swinging,
as the green light will come on – all indicating the presence of some piece of
metal, of course. Close up down on the pile of dirt, to the left
of the metal swing. Click on the trowel in your inventory, to remove some of the
dirt and reveal a metal container. Click on the container, and then on the egg
cups. Watch the cut scene. Click on the egg cup, to deposit it in the top
center of the screen. You now have the BARLEY offering.
Click on
the metal detector, to bring it in view; and then, click on it again, to put it
back in the top right portion of the screen. You now have all the seven
offerings you need, so it is time now to head for the place where these
offerings will be made. So, step out of the close up, and take four
steps forward, to arrive at the Dig Site. Turn right, and close up on the
board, to read all about the Barrow Hill Circle. Step out of the close up
then, turn left, and take two steps forward. Turn left, and step forward,
to what appears to be the first of the stones. Notice the dark brown
tree stump between this stone and the one to its right. As you approach the
stone, you will find yourself facing the brown stump to your extreme left.
Turn left, to face the stone itself.
NOTE:
There are seven stones in this Circle, and there are seven egg cups containing
the necessary offerings up in the top center portion of your screen. Each
stone will “accept” only a certain offering. The problem is that it is
rather hard to distinguish between the stones. What’s worse is that it is
equally hard to distinguish the contents of the various egg cups, especially since
(unlike in many other games) you can’t hold your cursor over an inventory item
to get its description. So I strongly advise you to SAVE your game before
making any offering, because if you click on the wrong choice, that
offering would be lost and you would have to go back and make/collect another
one of the same kind. So, be sure to save your game before making each
offering.
APPROACHING THE STONES: You are already facing the first stone. Click on the egg cup
containing the appropriate offering, as described below. Watch the cut scene
that ends with a beam of light emanating from the stone, indicating the acceptance
of the offering. Turn right then, step forward, and turn left to face the next
stone.
THE
ORDER OF THE OFFERINGS:
Counting
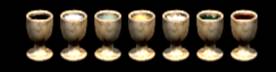
the egg cups from left to right in your inventory, the offerings are:
1.
OIL. 2. FISH. 3. WATER. 4. BARLEY. 5. SALT. 6. PLANT. 7. FRUIT.
Following is the appropriate
offering for each of the seven stones.
FIRST STONE:
Click on the second egg
cup, with the FISH offering.
SECOND STONE: Click
on the first egg cup, with
the OIL offering.
THIRD STONE:
Click on the on the sixth
egg cup, with the PLANT offering.
FOURTH STONE: Click
on the fourth egg cup,
with the BARLEY offering.
FIFTH STONE:
Click on the third egg
cup, with the WATER offering.
SIXTH
STONE: Click on the seventh
egg cup, with the FRUIT offering.
SEVENTH
STONE: Click on the fifth egg cup, with the SALT
offering.
Turn right now, and take a step
forward to the left of the first stone. Take another step forward, to
see the white sign (on the Barrow Hill Circle) to your left, and get a call
from Emma Harry. Listen to what she has to say, and then put the phone away (by
clicking on the open hand icon appearing outside the phone). Take two
steps forward, to find the third piece of the Artifact placed on a note on the
ground in front of you. Close up on the two items, and click on them, to pick
up both at once. Read the note first. Then, click on the two items. The note
will disappear altogether, while the third piece of the Artifact will be added
to the two pieces already in your inventory.
Step out of the close up. Take
two steps forward, and then turn right. Take eight steps
forward, going down in some kind of a hollow. Note the two large stones on
either side of you in your front, and the Altar Stone immediately to your
left. Close up on the Altar Stone, to find a piece of paper to its left on the
ground. Pick up the paper, read it, and then put it away. Step out of the
close up.
Step forward, turn right twice,
and then close up on the three pieces of paper you see on the ground. You will
be able to pick up only the one closest to you, however. Read it, and then put
it away. Step out of the close up, and turn left twice. Step forward,
to find another one of those invisible barriers in front of you. Turn left,
step forward, and then turn left twice. Close up on the Altar Stone,
and then on the large white spot on it. Click on the three pieces of
Artifact, one by one, in your inventory, to see them neatly arranged on the
white spot for you. Step out of the close up.
Turn left, and close up on the
ground to the left of the large stone in front of you. Pick up yet
another piece of paper, read it, and then put it away. Step out of this close
up now, and into the one at the top of the large stone. Close up
further on the hollow spot at the top of the stone, and click on the
Halogen lens in your inventory, to see it placed perfectly in that hollow spot.
Step out of this close up, turn
right, and take a step forward. Turn left now, and close up on
the large stone in front of you. Click on the white image of a hand on the
stone. Watch the cut scene, by the end of which you will be back at the Altar
Stone with the three pieces of Artifact now joined together in a perfect whole.
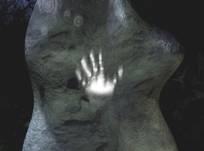
Pick up the
Artifact, step out of the close up, and take a step forward. Turn right
now, and take nine steps forward, to find yourself back by the tent.
Turn left then, and take six steps, to return to the Stone Circle. Turn
right now, and take three steps. Turn left then, and
close up on the open trench in the center of the Stone Circle. Click on the
trowel in your inventory, to see some of the dirt removed to reveal the image
of the Artifact underneath.
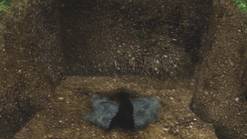
Note: You could have approached the trench, right after getting the
third piece of the Artifact from Emma, and dug up this same image of the
Artifact in the ground. In that case, you would have been “allowed”
to place those three pieces directly onto this image. But the following
cut scene would have struck you as peculiar. The game credits would still be
the same, leading at least some unsuspecting gamers to think that they have successfully
completed the game. Not so, of course, because we would have left out that
whole business of the lens, the Altar Stone, as well as the “mending”
of the Artifact.
The Correct Ending: As the image of the Artifact appears, a very short cut scene will
follow, indicating the breaking of the ground and your falling below. You will
find yourself inside some kind of a tomb. Feel free to explore and find
all seven of the egg cups, each in a separate chamber of sorts. You may even close
up and click on each or any one of them, to see a replay of the cut scene that
had initially followed when you had placed that cup on the appropriate stone.
After you are done exploring, return to the point where you had landed after
the ground had broken. And if you never leave the spot after landing, just
turn right and you will see a large circular slab in front of you.
Close up on it twice, and then click on the Artifact in your inventory,
to see it neatly set in its place.
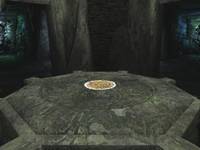
Sit back then,
and enjoy the correct ending of the game.
* * * * * * * * * * * * * * * * * * * * * * * *
* * * * * * * * * * * * * * * * * * * * *