Just Adventure original
Art of Murder: Cards of Destiny
And Turner? “Bald, quite tall … an intriguing look, but calm … Fortyish. Intelligent.”
Funny. Of the people we’ve met, that sounds most like the expert Emmerich, who surfaced out of nowhere in the wake of the railway-crossing murder (and whose promised report still hasn’t surfaced).
What’s next? Your first instinct may be to turn on the lights. Blake dropped into the exchange a request for his notebook from the cabin kitchen. (Oddly enough, the notebook never does surface.) Nicole can poke her head in the door for a glimpse of a shadowy interior and decide it’s too dark to proceed inside. It’ll turn out that the kerosene lamp was extinguished during the tussle. A search for light sources will send you poking around the better-lighted left side of the cabin. Zoom in on the big battery here and you’ll see the power’s been cut: You’ll need to replace a section of the red cable.
You can take a couple of items here — the deck chair and then the boat hook — but to no clear purpose at this time. And in fact you can’t yet take the stretch of copper wire (which we’ll get to in a moment) that will be needed to turn on the juice. Huh! The chair and six-foot boat hook won’t get in your way, but a short bit of coil-able wire apparently will.
So how do you kick things along? Simple: Descend the stairs and head left. The view pulls back and Nicole gets on her cell — first to Parry to have him check out Blake and then to a rather zombie-like Ruth to establish whether the real-estate outfit exists and a Turner works for them.
Move back toward the stairs for a text message: No Prescott et al. doing business in Louisiana. This is followed by a call from Parry: Blake seems legit … and he didn’t lie about talking to the sheriff. He’s beginning to look like another prospective victim and his appointment a trap. A trap that may soon be sprung: An abandoned rental car from New Orleans has been found and it’s not Blake’s.
Talk to Blake. He yaps up a storm and, once uncuffed, supplies details about the scam used to ensnare him. Nicole then proposes (via “Cabin”) hiding in the cabin until Parry arrives.
And now, finally, you can turn on the juice.
We’ve already established the power source — the battery on the left side of the cabin — and the required repair. The copper wire you’ll need is wound around one of the yellow pier footings — the one just across from the airboat’s engine. Take it, left-click on it in inventory to untangle it and create a loop at one end and jet back to the battery. In the closeup view, use the wire on the left electrode to complete the connection and a piece of the sheriff’s tape (snipped off with the scissors as during the boat repairs) on the cable end. Let there be light. Return to the front of the cabin. Nicole automatically talks with Blake about making tea and lighting a fire in the stove and the two step inside.
OK, the fire. The basics are pretty obvious. The old calendar on the side of the fridge in the corner would make good kindling. The tea’s in the left side of cabinet on the right side of the kitchenette. Two tin mugs are on the counter below. The tea kettle’s atop the stove at the right.
What about wood, water and fire? For the first two, you’ll have to go back outside.
When you do (the door is offscreen to the right), you’ll get a call from Parry. They’re bogged down in the mud and Nicole may have to spend the night. And he’s learned that Aaron Morton is the owner of the land and the steamer. He’s already held forth to Nicole on his fantastic plans for the steamer and this just emphasizes that the sale is that much more likely to be a scam.
Wood: You may have spotted an axe around the right side of the house back when the lights were out. Make your way around there now, take the axe behind the stump and use it on the crate atop the stump. There’s your wood. Take it. Back inside, open the stove door and place wood and calendar within.
Fire: Back out of the scene, talk to Blake about “Lighter” and he’ll produce one. Use it on the stove interior and, in no time a blaze is burning merrily.
Water: You’ve seen potable water — that plastic bottle to the right of the battery. Use the kettle on it and then on the stove in closeup.
Um, is this going to boil any time soon? Yes. But, as you’d expect, you’ll have to pull a couple more rabbits out of the hat first. Place the mugs on the stove — huh! I wouldn’t want to pick those up barehanded — and use the tea on each. Then talk to Blake. He blathers on about his amazon/wanderer story for a while and the talk eventually turns to tea — at which point Nicole’s cell phone rings.
Or seems to ring. When Nicole steps outside to take the text message, she realizes it wasn’t her cell. (She does not follow up on this mystery, but this appears to have been a text message from “Turner” to Blake.) When she returns indoors, Blake says the tea is ready. Take the remaining mug from the stove. Nicole immediately begins to feel odd, wanders outside and collapses. When she comes around, she’ll automatically return inside and discover Blake has vanished.
Odds & ends: So Blake sabotaged Nicole? With what? A guy looking for an uncomplicated life in the bayou brings knockout drops with him?
It’s a fair guess that Nicole was knocked out by some prearrangement with (and with drugs provided by) “Turner” and that the signal was the text message. But wouldn’t it have dawned on Blake that this was unconventional behavior for a real-estate agent? Either way, it’s a weak transition.
The Swamp
Step outside again and descend the stairs. Nicole notices that the drawbridge on the right side of the screen is in a lower position that it was earlier and finds (rather too conveniently) Blake’s cell phone on the near side. Two hours earlier, he received an odd text message from “Turner” asking Blake to meet him at the steamboat in an hour. (You can see the steamboat in the background — now all lighted-up.) She alerts Parry, who says he’ll assemble a “special unit.”
Lowering the drawbridge the rest of the way is easy. If you haven’t done so already, grab the deck chair (which doesn’t come into play yet) and then the boat hook on the left side of the porch and use the latter on the bridge.
On the far side, meet the mother of all alligators. Play chicken with it. Left-click on the one Aaron gave you in inventory to remove it from the packaging and then use the chicken on “Wally.” Sated, it backs off and the path is clear.
Paths, actually. In the darkness at the top of the screen, the trail forks. The left one would be a more direct route to the steamboat, but the bridges are broken. And the right one’s not much better. The bridge beyond have also fallen into the drink, but the support posts remain in place and Nicole suggests she could jump between them if she had some light. Drop back one screen and she suggests a refueled kerosene lamp. That’s on the desk back at the cabin.
But how to refuel it? Ah. Remember the post where we found the copper wire? Well, just to the left is a pool of water with a petroleum slick on the surface. You can cobble together a little homemade refinery to separate the fuel from the water.
Start by collecting some of the raw material: Use the bucket at the right side of the cabin on the pool. Nicole here says the “dark gunk” you’ve collected needs to be purified and heated before it can serve as fuel. The “purified” may ring a bell with you. Aaron used the same word if you asked him about a copper coil retrieved from the bag at the sheriff’s office. Sure enough, that’s a key piece of equipment.
So what is to be the foundation for this refinery? Ultimately, the tea kettle — now fixed in place over the location’s one heat source — but the process actually starts with the big funnel from the airboat toolbox.
And not the funnel alone. You need a strainer to remove the “gunk” element from this brew. The canvas on the deck chair at the left side of the cabin would serve well in this role and, sure enough, when you left-click on the chair in inventory, you’ll be left with just the canvas. Use it on the funnel and then use the scissors on the funnel + canvas to trim the canvas back. (Remember: You’ll be heating this stuff, and it wouldn’t do for the strainer to catch fire.)
Now return to the cabin, install the funnel + trimmed-back canvas atop the tea kettle and fill the funnel (not the kettle proper) with your bucket of undistilled petrol. Nicole then says the fuel will be steamed off as the liquid heats. In other words, you have to capture the steam, turn it back into liquid and provide a receptacle for the fuel.
The copper tube you liberated from the sheriff’s office will serve admirably as a condenser. Just use it on the kettle’s spout. Blake’s left-behind teacup (still on the stove) will do for a container. Just pick it up and replace it on the stove.
And now you just have to seal the container to prevent the loss of steam. Use a piece of tape on the spout and then remove the funnel to replace the lid. The teacup rapidly fills with “crudely purified petroleum.” Use the teacup and then the lighter on the lamp and you have the light source for your swamp crossing.
Return to the right-hand path and you’ll discover one last logistical issue. Where do you put the lamp? For it to be of use in your crossing, it can’t just sit on the near landing. You’ll need to float it somehow. And not just float: You’ll need to elevate the lamp somehow so it illuminates a wider area.
The solution to both these issues is found at the right side of the cabin. Take the basin up against the cabin wall and the can to the right. Then place the basin in the water on the right side of the bridge abutment, then the can on the basin and finally the lamp on the can. Cut-scene of the lamp floating off into the swamp.
And now for the jumping portion of our program. Nicole must leap from post to post to reach the other side. This has some risks. Certain posts — one in this first sequence and perhaps a half-dozen in the second — will come apart when she lands, dumping her into the drink and leaving her to the tender mercies of Wally the Alligator.
Moreover, a clock is running here. When Nicole lands on a post, it immediately starts to descend slowly into the muck and mire until Nicole’s feet are immersed in the water — at which time she’s killed by Wally or one of his brothers. So you’ll need to act quickly and know in advance where you’re going.
Beginning with the post closest to the bridge abutment (the right is too far), you’ll want to jump:
1) atop the first three left-hand posts …
2) … and then switch over to the right one to avoid the collapsing fourth post on the left.
3) This seems to be a dead-end, but Nicole’s landing somehow resurrects a previously-sunken right-hand post. Jump on this one and the one above it.
4) Switch back to the left for the final two posts and the leap to the far abutment.
On the far side, grab the long stick and use it on the floating lamp and haul it back to land and into your inventory as an intact unit. Move off the top of the screen and deposit the lamp platform in the water on the far side.
A more complicated scenario here. The path is more circuitous, you don’t see your destination plainly until you’re past the halfway point and you can now manipulate your environment.
1) As in the first section, you have only one choice at the start. Hop onto the nearest post. Mercifully, it does not sink.
2) However, the second post is rotten and will collapse on contact. There’s a way to prevent this. From your position on the first post, use the long stick to redirect the plank connected to the third post. It pivots to create a bridge and Nicole can simply walk down the plank to the third post.
3) The distance prohibits another leap forward, so hop onto the post to the left and then onto each of the additional two posts that appear out of the muck as you progress. Then jump downscreen onto the middle of the three posts linked by a cross-bar. A stable platform and good place to save your game.
4) Hop two posts to the right. (The post to the left collapses on contact.)
5) From here, you have a variety of possible routes — all but one ending in collapsing posts. Drop down one post and you’ll find submerged posts rising down and to the left. Nicole says she doesn’t know which way to go. Try two posts left and one down.
6) Here, at the edge of the screen, the scene and perspective change. This doesn’t change the overall orientation of the sequence — you’re still headed downscreen and to the right — but it occasionally still throws me off and sends me hopping in the wrong direction. Just be aware of this and don’t get turned around.
You can now see your destination in the lower-right corner of the screen. The post-hopping from here is pretty much pro forma: two down, one left and one down.
7) This places you between the lamp below and to the left and an odd double post above and to the right. You can’t go forward from here. The next post barely appears above water level and a jump here (supposing Nicole were allowed to jump) would presumably result in our girl’s going straight into the water.
However, you can move things around to create a higher platform. Take the lantern and place it on the smaller of the posts to the right and then collect the can and the basin. Use the basin on the little post, then the can, and hop across this makeshift post to terra firma.
Steamer
Finally, the steamboat. You’ll see the paddlewheel turning. Clearly worth investigating. Cross the gangplank. The ruined deck prevents you have heading aft here, so climb the stairs at the front of the craft to reach the middle deck and then the stairs at the right to reach the upper one. Finally, climb the stairs at the middle of the screen to reach the top deck and make your way right to the stern. You’ll find Blake tied to the paddlewheel. Dead, alive? No telling. But either way you have to stop the wheel.
Nicole suggests the bridge might hold the answer. That’s the lighted cabin on the top deck. It’s locked (though this isn’t expressly stated) and you’ll have to break in. Use the clapper from the broken bell at the stern to smash the glass.
Within, you’ll find the captain’s hat hanging off the right side of the throttle (partly hidden by Nicole). Take it to collect a King of Hearts and operate the throttle itself to turn off the engine. Make your way back to the stern. Still no sense of whether Blake survived his ordeal, and the focus now shifts in a new direction: The cops have found a journalist in the area. Does that ring a bell?
October 23
FBI Field Office
The interview room again. The reporter is Jack Rowling — the fellow who was hanging out in the bar near the railroad crossing on Oct. 19 and (you’ll learn shortly) also at the power plant the next day. (It turns out it was Rowling that Nicole spotted fleeing the plant.)
Too much of a coincidence. He must be in touch with the killer in some continuing fashion. So it seems. At length, Rowling admits he learned about the bar from an email sent from a fake address only to talk to the wrong woman — Patti instead of Nicole — and got bored. He learned about the power plant from a phone call.
But here the interview eventually bogs down. Rowling’s willing to share data from his cell phone about that one power plant-related call but won’t consent to a fishing expedition in his contacts file. And he doesn’t want to have his fingerprints taken at all.
When Nicole leaves the room to get Rowling a soda, she gets a call from Wang: He’s finally lifted the difficult fingerprint off the chip used to shut down the car at the railroad crossing. It’s already on the computer. But you’re going to need something match it against, right?
This will quickly prove a dead end, evidence-wise, but you have to follow through in any case to tie up this loose end and make progress in the game. And there’s a sneaky way to acquire a set of Rowling’s prints. You’re standing right next to a soda machine, so left-click on it to collect a “City Cola” for the reporter. You can deliver this straightaway and then innocently reclaim the can for “recycling” — with its intact set of prints. (If you talk to Parry outside the interview room, you’ll get a nudge in this direction.) Then deliver the can to Wang.
You’ll immediately get a call from Ruth that Nicole’s father has been trying to reach her. Step outside the room and she’ll call him back automatically. (Man, this has to be one of the least interactive adventures I’ve played.) Turns out her Mom is in the hospital in a diabetic coma. Nicole promises to visit the next day.
Odds & ends: She never does on our watch. And why bother to include this stuff if you’re not going to do anything with it?
And what about Louisiana? It doesn’t come up at all in the interview with Rowling.
Reenter the lab and talk to Wang about “Fingerprints” and “Database access” and you’ll be able to use his computer. Before you log in, Nicole suggests a comparison of the partial fingerprint from the car with one from the can. Just load the two images as you would evidence scans and then drag the partial print atop the full one. The orientation of the partial (it can be rotated like the seed pieces) doesn’t matter: They don’t match.
But you’re not done. The key action here is to run a search on the partial print.
This is interesting. “UAFD07 database: Access denied.”
Talk to Wang and, provided you’ve already run the comparison with Rowling’s prints, he’ll suggest you talk to your boss for access to the military database. Do so (checking with Ruth first) and access kicks in immediately. Run the search on the partial again and you’ll now come up with 10 matches. Compare the partial to the left print in the second row — both have a distinctive “u” shape” at the bottom of the central whorl — and you’ve got a match: a Paul Reed from Norwitch, ME. (Note that while you could drop the partial print anywhere in the prior matching attempt, for this one you have to drop it atop the matching section.)
Leave the lab to find the boss outside. Talk to him to learn Reed was a scientist working on a top-secret military project called “Queen of Hearts”; that the late writer Blake was a juror in Benson’s murder trial under his given name (which will turn out to be Barrymore) rather than his pen one; and that most people involved with that case are accounted for, but you’re to see Ruth about the judge who presided over that trial.
After the chat, Nicole automatically enters Ruth’s office. You’ll learn that Judge Wolsey from Maine is missing. “Left and didn’t reach his destination. The police are looking for him.”
It’s weird. Ruth offers details, but doesn’t provide them. Perhaps because there are none to provide? Believe it or not, the whole Wolsey bit is a red herring as well. He’ll turn out to be long dead. This is what happens when you send a secretary to do an agent’s job.
One last step: Visit Nicole’s office and talk to Parry about “Fingerprints” to pass along what you’ve learned and get a reminder that the killer asked Nicole to call him “Paul.” When Parry learns that Nicole intends to go to Maine with or without him, he agrees to come along.
October 24
Norwitch, ME
Reed’s not home. Nicole and Parry work out that she’ll hold down the fort here while Parry ventures into town in search of a warrant.
One odd thing: Before he heads out, Parry gets a phone call. He says something about a lens and quickly rings off. When Nicole asks about the call, he says it’s unimportant.
Nicole refuses to approach the house without the warrant, but seem deaf to Parry’s warning that the barn’s no different. A second-story window on the right side is ajar. If you could push the nearby conveyor belt over to the window, you’d be able to look inside.
But wouldn’t you know? The left wheel on this apparatus is stuck in a hole. You need to melt the ice holding it in place and then find a way to raise the wheel.
The ice is easy. Left of the barn entrance is an old stove. In the right-hand side of the oven is a bag of road salt and a bar of soap. Take both, use the salt on the ice and it’s gone just like that.
Now to raise the wheel. Don’t focus on the wheel itself but the metal framework (“bottom structure”) to the right. The key item is the mattress slung over the fence to the left of the mailbox at the starting location. Examine it in inventory to learn that’s “mattress” as in “air mattress.”. Place this on the grassy spot (”hard ground”) within the metal frame to the right of the wheel.
You’ll eventually pump it up by using the pump atop the stove, but hold off on that for the moment. (If you’ve already pumped it up, let the air out again by left-clicking on the valve in the mattress’s lower right corner.) You’ll need to first place a hard surface atop the mattress and under the “bottom structure” so the inflating mattress will lever the wheel out of the hole — and an ideal candidate is the board to the left of the stuck wheel. With this board in position atop the mattress, use the pump on the mattress valve and the wheel rises from the rut.
But, alas, the conveyor does not slide down the board and a nudge elicits the intelligence that there’s too much friction. You’ll need to grease the board with the soap and then give the conveyor a little push. It rolls up against the barn and you’ll be able to peer through the open window into Reed’s workshop.
From the top of the belt, Nicole see a load of evidence that would seem to satisfy the “probable cause” required for a warrant — notably, what appears to be a laser junction box like the ones from the power plant, But she’ll have to move in for a closeup of the worktable to trigger the (optional) cut-scene memories linked to four components: left clicks on either of the projector elements (at the top and left), either of the laser casings (at the left and under the table), the box at the right and the circuit wafer at bottom-center.
However, you can’t take anything. The only required action is sorting out a small puzzle to summon the elevator to the barn’s top floor. To start, just left-click on the panel to the right of the elevator door. It’s very much in the manner of IQ tests and. most of the time, beyond easy. The three images to the left represent a sequence. You’ll have to use the dial at the right to select the appropriate fourth image in the sequence. Most of the puzzles are simple rotations while two offer slightly more complex changes:
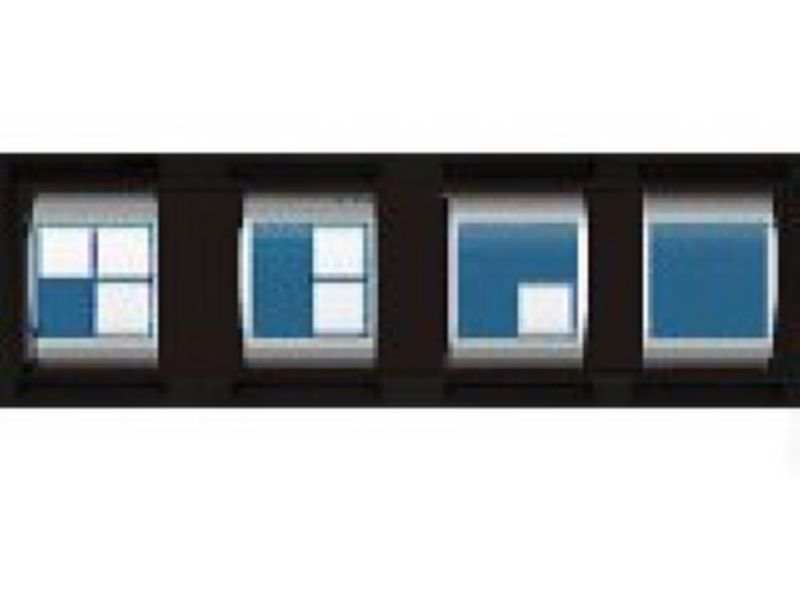
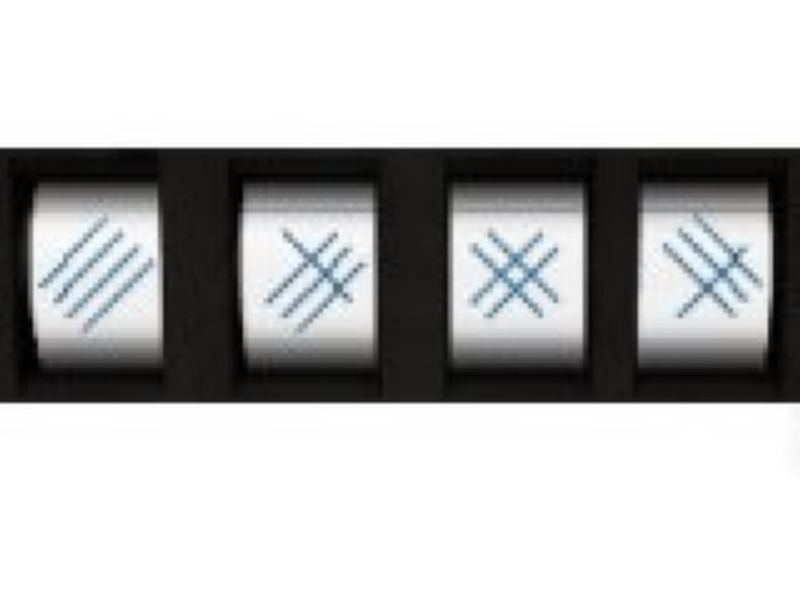
After each round, press the oblong button below. A green light indicates you’ve chosen correctly and three greens opens the elevator door. (“Is the Card Man waiting for me upstairs?” asks Nicole.) A wrong answer at any point resets the puzzle and you’ll have to start over.
No one’s here. Just more gear. You can inspect the diagrams on both walls. (These include plans for a device you haven’t seen yet “A fan?” asks Nicole. “A propeller?” This turns up in the endgame.) But the only thing you have to do is hop back on the elevator by exiting off the bottom of the screen.
And here you’ll meet Reed and his shotgun-toting sister Fan. Over a long and occasionally bewildering conversation, it’ll develop that Reed is the killer’s well-paid outside contractor — building equipment required for the Card Man’s dark schemes without foreknowledge of how it would be used. (Whether Reed had suspicions, or should have had suspicions, isn’t explored.)
Reed doesn’t provide any direct evidence in this interview. He never met his employer — everything has handled through the mail — and payments for the eight or nine jobs always came from a different city.
The conversation eventually turns to the accident that put him in a wheelchair — a result of Reed’s participation in a banned experiment related to the secret “Queen of Hearts” project — and here it quickly yields four interesting bits of info.
1) Reed’s pal Peter Douglas was imprisoned for five years over the mishap.
2) Parry, who passed the brother and sister on his way into town, looks like someone who once worked for the local police.
3) Around that time, a wife-beating womanizer named Derek Finney was strangled in the church tower by a rope tightened by the clock mechanism.
4) Finney’s wife has since moved away, but her pastor father remains in Norwitch.
When the chat ends, you’ll find Nicole outside the barn. Move her toward the car. She’ll call Parry with an update. He’s getting a bite to eat. Nicole’s going to talk to the pastor.
The Church
Enter the church gate. You’ll find Pastor Simon outside. Nicole talks to him automatically — “automatic” is very big in this game — and gets three useful nuggets. Finney was a member of the Benson jury and the pastor suspects he played a key role in the verdict. He’s buried in the graveyard here. And though the murder occurred six years earlier, the church tower might still be worth inspecting. The pastor mention letters that Finney scratched into the floor
You’ll need to complete two tasks here and can perform them in either order.
Locate Finney’s grave. From the pastor, head left to the graveyard. It’s the first stone on the near side of the central path. Zoom in on the location and then the grave and you’ll see someone’s inscribed a 2 of Hearts here. Talk to the pastor again. He doesn’t know the source but says it appeared a year after the funeral. The Card Man’s first victim, it would seem.
Explore the tower. Enter the church and you’ll kick off a call from the Card Man. He identifies Blake as Barrymore and says he’s “preparing a new card. Hurry up.” Nicole asks for a hint. To Which TCM says, “There are plenty around you,”
That’s as far as you go — both in conversation and in the church. (The gates upscreen and the door to the left are locked.)
Retreat to the pastor and talk to him again. He’ll supply the key to the tower. Use the key on the left door and enter. You’ll find the darkness upstairs oppressive. (You can look around in a minimal way, but can’t do anything.) Retreat to the pastor again and ask about the lighting. The pastor just happens to carry around a flashlight and it’s yours for the asking.
In the tower, zoom in on the far left corner (“dark corner”) and plug the lights back in. Then have a look at the floorboard in front of the cabinet. This is where Father Simon had the boards replaced after Finney’s murder and one is loose. You can’t pull it up barehanded — is the pastor also carrying a claw hammer? — but you’ll be able to pull out the two nails and then lever out the board with the peculiar wrench (“lever”) hanging on the near right corner.
What you can’t do is clear up the dust below. (“I’m not getting my hands dirty,” says Nicole.) However, down in the vestibule, you’ll find a brush on the prayer desk (“prie-dieu”) to the right. This works fine. You’ll find some marks — “D P” — carved with a nail. (The pastor reported that Finney had a nail in his hand when he was found.) Is this a clue to his killer? Do we know a DP?
Well, yeah, there’s Dick Parry. (Nicole starts wondering about this on her return to the vestibule.) And the Reeds did suggest that Parry looked like a former Norwitch policeman.
But after positing Nicole’s boss Chaser as a serial killer in FBI Confidential, the designers of Cards of Destiny surely can’t be suggesting the FBI is home to a second criminal?
Actually, they are.
Get back to the pastor to return the flashlight and see what else he knows about Finney’s death. You’ll learn Finney was still alive when discovered by a police officer. The officer was ultimately cleared in the death, but there’s a lingering suspicion that he allowed Finney to die. (After all, it was the same officer who’d been trying to protect the pastor’s daughter from abusive husband Finney.) The officer: Dick Parry.
That wraps up your business here. Nicole’s just reached the car when she gets a call from Ruth. She’ll connect Parry with Maine and report that the bureau has received another parcel from the Card Man. This one also detonated on its own and Wang found in the remains pieces of a Fresnel lens — a type used in lighthouses,That’ll make you think back to Parry’s “unimportant” phone call. He’s clearly withholding information from you and must be considered a potential accomplice in Finney’s death. At the very least, he has a lot of explaining to do.
The Courthouse
You’ll find Nicole outside the courthouse. That’s Parry’s vehicle over to the right. Walk up to the door to find it locked but light coming from a doorway to the light. (Also, unmentioned, evidence of unlawful entry via the window at the rear.) Go around the right side of the building. You’ll find the middle window slightly ajar. Nicole can’t reach it unassisted and the only potential ladder in reach (the sign) is chained to the lamppost.
Not a great mystery: The only potential tool for breaking the chain is the shovel handle (once again called a “spade”) in the trash can in the foreground out front. Take the handle, return to the back of the courthouse, zoom in on the base of the lamppost and use the handle on the chain. It snaps and the sign is yours. Place this below the middle window, climb inside, enter the doorway on the left and move right to find Parry.
Nicole talks to him automatically. Parry’s claims to be working on a lead about Reed’s pal Peter Douglas: He apparently shared a cell with everyone’s favorite security guard Archie Benson before he was released in 2002. Parry thinks Reed was working for Douglas. Evidently blind to her own warrantless search of the Reed barn, Nicole challenges Parry’s acting “in secret and on your own.” Parry offers the excuse of expediency — the missing Judge Wolsey — but things quickly deteriorate from there. When Nicole moves to cuff Parry, he throws her down and takes off. In the pursuit that follows, his car crashes. Before Parry dies, he discloses that Douglas was blackmailing him and provides a location: “light on the shore.” (Oy. Wouldn’t it have been easier for the dying man to just say “lighthouse?”)
The “Outhouse”
Move toward the small structure near the cliff’s edge.
It’s a little hard to see from your starting location, but there is a ready way across the channel: the cable car just to the left of the building.
Naturally, it doesn’t work. Nothing works in adventure games. Imagine what it would be like to live in such a world of eternally deferred maintenance. It’s a wonder all the heroes and villains don’t just spontaneously kill themselves.
What’s wrong with it? Enter the shed and have a look. Clearly, the engine is missing some parts. And though you’ll learn this only after you’re deep into the repairs, it’s also out of fuel.
You can handle the four required tasks in any order. I’ve put the starter first because, once it has been assembled, unsuccessful attempts to start up the engine will be rewarded with info on the bits that are still missing.
Starter: Think old, pull-cord lawnmowers. The cord here is the belt behind the jacket hanging on the left wall. You just need a place to install it.
However, you’ll need to lay the groundwork first.
Take the wingnut off the lower left corner of the engine and the flywheel at its upper right corner. Zoom in on the engine, install the wheel and then the nut on the axle and wrap the belt around the flywheel’s inner ring (i.e. just above the nut). Left-click on the belt to try and start the engine.
Depending on what else you’ve done, you’ll get one of a range of responses. The clutch is missing. The cylinder head is cold. The engine’s out of gas.
If you’ve already remedied all of these, the engine roars to life … and, quite honestly, like the haunted-house ride back in Jersey. the cable car should be off and running without Nicole onboard.
However, that wouldn’t do, so the designers cheat a little here in your behalf: The car stays put until you figure out a way to operate the clutch remotely. (See below.)
Clutch: If you move behind the outhouse to inspect the cable car, you’ll see a fuel tank to the left of the structure. Zoom in on it and you’ll see a lever leaning again the right front support. Take it. That’s your clutch.
Back inside, zoom in on the engine and again on its right side. The hole for the clutch is now at the bottom center of the screen. Just pop the lever in there.
You’re not quite done. The clutch allows the engine to engage and disengage from the cable that drives the car. With the handle at the top of the clutch in its current “out” position, it’s engaged. You’ll want to find a way to keep the handle compressed until Nicole’s ready to travel.
In the outhouse’s upper right corner is a reel of fishing line. Grab it and left-click on it in inventory to lose the reel. Use the fishing line on the clutch to tie down the handle and thread the remaining line through a hole at the back of the outhouse. (If you walk around back, you’ll see it ends at a spot near the cable car.) Presumably, this line is now taut and Nicole lets it go slack when she finally boards the car.
Cylinder head: Tricky until you remove and inspect the “shank” in the hole atop the cylinder head. When you right-click on it, Nicole offers that the bent metal pipe is used to heat up the cylinder head. Essentially, it’s the sparkplug.
What’s missing is the spark.
You’ll need the moldy blue jacket hanging on the left wall. Right-click on it in inventory to learn “the pockets look stuffed.”
In this closeup, you’ll find a pack of “MarlonBoro” cigarettes in the left one (“Extremaly Gold” [sic]) and a box of matches in the right. In the closeup view of the pack, left-click on the cigarette tips at the top to extract one, then use the matches on the tobacco end and, finally, insert the lit ciggie into the open lower-left end of the shank and replace the shank in the cylinder-head hole.
Fuel: Remember the fuel tank outside? Is it full or empty? You can’t really tell from the valve. Right-click, left-click — all you know is that the faucet isn’t leaking.
If you haven’t claimed the lever beside the right front support — this is your clutch (see above) — take it now and then the rock beneath the support. The tank tilts. The fuel presumably gathers at the near end and the faucet now leaks. You can now collect fuel — provided you have a suitable container.
There’s a semi-suitable container behind the oar in the outhouse’s left near corner. And why just “semi”? Because it has a big old hole, that’s why!
Can you plug the hole? Yeah, but, like every other damn thing in this place, it’s going to take some work. The cap on the fuel tank for the cable-car engine — in the lower right corner of the engine closeup — is a perfect fit. Unfortunately, it’s been screwed tightly in place and you’ll need a special tool to remove it. And, unfortunately, that special tool has fallen through a crack in the floorboards to the right of the engine. You can’t reach it without another tool and that one you’ll have to cobble together yourself.
Oy and oy again.
This tool consists of two parts: the larger section of the broken front board of the bench at the right side of the room and the hook on the left wall that holds the jacket and belt. If necessary, remove the jacket, belt and hook, screw the hook into the board, use the board + hook retrieve the wrench from the crack, use the wrench to loosen the fuel cap, remove the cap by hand and fit it to the hole in the metal cover. Now place the plugged cover on the ground below the fuel-tank faucet and turn the valve. The remaining fuel drains into the cover. Retrieve the cover and, in the closeup view, pour the contents into the engine’s fuel tank. Right-click on the cover in inventory, rotate it to display its underside, remove the cap and replace it on the fuel tank.
One you’ve completed all of the above, left-click on the belt wound around the flywheel to start the engine and board the cable car. Nicole automatically loosens the fishing line to engage the clutch and off you go. She’s most of the way across when something goes wrong up top and car and passenger plunge into the ocean. Nicole surfaces beside the lighthouse.
The Lighthouse
Endgame. Does it seem we’ve hit it kind of early?
Climb the stairs and hop across the platforms to the left, bayou-style. Head left and climb the stairs to find the entrance locked. What can be done?
Well, there is that the ladder down below. If you could raise it to a position beside the door, it’d allow Nicole to reach the roof. Alas, it’s too heavy to carry up the stairs. but maybe you could hoist it up using the cable hanging to the right of the door.
Sure enough, a hook can be found at the cable’s left end — this is visible in the closeup view of the left end of the ladder — and with a click you can slip this around the ladder’s leftmost rung. However, the other end of the cable’s has been slung onto an inaccessible ledge and you’ll have to knock it down.
Simply take the oar from the patrol boat suspended outside the locked door and use it on the cable at this location. The far end falls onto the platform atop the entry stairs. Retrace your steps and jumps to the lower platform and hook the cable’s left end to ladder and the right to the WWII-era mine. (That’s your counter-weight.) Now you just need something to pry the mine off the edge of the platform.
And wouldn’t you know? When to click on the cable, connecting it to the mine, a pry bar arrives on the scene: A beam falls down from above. Take it — it’s just to the right of the ladder — and, in the closeup view of the mine, use the beam on the mine to put it in position. Then left-click on the beam’s left end to roll the mine off the platform. As the mine drops down, the ladder is pulled skyward — stopping just right of the locked door at the top of the stairs. Now Nicole can climb to the roof …
… to no clear purpose at first. The lighthouse to the left is locked, the embedded rungs of the ladder to the right of the lighthouse door are too rusty to risk and the central hatch to the storeroom (atop the ladder to the right of Nicole’s starting location) is far too heavy to lift.
But there is that crane. If it can lower the patrol boat into the water, it should be able to raise the steel hatch. Move left and down, zoom in on the control panel, take the joker inserted at the top and press the green button to start ‘er up.
They’ve made it pretty easy for you. At any given time, no more than two of the four control knobs will be working (i.e. displaying a constant green light), so you can only screw up so badly.
1) Press the left of the two up/down knobs up once to raise the crane.
2) Press the upper of the two left/right knobs left twice to rotate the crane so it’s pointing toward the hatch.
3) Press the lower of the left/right knobs left once to extend the crane out over the hatch.
4) Press the right of the up/down knobs down twice to the lower the hook.
5) Now back out of the control panel, make your way up the ladder to the hatch and click on the crane hook to connect it to the hatch handle.
6) Finally, back at the panel, turn the crane on again and push the right of the up/down knobs up twice to open the hatch.
Climb the ladder to the hatch again. Nicole automatically drops down into the storage room for a face-off with Archie Benson. He reveals that Wolsey’s long dead, that the jury members on his case were hypocrites — feigning moral superiority in court but just as greedy as the next guy when it came to taking his father’s bribes (with Finney as conduit) — and that he did in fact kill the card reader.
It’s may not be clear at first why Benson takes so long to shoot after he tells Nicole to “say hello to Hoover for me.” But watch carefully. He does pull the trigger. (It’ll turn out his gun’s empty.)
Nicole does fire. Benson’s dead. And Nicole appears to be trapped. The lone door is locked and the duct below the grate in the floor to the left appears inaccessible.
Forget the door for now. You’ll have to open it from the other side and the duct’s your way to get there. Two problems: The grate on top won’t open. And the duct is full of water.
The grate shouldn’t be a big obstacle. This place is packed with tools. There’s a big wrench to the left of Benson’s body, a small one under the bucket at the near end of the boat-storage area to the right and a medium-sized one (and maybe a saw blade; see below) in the toolbox to the right of the door. Granted, the handle doesn’t appear wrench-friendly, but who says tools need to be appropriate to their targets? Use any of the three wrenches on the handle in the close-up view to raise the grate.
Now for the water in the duct below. The pump is controlled by the panel to the right of the door. Use the saw blade from the toolbox on either of the two screws to open it. You’ll notice that three wires at the top have been disconnected from their terminals.
Note that it does matter which screw you unscrew. If the top screw, the bottom screw stays in place, the cover remains semi-attached to the panel. If the bottom screw or both, the cover is added to your inventory, where it can be rotated to display a diagram that displays the proper connections — from left to right: blue, red and black.
Odds & ends: A curiosity — or maybe just a bug: If you haven’t taken the saw blade from the toolbox, it magically appears in your inventory and vanishes from the toolbox when you zoom in on the panel.
Once the wires are hooked up properly, simply press the switch beneath the panel. The duct drains and Nicole can hop down inside to discover the passage is now blocked by the three fans of an “impeller.” (You saw a bit of this back at Reed’s lab.)
The object here is to use the three wrenches on the central axle to adjust the blades so Nicole can slip beneath. In other words, the three blades of each of the three fans must be lined up with each other so they point only to the sides and up.
The darkness and limited visibility are the main issues here. The puzzle itself is much easier than it may look, and I’ve finished it in as few as four moves. You just need to understand how the wrenches operate the fans.
Wrench Turned Results in …
Small Clockwise First (front) and second (middle) fans turning clockwise
Small Counter-clockwise First and third (rear) fans turning counter-clockwise
Medium Clockwise Second and third fans clockwise
Medium Counter-clockwise First and third fans turning counter-clockwise
Big Clockwise Third fan turning clockwise
Big Counter-clockwise Second and third fans turning counter-clockwise
Note that five of the six possible moves each adjust more than one fan.
But if you turn the big wrench clockwise, only the third fan moves. This exception to the rule has be important. What might you do with this information?
Simple: This sets up the big wrench to serve in the role of socket wrench. Have you ever used one of these to turn a bolt in a constricted space? The principle here is not dissimilar.
The three steps below should work regardless of the random arrangement of the fans in your game.
1) Second (middle) fan: Use the big wrench on the impeller axle, turn it counter-clockwise and the second and third fans will turn counter-clockwise. That’s as far in that direction as the big wrench will go — try it again and Nicole says, “No, that’s not right …” — so turn it back clockwise and the third fan returns to its original position. But the second remains where it is. And by repeating this process as needed — i.e. using the wrench on the axle again and turning it counter-clockwise and then clockwise — you can ratchet the second fan into position. (If the second fan is already in position, skip to step #2.)
2) First (front) fan: Use either the small or medium wrench on the impeller axle, turn it counter-clockwise and then use the big wrench on the axle and turn it clockwise. Repeat the process until the first fan is set up properly. (If this is already in position, s
3) Third (rear) fan: As noted earlier, this fan can be moved independently of the other two using the big wrench. But suppose that single move fails to bring the fan to its final position?
At that case, jigger the small wrench clockwise and counter-clockwise to ratchet the third fan into position. The first fan won’t sacrifice its overall position, but this process will push the second fan out of alignment — so simply repeat step #1 to restore the second fan to its position.
Once everything’s properly lined up, send Nicole under the blades to a small platform. The grate above doesn’t require any wrenchwork to open, but this platform is somewhat lower than the duct and Nicole can’t reach it from this position. She needs something to stand on. Left-click on the bucket in inventory to remove the handle, use the bucket on the platform and zoom in on the grate. You’ll lift it and see you’re below the room on the far side of the door.
For some unstated reason, the otherwise-limber Nicole can’t climb out here, but you can cobble together a final gadget to unlock the door. Retreat down the duct to the other side of the door. Take the push-broom to the left of Benson’s body, left-click on it in inventory to reduce it to just the handle, left-click on the detached handle to form a metal loop and finally use the loop on the broom handle to produce a “stick with wire.”
Reenter the duct. On the far side of the door, use the stick with wire on the door to put it in position and then left-click on the stick -twice- to unlock the door. (Nicole will say, “The door’s opened!”) Retrace your steps to the storage room, open the door and climb the spiral stairs within.
Yeah, yeah, it’s the “expert” from back at the beginning of the game. Was even anybody remotely surprised by this? He goes through the usual end-game disclosures. The judge Wolsey is indeed long dead. The missing man must be his son, and he’s probably just visiting his girlfriend. (How exactly did the FBI screw up this basic piece of information?) Douglas is pretty much crazy. (“I am God here, the master of life and death.”) Benson, Reed and Rowling are not accomplices “as the law defines it.” He received the most help from the greedy victims. Nicole is the Joker. Douglas used her to kill Benson (who had an empty gun). He sees himself as being acquitted on the strength of his video recordings of Nicole in the storage room. And he did blackmail Parry after watching him permit Finney’s death.
And his motives are, shall we say, obscure. Douglas feels he deserved imprisonment for crippling Reed. But what he learned from cellmate Benson about Benson’s father’s bribing the jurors in the murder trial seems to have precipitated some kind of crisis and he decided to punish the jurors for their “base wishes.”
His spiel complete, Douglas makes a break for the stairs. He’s shot by Nicole (now, was that really necessary?), falls through the window and plunges into the churning sea. The FBI choppers show up (presumably summoned after Parry’s crash), the scene fades to black and an evidently disillusioned Nicole gets the last word: “Nick, you still got that job for me?”
Odds & ends: If Nicole performs certain actions in the storeroom — either trying the door or opening the grate and then backing out of the close-up — the view changes to a monitor at the top of the lighthouse and Douglas taunts her.
And something doesn’t quite track. Douglas tells Nicole he watched Parry allow Finney to die from a position inside the cabinet at the top of the church tower. How? You’ve seen that cabinet. Only the top part opens, and it’s full of machinery — and Douglas is a big guy!