80 Days
80 DAYS
by Frogwares
Walkthrough by MaGtRo December 2005 version 1.1
Gameplay:
The game comes in 2 CDs. CD1, the application CD has to be in the drive for the
game to run. The
game manipulation uses a keyboard with some mouse control. The game manual in
Adobe .pdf
form is found in the installed game. The Main Menu has New,
Load, Resume, Controls, Credits, Options and Exit Game. When new game is
selected, a choice of gameplay mode is seen. Tourist mode is the easy level
where the limited time is disabled and with large amount of money. The Globe Trotter mode is
the medium level where the limited time is enabled and money amount is normal.
The Adventurer mode has limited time enabled and the time moves fast. The money
is the least amount of all 3 modes. Press ESC key to get the main menu during gameplay.
The gameplay Saves are
automatically done, usually when a mission is accomplished. The Load screen has
buttons on left and right that will scroll the load pictures.
The Controls menu has adjustment to change the default keyboard action keys. W
(forward), S (reverse), A (strafe left) and D (strafe right) are the
default keys for moving Oliver. The arrow keys also do the same movements. The accompanying keys for directional movements are X for crouch, left shift key for run and space bar for
jump. I key or right click of mouse opens the inventory. The inventory uses O and P
keys or the mouse wheel to scroll to view the different items. Tab shows the
current mission.
The Options menu has selection for
screen resolution, frequency of the LCD display, color definition,
anti-aliasing, graphic details, texture details, gamma, effects volume, music
volume, dialog volume, shadows, subtitles and invert mouse.
During gameplay, the Mini Map at top
left of the screen is very important. It shows where you need to go. You are the
orange arrow. The red arrow is your hotel. The green, blue and violet color
arrows are the different levels of the locations of the mission you are doing at
the moment. They disappear when the mission is accomplished. The green arrow
shows that the mission location is at the same level as Oliver. The blue arrow
shows a higher level and the violet arrow shows a lower level than where Oliver
is at that moment.
At bottom left of the screen is the
Tiredness bar. It shows the amount of Oliver’s energy. When it goes down, you
can buy food to restore your energy or rest at the hotel. The stay at the hotel
costs money but it restores the energy to the maximum. Note that if you sleep at
hotel, you use up 8 hrs. If you sleep on the
street when you can’t get back to the hotel restores the energy only halfway.
The Money bag at bottom right of the screen shows the amount of
money Oliver can spend. Budget wisely when using the Globe Trotter and
Adventurer mode. Face an active (green lined) item to buy or rent and then open
the inventory and select the money bag. Then click to get that item or ride the
transportation.
Clock and Time line is at top right of screen. This shows the
time of the day with the night and day icons at bottom. It also shows the number
of days of the gameplay. The colored bottom by the day number shows green when
the travel is on par with Phileas Fogg or red when running behind. The T key of
the keyboard shows the progress of the game compared to Phileas Fogg.
Mission objective is seen for a short time. Press the Tab key
to review the mission objective. The objective at the moment is highlighted and the completed
sub-missions are grayed out. Points are awarded when a mission is completed. Some
of the mission is not necessary to the completion of the games but with enough
points a bonus is seen at the end of the game.
Press the left mouse button to skip the dialogues.
Happy traveling!
Oliver reminisces. London, 2 October 1899: Oliver Lavisheart
is in
discussion with his uncle, Matthew. After informing Oliver of his parental
wish-demand of an arranged marriage, Matthew asks Oliver to help him. He wagered his nest egg
and reputation that Phileas Fogg’s 80 days travel around the world can be redone. He also asks
Oliver to recover the patents of his 4 inventions (trinkets) that he ‘lost’ in his travels.
If Oliver does not succeed they will take his title of Pulsative Engineer.
NOTE: The game might seem to stall or lock a bit.
It is just processing. Wait until it continues by itself or click on screen.
For the money locations – check drdel’s Money
Source list by clicking
here.
CAIRO
Arrival Island:
Save point Cairo 1.
Press P on the keyboard or right click to show the
inventory. Use the O key to scroll through the inventory. There is a knife
and money (400 pounds for tourist) in inventory. Note Uncle
Matthew’s bird, he will be with Oliver in his journey.
Find a way off the island: Oliver is at
Arrival Island off Cairo’s wharf. Practice the
movement keys and explore the place. Talk to the other waiting passengers. Talk
to the guard after he announces a delay of 24 hrs. He states that Customs
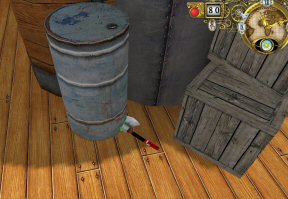
are closed for 2 days and they are looking for tomb robbers. Go to the wood structure left of the guard’s hut and right of the people. Look down on the floor at the corner and take the iron bar.
Note that the city is on the other side of the water and that the arrow to gain
your mission on the minimap at top left of the screen is red. This means that
the mission objective is located lower than where Oliver is at present.
Go down the steps and check your energy. You can buy
fruits by facing it. When the fruits are highlighted, select your money bags
in inventory and then left mouse click. Check the 3 feluccas around the sides of
Arrival
Island. See that each of them
is fastened on a bar. The only one with no onlookers around is the third one.
Also this is where the mission arrow on the minimap is pointed. Use the iron bar on the stand of the third felucca and away we go.
Sail the felucca to Cairo’s harbor:
Sail the felucca using the same keys for movement. Use the mouse to change your
point of view. Back up or reverse the felucca and then turn left to get Arrival
Island on your right. Sail forward avoiding the nets to your
left. After the nets, turn left and forward to Cairo’s wharf where you see the
zeppelin.
Cairo Harbor: Save point Cairo 2.
Pass customs but the policeman must not locate you: See the 3 policemen patrolling the area. Watch the movement pattern
of the 2 walking policemen. You can hide by crouching (X key) behind the crates and
then walking forward while they patrol away from you. Your target is the opening on the
wall to the right of the compound by the last policeman. The custom office is the open building
ahead. You do not need to go in there yet. Use the mouse to see over the crates
and watch where the policemen are walking. I crouched and waited by large crates
at the beginning, middle and end of the path. While at the last set
of crates at the corner, checked again for the last policeman to go right. Then I crouched
forward to the second to
the last crates close to the exit out of the area. I hid behind those crates and waited for the closest policeman to move pass.
Immediately crouched-walked to the exit out of this area. If you get caught, you can
bribe the policeman and mosey out of here (of course, your money bag is lighter)
or if you’re a tightwad, you can go to jail and wait it out. If you’re
playing Globe Trotter or Adventurer mode, you’ll be behind your schedule. That you
can ill afford.
Try to reach your hotel: Outside
the Harbor compound, see a Rent a Car area. Select the transport you want to
use. Face the transport, open inventory and click on money bag.
You have a choice of a camel – the slowest of the transport, a flying carpet and a chopper-tribike. Later you will
have an added choice of a one tire. I ran-walked a LOT. Watch the minimap and follow
direction to the red house arrow to the hotel. The closest route I found is to go forward,
right, left and go around the block of the domed hotel.
Enter hotel. Click on money bag while facing the man
at the reception booth. Take the hotel key card and the roll wax
message from Matthew. Bonus points – 30. Turn left and use the roll
wax message on the gramophone looking machine. Listen to Matthew. More money is
added to money bags.
Climb the stairs and turn right at top of second set
of stairs. Enter the first door and rest to gain full energy points. Save
point Cairo 3.
Find Youssouf the merchant:
Note: Be sure to check your
energy level. Buy food whenever you need to from the stalls around the area –
hot rat, fish or fruits. There is a Rent a Car area by the hotel. You
can try all the wonderful selections and then go back to the saved point to try
another, continue the game and not lose any time.
Find 4 of your GPAK
colleagues: Exit the hotel and get accosted by Mac Harony (now
we’re into pasta). He promises to help but in return the Guild asks you to join
to promote the kilt and do ‘small’
favors. After joining the Guild for the Promotion and Acceptance of
the Kilt (GPAK), he will help you find Youssouf. But first you have to find 4
Scotsmen and give them 4 manuals for using the amazing kilt.
Use the minimap
to home in on your fellow Kilt brothers. Remember that the green arrow shows
that the mission location is at the same level as Oliver, blue arrow shows a
higher level and the violet arrow shows a lower level than where Oliver is at
that moment. I recommend going first to the one on
top of the long stairs – follow the blue arrow on the minimap. Climb the long stairs, then turn right, forward
through the open building, forward to wall, climb
down the right steps by the wall, go forward pass the first balcony on your left
and forward to the second balcony. Give the manual to your GPAK brother up at
the balcony. He gives the password (unforeseen doesn’t exist) when you see
Youssouf.
Go back down, pass the first balcony and climb the
stairs. Go through
open building, left and down the long stairs to the lower level. After the
stairs, go forward until you see a palm tree on the left that is surrounded by
bushes. Get the necklace to gain more money. Oliver shows his pleasure in
getting money by dancing. Another source of money is at the small alley across
the entrance to the harbor close to the rent a car.
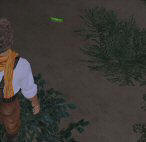
One member can be found walking the
street and tells you that Youssouf is at the bazaar. Another one is behind a wood fence
(one block and right from long stairs) that says that Youssouf’s club is called
Reform Club. There are 2 other side entrances to get to this member. The one
member at the Bazaar states to use the staircase.
Bonus point = 15.
Youssouf:
At the bazaar, go forward and turn left on the steps to go to R(e)form Club.
Bonus point = 30.
Talk to Youssouf. Follow Youssouf until the entrance of the catacombs to meet
with Otto, the archeologist. Listen to learn about a part of what caused some of
Matthew’s problem and Ethan Fairberry. At the entrance, Steward Fix, son of the late
Inspector Fix (he’s the baddie that will try to stop you) accosts Youssouf.
Youssouf departs with Fix and secretly gives Oliver the catacomb key.
Tomb
Robbers: Save point Cairo 4.
Go forward to the ornate catacomb. Use the catacomb key on
the door. Enter, forward to the big room and listen to the tomb robbers the
authorities are looking for.
Close all the gates
around this room to trap the evil thieves:
First Gate – Go to the
opening on the right and go forward until the ladder. Face the ladder from the
right side. Be one step away from the ladder and then climb up using the space
bar. Click on wheel to drop the first gate.Second gate – Climb down
and forward to the next room. The wheel on the left is too high. Go forward to the next room
where the third wheel is seen at above left. Go down the pit left of the
scaffolding and climb up
the dirt ramp up to
the second wheel. Click on wheel to drop the second gate. Jump down from the
platform.Third Gate – Go back to
the next third wheel room. Turn left and see that the wheel is above on the platform accessible by the
scaffolding. To get there, jump (spacebar + forward arrow) on the rocks left of the pit, walk around the
ledge to the scaffolding, push the bridge and turn the wheel to drop the third gate. You can walk
down or jump down from here.Fourth Gate – Go to next room on the left. See that the gate entrance is blocked by a big square boulder. The
right side of the entrance is left opened. Turn right, climb the piled rocks and see a big round
rock. Move to the right a bit to get out of the way and click on the wood to get that ball rolling.
That got the right opening of the gate blocked. Climb up to the ledge and run-jump
(left shift + forward and then space bar)
over the broken part to get to the wheel. Click on the wheel to drop the fourth gate.Fifth gate – Go left to the next room. Climb
(spacebar + forward) a pillar like stone on the right as soon as you enter the
room. Walk and jump-run (left shift + forward and then space bar) around the
ledge to the wheel. Click on wheel to drop the last gate down. Now the thieves
are trapped. Well done. Bonus point – 25. Save point Cairo 5.
Find
Otto the archeologist:
Go back to the third
wheel room. Turn left and see Otto the archeologist in his wheel chair on the
other end of the room. Talk to
him. He mistakes you for his new assistant. He wants you to find the 7 chalices in
the ruin. You can sleep in his tent to wake up
refreshed before doing his order.
Detect the hidden
painting to find the 7 chalices: Eat the food on the camp
table. Take the helmet just outside the tent. Automatically wear the
helmet and see a foggy scene. Right click to remove the helmet and right click
to wear it again. Go forward and enter the
ruins.
The Eye and the chalices
– Use the minimap to find where the Eye paintings are located. You are the
orange arrow. The green arrow shows that the painting location is at the same
level as Oliver. The blue arrow shows a higher level and the violet arrow shows
a lower level than where Oliver is at that moment. Right click to wear the
helmet and see foggy scene. The helmet helps to see the eye paintings.1. Go forward from Otto to the path at the ruins
and turn right to the first room. Look behind the middle post and click on the
Eye. Take chalice.2. Exit room, go right and take
the left path at the intersection. See a bridge that is in a wrong position. Jump down the pit and
click on the turnstile to turn the bridge
above. Go forward until you’re outside and then turn left. Turn right and again
turn right to climb the stairs across the closed grilled door. Go forward pass
the active pillar and turn right at the intersection.
Go forward and walk thenow turned bridge. Go forward and enter the ruined temple on the left. Enter
the first room on the left and click on the Eye. Take chalice.3. Go back and pass the bridge. Go left on the
intersection and see a ramp to the left. The ramp acts like a
seesaw when you reach the end. Push the broken pillar right of the ramp to hold it down. Walk-jump the
ramp to the ruined temple. Enter and walk to back left of the room behind the
last left pillar. Click on
the Eye and take chalice.4. In the same room,
exit the hole on far wall between the 2 pillars. Climb down the broken wall left of
the ledge. This brings you to a courtyard below. Enter the far right temple. Click on
the Eye and take chalice.5. Climb back up the
broken wall to get back on the ledge above. Walk the ledge to the corner and look
down to a room with no roof below. See an Eye painting on the wall. Climb the fallen
pillar on the right. Jump forward to land inside the open room below. Click on
the Eye and take chalice. (Thanks, Becky.)6. Jump-climb on the
fallen pillar by the wall. At top of fallen pillar, jump down to the floor below.
You will now be in a courtyard full of broken pillars. At one end is a temple
with broken statues on the front. Pan right and go to the obelisk on the far right of
the courtyard. Click on the Eye on one side of the obelisk. Take chalice.7. Go back up to the top
level via the stairs where the seesaw ramp is situated. Go forward and take a
left at the intersection. Go forward, left to the wall and left again to a side passage.
Right click to remove the helmet. See a wooden ?gate on the right. Use the iron bar on wood gate to drop it below. The
wooden gate
turns out to be a ramp. Jump down to the wood ramp. Turn around and see an
uncovered opening to this temple. Enter, right click to wear the helmet, click on the Eye and take chalice.
Hurrah. Bonus point – 30.Exit through the wooden ramp, climb the steps on the
left and down to the courtyard. Take a left, up the stairs and forward to Otto.
Go back to Otto: Give Otto
the 7 chalices. Matthew’s patent is for a beach sonar that can detect through 30
ft of sand. Hear more about Ethan Fairberry’s part in Matthew’s problem. The
patent is hidden in a black opaque teardrop. It is in the lighthouse. Then talk
to him again to find out how to get out of here. He shows an underground way to
get out of the ruins. Go back to the ruins, forward and see the statue of the
temple at the background. Go down the stairs. Turn left or right and forward to
the temple with statues at the back of the area. Climb the left slab between the
statues. Exit through the door by using the catacomb key.
Tear
of Darkness: Save point Cairo 6.
Find a policeman to
report the Tomb robbers: You are now under a bridge. Take
one of the side steps to go up to main road. Find a policeman and talk to him
about the tomb robbers and get more money.
Go to lighthouse to
take Tear of Darkness: Go to the lighthouse that is to the
left at the Cairo harbor where you landed. Enter, right and see that there is a
policeman standing up the steps inside the lighthouse proper entryway. He will
not let you go inside.
Find disguise shop:
Exit the harbor compound. Go to the building with carpets hanging in front across the street from the car
rental area. Click on
tailor’s door and automatically change into a police uniform but still wearing
the orange scarf. Money will be used.
Get the Tear of
Darkness: Go back to and enter the lighthouse pass the
guard. Climb up and enter the first balcony. See that the windows are active. Go
up
one more level and see the Tear of Darkness. Take the left Tear. Well
done. Bonus point – 15. You cannot
take the Tear out of the lighthouse. Drop the unbreakable Tear through
this window or the window below this level. Exit the lighthouse and pick up the Tear of
Darkness from the ground outside the lighthouse. That is one tough tear.
Go back to the tailor shop door to change back to your
original adventurer
outfit with orange scarf.
Scheherazade:
Bring the black pear
to Youssouf: Go back to the bazaar and Youssouf’s club.
Well done. Bonus point – 20. Save point Cairo 7. Watch the dialogue
between Fix and Youssouf. Talk to Youssouf and learn about the loud voice of Scheherazade at the harem.
Go to the big harem
to find the beautiful but loud Scheherazade: Check the
minimap. The harem is the building on the right just outside the bazaar
between the 2 fountains.
Go to the entrance left of the closed harem door area (2 fountains) and diagonal to the hotel. The
guard is standing there during daylight. You need to go back at 9 PM. Roam around
and eat or rest to gain energy for the meeting with the lovely Diva or you can
bribe the guard to enter. But be careful of your money. If the guard is gone and you
came back at night, go forward and jump in the water. Wade forward, climb the steps
on the right and go
left on the courtyard. See a and climb the flowered trellis on the left wall. Enter the window of
Scheherazade. Talk to her. Impale him!
Leave the harem to go to
Otto: After the convincing Scheherazade, exit through the door
closest to you to get to the balcony. Take the bench on the left and click it on
the middle part of the bridge across the balcony. The green active place on the bridge has a smudge on
the ledge like it’s been used frequently. Cross the
makeshift bridge and Scheherazade will follow.
Go to the building on
the right. Go forward to the next room and see a bathing area below. Go down the
right stairs and see ramps to open the windows. At ground level, see that the right exit door is locked.
Go back up the same stairs by the windows. Climb the ramps and click on all the windows to open them. Go back up
to the top floor and then
go through the left door. Go left to a balcony. Go forward to see
the opened windows. Climb up the railing and jump forward on the opened windows to get to the bottom.
If you fall down, you get chances to complete the jump. Click on door to open it. Scheherazade will now be able to follow you.
Go to the right top corner of the small courtyard and
see a water wheel blocking the passage by the water
channel. On the wall right of the water wheel are pictures of 3 men in different
poses. Below the
pictures are 3 levers used to stop the water wheel.
Based on the pictures, click on levers left, right and then middle levers. Once
the water wheel stops, go through to the other side, forward and left to side
gate.
Automatically be with
Otto at the ruins. After the interlude between Scheherazade and Pookie Poo and when
your ears are now cleared, take the little trinket number 1 Cairo – patent paper.
One down, 3 to go. Well done. Bonus point – 40.
Go and
take a ticket for your next destination:
Go to Cairo harbor
and enter the custom’s office. Talk to the man inside the booth with no line of
people. You have now a choice of buying a ticket for a train, cruise ship or
zeppelin. Select your choice and pay 200 for the transportation ticket.
Save point Cairo 8.
Exit the office and
watch the great production number of Run like a Hero sang by Scheherazade and
the Cairo cast.
NOTE: If you selected another mode of transport –
scroll down the walkthrough and look for the write up for that transport.
Train – The Goliath
Try to
avoid the delay of your transportation: Save point
train 1.
Go and see the
Commodore: You are in your passenger compartment in the
train. Exit your compartment and hear the porter say not
to get out of the train. Turn right and follow the minimap directions to get to
the Commodore. On the way to the front of the train, hear
Dr. Vlad and Princess Kugloff’s discussion. Continue to go forward to the front
of the train pass the boiler room. At the front of the train, overhear
Col. Stamp W. Proctor and the Commodore. Talk to the Colonel a bit. Talk to the
Commodore with the Colonel eavesdropping. Oliver volunteered his services yet
again.
Repair the water
feeding system and refill the train’s tank: Exit the
engineer’s compartment and back down to the boiler car. Veer right before the steps
at the boiler car and out through the door. Save point train 2. Go right and then enter
the building on the left. Take the bottle of oil (grease) from atop
the crate. Exit and climb the stairs until the top level.
To the right is the area
that controls the water release through the pipe above the train. See crank on
the first control panel that controls the water opening that is to be done at
the last moment. Go left of this control panel and see another lever that
tilts the pipe hanging overhead. Go to the train roof.
Batteries – The
first platform has 6 empty battery slots. Read the plaque that has the procedure
for opening the water tank. Put all the batteries to this platform. The wagon
will not move when empty. For any plug in, a round battery cannot be connected
alone without its own square battery if another square battery is plugged.So, move the batteries
from back platform to the first platform. The mover has to have a battery on it
to move. The square batteries have to be moved first so that the round batteries
can be placed.Go to the back platform.
See a pair of yellow, green and blue batteries. Each color has a round and a
square battery.1. Pick up the round
battery of a color A and place it on the mover right of the steps. Pick the
square battery of color A and place it on the mover. Press the button to
transfer the mover to the other side.2. Pick up the square
battery of color A. It easier to pick it up and make the square battery active
by standing on the steps and facing the batteries than when you are by the
button of the mover. Place color A square battery to its slot on the first
platform leaving color A round battery on the mover. Push the green button on
the mover.3. Go back to the rear
platform, pick up color B round battery and place it on the mover together with
color A round battery. Press button and go to the first platform.4. At first platform,
take color A round battery and place it on its slot. Press the button to
transfer the mover with color B round battery to the rear platform.5. At rear platform,
pick up color B square battery and place it with color B round battery on the
mover. Push green button. Go to the other side.6. At first platform,
take color B square battery and place on its slot. Move color B round battery
back to the rear platform.7. At rear platform,
take color C round battery and place it on the mover with color B round battery.
Press button.8. At first platform,
take color B round battery and place it on its slot. Press the button to
transfer the mover with color C round battery to the rear platform.9. At rear platform,
take color C square battery and place it with color C round battery on the
mover. Press button.10. At first platform,
place color C square battery first to its slot and then place color C round battery
on its slots.If done correctly, see
the train’s water tank rise up. What do you know it works. Now let’s open the water.Fill the train with
water – Go to the area that has the control panels for the water tank right
of the train. Go back to the rear left area and see a lever. Pull this lever to tilt
the pipe to the train’s water tank. Go to the right control panel and try to
pull the lever. It is jammed. Use grease on the lever. Automatically pull the
lever and see water is poured into the train’s water tank. Well done! 30
points.Go back to the train.
Money: (Thanks, Ana!)
Take the money twice from the dresser at Oliver’s cabin, just before entering
the building outside the train (possibly not seen on replay) and also twice in the Conductor’s room just outside the
Engineer’ door.
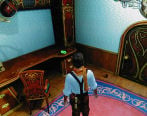
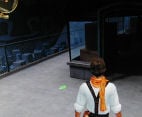
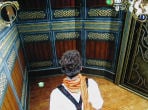
Find Kugloff treasure:
Save point
train 3.
Find the person that
shouted: You are awakened by a scream. Exit the room, turn
right and follow the minimap to 2 cars away. Go up the top level of the car pass
the dining car and
enter the sleeping cabin of Princess Kugloff. Talk to her. She has a memory
problem.
Find some clues in
Princess Kugloff’s cabin: Look at pendulum on the shelf
behind you, the diary on the table and Dr. Vlad’s prescription on the shelf left
of the table.
Bring Dr. Vlad to
Princess’ cabin: Exit the room and follow the minimap.
Find him on upper level area of the dining car. Dr. Vlad hypnotizes the Princess
to find out where the jewel is located. 5 hands are needed. Cluck, cluck. Save point 4.
Go to the kitchen:
Exit the room and meet the Colonel. Follow the minimap. At the left end of the car after the
dining car, go down the
stairs to get to the kitchen.
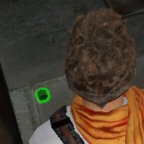
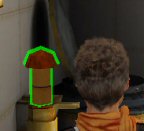
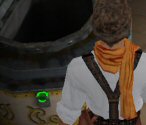
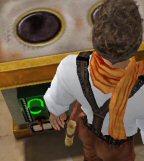
Find all 5 green buttons in the kitchen and press
all of them. From the stairs, go forward to the far wall and press the green button on the
left cabinet of the table. Turn right, forward and turn the corner, press the
button on the lamp holder on the post at middle of the wall. Press the button on
left side of the hooded set up at the corner of the room. Turn right to the
stove and press the button on the right side. Press the button on the other end
of this island close to the stairs. Oliver will say he needs help to push all
these buttons. Save point train 5.
|
|
|
|
|
|
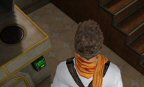
Look for volunteers
to help you:
Exit the kitchen and look for 5 GPAK members.
Follow the minimap. Climb up, go left and take the stairs to the upper level to
meet one GPAK member. Talk to him and all other kilted men you see. Go down and
forward to next car and see another GPAK member. Turn right and climb the steps
to see another GPAK brother. Go down and go back towards the front of the train.
At dining car, climb the stairs to the upper level and talk to the next
member. Go to the next car and up the stairs and talk to the next kilted member.
Go to the kitchen:
They will all go to the kitchen ahead of you. Go back to the
kitchen. Press the buttons, now. When the kilted brothers have pushed the buttons,
take the Kugloff treasure from the now opened corner stand.
Go back to Princess
Kugloff cabin: Note that the Colonel is still standing outside
the Princess’ cabin. Give the Princess the jewel. Well done! 40 points.
Go see the Commodore:
Go back and talk to the Commodore at the engineer compartment at front of the
train.
Help
Proctor not to turn into a bat:
Go to Proctor’s
cabin: Save point train 6.
Hear the Colonel call
for help. Exit the cabin, turn right and go up the stairs at the end of this
car. Enter the first door and talk to Colonel Proctor. He has 2 holes on his
neck.
Find some garlic and
give it to Proctor: Exit the room, go down the stairs and go
to next car. Turn right and go down to the kitchen. Go forward to the far side
of the kitchen and take garlic from central counter. Go back to Col.
Proctor and give him the garlic. Well done – 15. Save point train 7.
Look for the vampire: Exit the room and go to
the front car pass the dining car. Enter Dr. Vlad’s cabin.
Open Dr. Vlad’s
coffin: Go up to the coffin and try to open the coffin.
Click on coffin several times to hear Dr. Vlad’s snoring.
Read the book on table
on how to open the beast’s refuge -the pile of innocence blessed of
unconsciousness will…Take the stake of virgin bed beside the book. Take
the holy calcareous water from the floor. Take the holy soporific
water from cabinet fold out desk. Take the wooden leg stake (WaelAMR’s)
from the couch. Take Snagov’s monastery stake from floor in front of
couch. Take the holy recycled (used) water on shelf left of sink.
Go to the bat box left
of sink that has a hole and a funnel. Click on crank-wheel in front of bat box.
The crank is wedged. Based on the Frogwares enigma (book), we need pile of
innocence and blessed unconsciousness. Place the pile of innocence – stake from
virgin bed on the hole and pour blessed unconsciousness – holy soporific water
on the funnel. Automatically the crank-wheel will turn and open the coffin.
Hurrah! Bonus point – 30. Save point train 8.
Help
Vlad become a new man:
Find some fashion and
good taste specialist: Exit room and follow the minimap to
Car II. Enter the first cabin in Car II. Listen to 3 GPAK members. Mac Keshift
is excited about the plan to redecorate a new compartment.
Distribute 6 leaflets
to 6 WTO members: In return for the decoration project, the GPAK member wants you to
distribute 6 leaflets train staff. Get 6 leaflets in inventory. Follow the
minimap to locate the 6 WTO staff and click the leaflet on them. One is in a
room at left end of this car. You can find 2 staffers at the kitchen. One is on the top
level of the car after the dining car. One is in the boiler car and the other at
the level above the boiler room. Enter the door by the engineer’s compartment.
Well done – 20.
Go see the GPAK
members: Go back to the room where the GPAK members where
earlier. The member has a plan to speed up the train but a shout is heard.
Find who shouted:
Go to Vlad’s room. See the wallpapers. Mac Keshift is in the coffin. The
Princess arrives and likes the cabin.
The plan to get the
train started is to have it repaired 100% and to put kilts in front of the
train. Kilts are in inventory. Well done – 20.
Repair
the train to start it again: Save point train 9.
Go to the boiler car and
exit the train through the door on the left. Turn left and see that a broken
pole blocked the wheel of the train. Go back to the stairs and open panel left
of the stairs. Take iron bar. Go back to the obstruction on the wheel.
Use iron bar on block.
Go to front of train.
Place the kilt at front of train. Well done – 40.
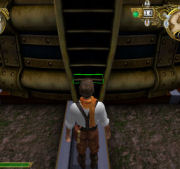
Quickly return to the
locomotive: Click on stairs and talk to Col. Proctor. He
gives a rolled message. Save point train 10.
And
now have some fun:
Read rolled message:
Go to next car and use the machine that looks like a gramophone to read the
rolled message. Uncle Matthew congratulates you on being accepted as member of
the Reform Club.
Go to rendezvous with
Princess Kugloff: Go up to the top level and enter the
Princess’ cabin. She informs you that you are a member of the nobility. Well
done – 30.
Bombay
Arrive
at Bombay dock: Save point Bombay 1.
Go to the hotel:
Using the minimap, go to your hotel. Enjoy the sights while walking or driving a
rented vehicle. On the way to the hotel, pass the elephants and the gate to
market. The hotel entrance is blocked by a sacred cow. You volunteered to get a
snake to frighten the cow to move away.
Money – At the empty animal stalls close to the
elephants by the market, take the necklace-money on the counter of the
first left stall. This will add 50 pounds to the money bag. Love the way he
dances when he gets money. At Shankar’s ocean front home, there is watch-
money at the backyard. At the left end of this ocean front road, there is
money at the side of the last house. There’s money behind the Buddha found
across the compound from stairs to snake temple. You have to jump to get up the
platform and the Buddha. (Thanks, Ana!)
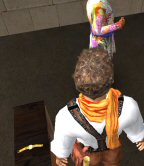
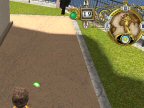
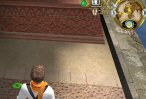
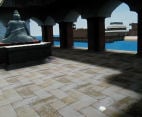
Go to the Snake temple:
Use the minimap and follow the blue arrow to go to the snake temple. On one of
the way
to the temple, you can check the posters of Scheherazade and Bollywood or Fix
Spy Agency advertisement. Talk to the guard
(we are like Snakes R Us) and he explains
that you need to offer spices to the snake god. A snake basket on top of
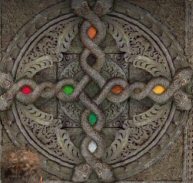
the central tower, a colored entwined snake stone plaque on the wall and an
offering stand are shown in the panoramic pass of the temple.
Buy spices for offering:
Go to the market using the minimap (arrow beside the red hotel arrow) and buy spices.
The market gate is beside the elephants. Buy 8 spices: brown ginger, white salt,
green allspice, yellow turmeric, red saffron,
orange-brown coriander, black cloves and light green peppermint.
Take note that each sack of spices has the name of the spice. Note also that there’s a tube message reader by the wall and GPAK brothers
selling plaid cloth around the marketplace.
Offer the spices
– Go back to the snake temple. Look at the entwined snakes on far wall top
level and see colors in between the snakes. Take note of the colors and their
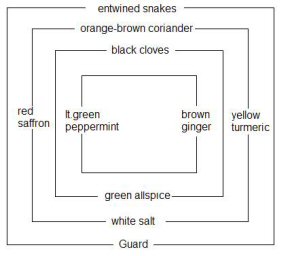
placements.Each level has offering rooms that you can burn the
spices. Burn the correct spices at the correct offering rooms based on the
entwined snakes color placements, colors of the spices and the location of the
rooms with the offering stands OR check the name of the spice written on the
back wall and compare that to the name of the spice written on the sacks in the
market. (Thanks, Franka!)Top level – Guard at gate and entwined snake on other
side.Place spices on offering stands in rooms at different
levels:Second from top level: Under guard –
white salt, left – red saffron, across guard – orange brown coriander, right
side – light yellow turmeric.Third from top level: Under guard –
green allspice and across guard – black cloves.Lowest level: Left of guard – light
green peppermint and right of guard – brown ginger.If you make a mistake, pick up the spice and replace
with correct one.If correctly done, see the steps move closer to the
central tower. Climb to top and take snake basket. Hurrah!
Go to hotel and scare cow:
Click the snake basket on cow. That is one smiley cobra. Bonus point – 30.
Save point – Bombay 2.
Find Shankar:
Enter Hotel: Enter the hotel. Give
money to receptionist to rent room. Get tube message from Matthew – Bombay
and some money.
Play the tube message on message reader at right wall. You have to meet Shankar
to get the construction map from 1858-60.
Send message to Uncle: After
reading the message and realizing the shortening of the trip (WHY?), go to the
receptionist and click money on him. A message to Matthew will be sent.
Go to Shankar’s
lodge: Follow the minimap to get to Shankar’s home by the
water. Go left outside the hotel, left at intersection, right, right again and
left to the house by the water. Bonus points – 15.
Enter the compound and
Oliver will call out. Meet Anand, the daughter of Shankar at the gazebo on the
left. After discussing the ownership of the patent for the flood draining
machine, Oliver will be taken by the bodyguards. Something is rotten
here!
Find a way to escape:
Wake up at a place with a giant telescope and Aouda, the Bollywood actress another
prisoner of Anand. The actress points out the only possible exit to this place
that is in the center of the city. It is way too high to jump on.
Telescope puzzle – The object of the puzzle
is to raise the 4 blocks of stone to make a path to the exit.Wheel – The telescope
has a wheel on the right side that raises and lowers the telescope. Go to the
wheel found at right side of the giant telescope. The telescope can bend by
angles of 15 degrees. Select one inclination following the graduation from 1 to
6 stars. Click on the command wheel then press A key to raise the telescope or D
key to lower it.Ramps – Look at the 4
ramps in the area. Note that each ramp has distinct numbers of light stars on each side
– 2 and 6 light colored stars on the right side of the telescope and 4 and 3
light stars on the left of the telescope. Each ramp is surrounded by
tiles with glyphs on the floor.Lens and gradation – The
telescope’s gradation seen like an arc on top of the setup shows when the
telescope is moved to point at 1 – 6 stars. Climb the stairs and you can look
through the lens to see what the telescope is pointed at.Stone blocks – At the center are 5
stone blocks that lead to the exit. The first one closest to the telescope is
already raised.Solution – Point the telescope to a
position in the sky based on 2, 3, 4 or 6 stars on the gradation as shown at
the side of the ramps. Center the
star seen on the lens until a glyph is formed. Note the glyph and locate that
glyph on the tiles surrounding the ramp that has that # of stars on the gradation.1. Click on wheel. Raise the wheel using
the A key or lower using the D key to position 2 of the gradation. Back up from
wheel.2. Climb the stairs and
center the bright star on the lens. Note the A looking glyph that is formed.
Click to back out of lens.3. Go down the stairs
and go to the ramp that has 2 light colored stars on each side – bottom right
ramp.4. Look for the tile
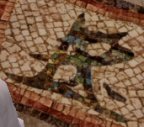
that surrounds the ramp for the glyph that is seen on the telescope lens.5. Step on that A looking glyph tile found on the right side of the ramp. If correct, the next stone block rises.
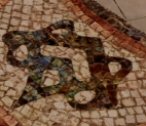
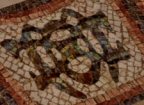
Do this for position 3 stars
(ornate double triangle; points at top and bottom),
4 stars (oval at center) and 6 stars (skull like) stars until a path is made to the exit.
Well done – bonus points – 20.
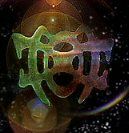
2 stars glyph
for right bottom ramp3 stars glyph
for top left ramp4 stars glyph
for bottom left ramp6 stars glyph
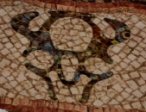
for top right rampClimb up the stone block
and walk to the exit. Save point – Bombay 3.



Go to the hotel. Get
the message from your Uncle: Play the tube message on
machine. Listen to Matthew’s explanation. Oh! To be cut off money and disinherited.
Send message to
Uncle: After reading the message, go to the
receptionist and click money on him. A message to Matthew will be sent.
Save point – Bombay 4.
If you can afford it, buy a hotel stay. Go to left
passage to rest. Click on door and rest to gain full energy points.
Find
Ravish:
Do something! Move!:
What to do? Exit the hotel and meet Mac Mao. Listen to his outsourcing the
tartan production here in India. LOL! Mac Mao tells of Ravish who knows Uncle
Matthew but first you must find 4 GPAK members that have knowledge of Ravish.
Find 4 GPAK members:
Follow the minimap for the locations of the 4 GPAK members. One is outside the
gate of Bollywood
– he says Ravish lives N of City and has elephants. One states, he is in a building full
of elephants. Another states, that he’s a Virgo. The other states, he lives in a
building with red door. Bonus points – 20.
Go to Ravish’ home:
Follow the minimap and see a big red door in a building. Climb the steps of the
building and
enter. Go down the steps inside the building and talk to Ravish. Aouda is his
fiancée. He will find what he can about the patent but first he wants you to
bring Kiouni, the famous elephant to bathe.
Bring Kiouni for a
bath: Click on Kiouni to ride atop elephant. Get the elephant out the
door by moving forward. Uh oh.
Open 6 cranks for water:
Ravish tells you to open 6 water cranks around the city. Ride-click on Kiouni.
Note that Kiouni’s run is just a hint faster than the walk. The closest crank is
by the wall on the left of the bathing area. Click on crank for Kiouni to pull
it down. Go left to the open building elephant court. There is a crank on right
wall enclosing the area. Turn left, forward and see another crank. Continue to
the left and go forward towards the exit to the compound and see a crank right of
exit and left of wooden bridge. Turn left again and forward to crank on right wall. Go left, forward, left
and forward to the rat vendor. Turn right to an enclosed area and see the crank
on right side.
Bring Kiouni to bath:
Now bring Kiouni to the bathing area. While riding on Kiouni, click money on
slot on the high pole. Automatically see that Kiouni gets a nice shower. Save
point Bombay 5.
Meet Ravish:
Return to Elephant
Park: Enter Ravish’s building and read the letter on the
wood bin. You are to meet him at the station. Well done! Bonus point – 30.
Go back to hotel:
Talk to Fix in front of the hotel.
Read message from
your Uncle: Talk to receptionist and get message. Read the
message on the machine.
Go inside the
station: Follow the minimap to get to the station. Fix and
Anand are talking in front of the station. Oliver wants to go inside the
station.
Go right close to the
wall behind the rent a car person. See an open window on the wall of the
station. Climb the crates to get to the window. Use knife from inventory on
grill of window. Enter through the open window.
Buy a ticket:
Go to the booth facing you and buy ticket for transport. I bought the ship
passage. Get a WTO transport
ticket. Save point Bombay 6.
Save
Ravish:
Go to Ravish’s home:
Ravish is kidnapped.
Go to the jungle with
Kiouni to rescue Ravish: Click to ride Kiouni. Bonus
points – 30 points. Turn right from Ravish’s home, forward and then turn right again.
Go forward to the wood log path an enter jungle. Note the glyphs on the stand
and their order on
your way to the building. Enter the enclosed area, turn left and go to the back of the
building. Get off Kiouni.
Maze:
Enter the cave. Go down the steps. Enter the doors by following the order of the
glyphs seen on the stands on the path.Solution: From left to
right and using the hour hand clock position as guide to where the doors are
located – enter the doors.
12 o’clock
9 o’clock
2 o’clock
12 o’clock
10 o’clock
3 o’clock
10 o’clock
12 o’clock
9 o’clock
12 o’clock
12 o’clock
12 o’clock
Go forward and enter the
jail area. Turn to right and talk to Ravish in the cell. Save point Bombay 7.


Find a way to escape:
Ravish tells you to find a way to break the cell door.
Go left of Ravish cell at other side of gate
and pull the lever. Enter the cell on the left and take the grease. Go
left and try to use the lever on wall. Use grease and then use the lever. Enter
the cell door on the left and take rope. Go left of this cell and use
grease on jammed lever. Enter cell on left and take granite rock. The
lever beside Ravish’s cell is ‘impossible’.
Use rope on Ravish’s
cell. The rope will be on the floor. Look at the metal torch on pillar right of
Ravish’s cell. Click on metal torch to tie the rope on it. Look down and see
that the end of the rope is active. Use granite rock on end of rope. Go to
grilled exit door above the rope with the rock and click on it to toss the rock
to Kiouni. Watch Kiouni pulls the rope and breaks Ravish’s cell door.
Listen to Ravish story
of how Uncle Matthew was misused by Shankar when he grieved for his Indian
bride. Automatically get the little trinket number 2 – Bombay.
Watch the Bombay casts
production number. Note the Sherlock Holmes billboard.
Cruise Ship – The Commodore
Try to have a good cruise:
Go to
Bar:
You are called to one of
the lifeboat. Talk to Mac Clean who is hiding from gulls that have been using
him as target practice. These gulls have been following you also since Cairo. He wants you to go to the bar and contact Baltimore, the
bartender. Save point Boat 1.
The Commodore, cruise ship:
Practice finding the change in level locations. Remember that the green arrow
shows that the mission location is at the same level as Oliver and the blue
arrow shows a higher level and the violet arrow shows a lower level that where
Oliver is at that moment.
The ship is separated into 3 set of decks with entry to its
own lower decks. The Commodore’s bridge is at the top of the front decks at
the bow (front) of the ship with cabins below. The middle decks have the
chimney, boiler and engine decks. The rear decks have cabins below deck. Each
cabin decks have an elevator in them that goes to the different levels. Use the minimap
to guide you.
Money can be found at back part of the top
outside level of the middle decks.
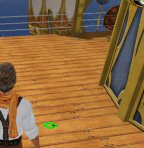
Baltimore, the bartender:
To get to the bar, go to the front decks behind
you, climb up
to the very top level and go towards the Commodore’s bridge. An elevator is
found in between the stairs to get to the bridge. OR enter through one of the
side doors, go down one flight of stairs and take the elevator. Enter the elevator and go down
to the lowest level to the Leisure and Alcoholism deck. Go forward and enter the bar on the right. Talk to
Baltimore. Save point Boat 2. He leaves and makes you temporary bartender.
Bartending 101 or Be a super cool barman – Cool
‘uniform’. Talk to the customers to get
the name of the drinks they want.The liquors from left to right:
Bottom row – red Tomato Juice, blue-green Curacao, green
Tabasco for hot nights and to heat cold women, yellow concentrated Ginger
– Baltimore’s best stuff, orange dry Mangos liqueur, black salted Vermouth, white 95 deg. Rum and brown
Cognac nectar.Middle row – pink African Papayas alcohol and yellow Quinquina
for headaches.All of the drinks made by Baltimore are half Ginger and
half of one of the liquors. Click the shaker on ginger and get a half full shaker,
then click on the appropriate liquor. Be careful in clicking, you might click a
double amount of the alcohol. It is best to keep the inventory hidden while
identifying the liquor bottles. The cocktail choice is based on the
description of the order, correlated to description of the liquor. If mistake is done, click the shaker at the waste basket on floor at end of the
bar.Atomic Baltimore – Ginger + Ginger. Give to customer.
Bloody Ocean – Ginger + Tomato Juice. Give to
customer.Afrococo passion – Ginger +Papaya juice. Give to
customer.Hard Morning – Ginger + Quinquina. Give to customer.
White Knight in Flames – Ginger + Tabasco. Give to
customer.Flamethrower – Ginger + Rum. Give to Batulcar.
If correct – Thanks. Delicious. Like the nectar of the
Gods.
A new set of customers comes in. Prepare all the new
drinks. Talk to Batulcar and
learn about his feelings for the beautiful Moira, the knife thrower. This ship
will never arrive until I speak with Moira. Bonus point 30. Save point
Boat 3.
Batulcar:
Catch
Batulcar before he does something stupid:
Follow Batulcar using
the minimap. Some time during the chase, see Batulcar enter a door at the middle
decks of the ship.
Use the elevator to get to top outside. Go down to the deck and take the
right ramp to the middle decks (with your back on the bow-front of the
ship). Go forward to door left of the stairs where Batulcar entered. It is locked and you have to find another way in.
Go up the stairs and then go to center of the level.
Climb stairs inside the central opening. Exit, turn right and climb up to the
next higher level. Go forward to center of the level and climb steps. Enter through the door. You are now in the chimney. Go down and enter through
the door.
Using the minimap, go down the steps on the left, forward
and go down another level. Turn to the right and forward to the door with
the window. Bonus point – 30. Watch Batulcar use dynamite. Too late.
Save point Boat 4. Talk to Batulcar.
Find Moira, the knife
thrower:
Follow the minimap to get to Moira’s room at third
deck. Climb to top level of boiler room. Exit through door at left and exit
outside. Cross the ramp to the front decks of ship. Climb up to top and
enter elevator. Press the #3 button to get to third deck. Evidently, she doesn’t
want to talk to you. Save point Boat 5.
Listen to the Commodore; he invites (between bouts of
seasickness) the guests to the unfurling of the sails. Wait… that was
postponed.
Save
the ship, part 1:
Go and see the
Commodore: Turn around and go up via the elevator or
stairs to top outside level. Take the stairs to go to the bridge at the top
level of the bow-front of the ship. Talk to the Commodore – the one hanging out
the window with seasickness. He allows only someone in uniform on the bridge.
Repair the unfurling
sails system: The Commodore was blackmailed into letting
you unfurl all the
sails since the ship does not have engine power.
Unfurl the sails – There
are 4 masts across the ship. Go to the first 3 and climb or ride the left to get
to the top. At the top are control panels that will unfurl the sails. The arrow
clues are beside the levers on some of the masts.First Mast with horizontal
walkway – Go to the first mast. Go up to the top and go to the left arm of the
horizontal walkway. Move the levers to position (left to right): bottom, middle,
middle. If correct – connected!Second Mast that has furled
yellow-gold mast and looks like the Eiffel Tower – Take the lift up (press
button), climb the ladder by standing on the outside and move the
levers to position (left to right): top, bottom, middle. If correct – connected!Third Mast that has curved arm
on top – Take the lift up and move the levers to position (left to right): top,
top, bottom. If correct – connected!Watch that wonderful display. See Moira throw out an envelope. Bonus points – 30.
Find
out what this all about: Save point Boat 6.
Go and see Baltimore
in his cabin: Mac Clean asks that you see Baltimore. Use the minimap
to find Baltimore in his cabin on the second class level at the front decks.
Your cabin is on second deck of the rear decks. Turn right and take the elevator to first deck #1. Climb the stairs to
outside. Go forward to the first decks in front of the ship. Enter the
elevator at top level and press #2 to get to second deck. Enter Baltimore’s cabin and talk to him. He wants
his papers retrieved. Moira’s last action comes to mind.
Enter Moira’s cabin: Turn
left and take the stairs going down. Go back to Moira’s cabin at the third class
level. The door is locked.
Find a pass to enter Moira’s cabin:
You need to get the master key and the Commodore has one. Go to the Commodore’s
bridge first and realize that the Commodore will question you if you go there. You
need a disguise.
Find a disguise: Get a
disguise by going to one of the sailor’s cabin and get a uniform. Go down to
main deck and to the rear decks.
Enter through a door on the back wall at main deck level. Click on the closet and
automatically be wearing a uniform. Lookee here, looks good!
Go to the piloting post: Go to the bridge.
The Commodore will ignore
you. Take the master key from the desk. Go back to the sailor’s cabin and
click on the closet again to change back to your regular outfit.
Search inside Moira’s cabin: Return to Moira’s cabin
at the third class level front decks and use the master key to enter. Look around and take
the box (casket) from the desk. Save point Boat 7.
Go back to Baltimore at
his cabin: Go back to Baltimore at second level above this
one. Give him Moira’s box. Baltimore is more that he seems to be – he’s a spy. Baltimore gives
2 roll waxes (from Matthew and Passepartout and brochure for show.
Bonus point -30.
Read the roll wax:
Go to the Communication level – phonotech at top level of the rear decks.
Enter through either side doors and go down the stairs to take elevator to top
floor. Place Passerpartout message on reader and learn about Moira’s innocence,
Tiger triad and blackmail of Moira. Place the Matthew message
roll wax on the reader. Learn about your bodyguard. Turn around and click the
Brochure for Show on the
rolls on the central back wall and learn about the code number 432. The numbers mean Tiger
triad messenger or straw sandals.
Find Moira:
Go to middle decks and climb to middle level and find Moira. Talk to convince her about partnering with Batulcar.
Go to Batulcar: Listen to the conversation between Moira and Batulcar
at the bar. Moira leaves. Bonus points – 30.
Find a rehearsal room for Batulcar’s show:
Talk to Baltimore. Baltimore needs keys to show room and notice paper for his
forgeries.
Find the showroom keys and notepaper with letterhead in the Commodore’s
cabin: Follow the minimap to go to Commodore’s cabin at deck
1 on these decks. Take the stairs or elevator to #1. Use the
master key to enter the cabin. Take the showroom key and paper with
letterhead.
Bonus point – 20.
Go to Baltimore: Talk to
Baltimore to give the key and paper to Baltimore at the bar. Now stick one on
official board and hand out the rest to staff. Get the forged
notices-letters. Save point Boat 8.
Save
the ship, part 2 or help the team handle their little problem:
A sailor has informed the Commodore that there’s a breach in the ship.
The spy, that’s you is asked to take care of the ‘small problem’. The
sailor talks to you at the bar. Go to the engine room and talk to the sailor
holding the plank that stops the ocean from pouring in.
Repair the water leak –
Exit the breached room using the door behind Oliver. Take the axe and hammer
on the pipe at left
side of hallway.Use the minimap to get 3
pieces of pipes around the engine room. Go forward and use the axe to take the
piece of hose on the left wall. Turn right, go forward and take the
hose from
the back wall by using the axe. Continue around the corner, go to far end and get another piece of
hose still using the axe.Go back to the sailor
and click the pipes on the plank the sailor is pressing on. Bonus points 20.Drain the water –
Listen to the sailor. Turn around and use the
hammer to turn the wheel on right wall of the breached room. Use the minimap to find the
other 3 wheels that should be loosened. Exit the room and loosen the wheel onleft wall. Go around the corner and loosen the wheel on wall behind the steps. Climb
the steps, go forward and loosen the wheel at far wall.Climb the steps and take the black plastic hose at right corner
wall. Go back down tobreached room and click the plastic hose on the pump at back of the room. Then
click again on the pump to start it. Hurrah! Bonus point – 30.
Fix a letter on
information panel: Go back to top level and exit through
door to outside. Go back to bar (lowest) level at front decks. Go to the notice board between the bar
and the showroom. Click a notice on the board. Bonus point – 20. Save
point Boat 9.
Give your letters to sailors:
Using the minimap, find and give notices to 3 sailors around
the ship. Exit to outside of this front decks and climb up to top deck to see
one sailor – give notice. Go down to main deck and go to rear part of the middle
decks. Climb up and see the other sailor – give notice. Go down the main deck,
go to middle mast and give a notice to the sailor.
Showroom:
You are in your cabin. Go to the showroom left of the bar. Bonus points – 15.
Watch Baltimore and the knife
throwing act.
At the bar, learn about
Matthew and Moira’s part in the story. This is the best cruise ever.
Yokohama
You are in a boat.
Save point Yokohama 1
Go to hotel:
Get off the boat and turn left. Climb the steps-bridge to get across the rail
tracks. Go right and follow the minimap to your 2 story red & white hotel with big red door. Pay for
a night stay. Take the message. Use the machine on the left to listen to
Matthew’s message. You are to find San Saruto to get the 1866 agreement between
Matthew and San Saruto granting him rights to his invention of a hydraulic
stilt – stand used to cushion earth against earthquake.
Go to San Saruto:
Exit the hotel, left and follow the minimap to bridge on the right. On the arch,
note Fix Spy Agency advertisement. Forward, turn left and go forward to
San Saruto’s closed ornate dragon gate. Talk to Yoko, the old lady that called
you. Learn that Lord Saruto was arrested for treason and slated to be beheaded. Some
plans are given. One is to sneak into the Shogun’s palace and find out when San Saruto’s house will be open. Save point Yokohama 2
Find a
way to enter San Saruto’s house:
Find when the
authorities will search Saruto’s house: Go to the Shogun’s
palace by turning around, forward over the bridge, left and see that the Shogun’s
palace is guarded by 2 soldiers. Go forward to the far side wall and see a small
enclosure with an opening to the ground below. Take the iron bar to the
left by the pile of wood in front of the opening in the ground. Climb up the
opening and down to underground path. At the end of the path is a jammed wheel
that control’s the cover on the opening above. Use iron bar on wheel. Click to
turn the wheel. Climb ladder and be at the Shogun’s grounds.
Be careful! The
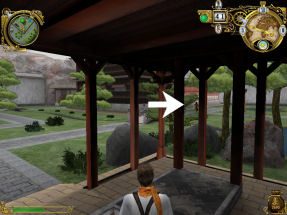
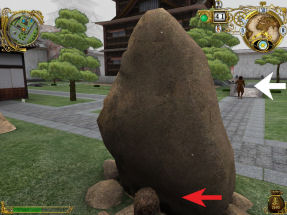
guards mustn’t locate you stay hidden: Crouch using the X
key. Wait for the guard pacing in front of the palace to go the other way and
then crouch fast to the 2 boulders by the wall. Go behind the small house.
Carefully, look out the corner to see if the guard pacing this path is close by.
Go to the next corner of the house and check again for the guard. When he moves away
from you, crouch forward behind the palace. At the far corner by the palace, carefully check
to see if the guard pacing here is moving away. Note that there’s a bridge above
that connects the palace to the brightly lit open building on the left.
Carefully, crouch enter this side building. Climb up the stairs and cross
the bridge. Enter the open room on the right. Take the necklace-money on
one end of the room. Pick up the Japanese letter by the altar. Bonus
point – 40.
 |
 |
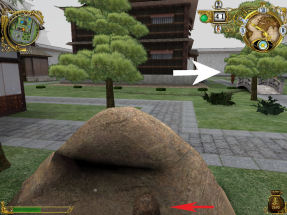 |
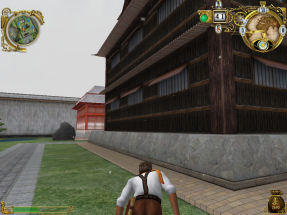
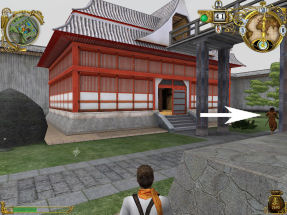
| Crouch using the X key and watch the guard walk to other end (white arrow). Check the point of view to be above to see Oliver and the guard. |
When the guard walks away, turn left and while still crouching use left shift +W to go the first boulder. |
While the guard still walks away, crouch forward to next boulder. |
 |
 |
 |
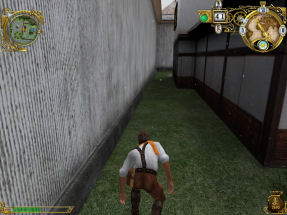
| Take a look to see if the guard is walking away, then move behind the building. |
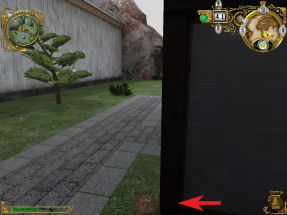
Peek behind the corner while still crouching to check if the coast is clear. |
Crouch forward to next corner and check if the guard’s back is turned. |
 |
 |
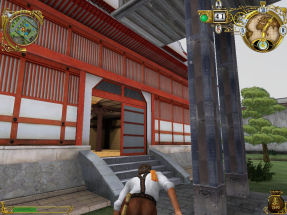 |
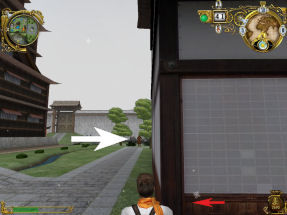
| Then crouch forward to the corner of the main palace. |
Go to the other corner of the palace and watch to see if the guard is moving away. |
Then crouch forward to open red building. |
Go back and see Yoko:
Go back across the bridge to the side building. It will be impossible to leave
the way you came in. There’s a guard at the door. See a
window above the landing of the 2 stairs. Climb (spacebar + W) and push the
window and exit through the roof. Go to Yoko to have her read the Japanese
letter. Save point – Yokohama 3. Yoko translates the letter – San
Saruto’s house will be open tomorrow. Bonus points – 30. You need a
disguise to get in the house.
Hang lanterns on 10
houses that converted to GPAK cause: Hear a GPAK member,
Mac Sushi call you. A message from Glasgow was received. Oliver is asked to hang 10
lanterns on houses that help the GPAK cause. Follow the mini map to the
different locations and hang the lanterns on the holders. Watch for houses that
has lamp holders on the post by the door. One place is across the bridge, one is at
the hotel and one you have to climb on a box to get to the holder. One is on the
inner wall of the arch by the bridge. On the 9th lantern, Fix arrives with
guards and Oliver is placed in prison. Save point Yokohama 4.
Find a way to escape:
Talk to Takeshi, your jail mate and a turtle painter. See an active spot on the
bricked arched on the wall.
While facing the stairs,
stand a step away from the overhead beam. Jump (spacebar) on to the beam. Walk
the beam to the window. Place the last Japanese lantern on the window. Here
comes Mac Sushi. He gives a knife to Oliver. Jump down and use the
knife on the bricked opening. Takeshi will do his – Tokui 2 on the bricks.
Crouch (X key) out through the hole. Turn right to the grill and pick up
money. Bonus point – 30. Turn around, forward and go left to
next hall. Go left, climb the ladder and exit. Takeshi follows you to Hotel.
Save point Yokohama 5. Talk to Mac Sushi and learn how Fix got the Shogun to
imprison Oliver.
Find a tailor:
Go outside and meet Yoko. Ride the motorized rickshaw or walk to the tailor. Use the minimap to get the location of the tailor. Enter the tailor shop and come out
looking like a samurai.
Find
your uncle’s agreement:
Go to San Saruto’s
house: Fix is standing by the gate of San Saruto’s house.
Talk to Fix. Konichiwa! He mistakes you for the translator he asked for. He
is also looking for the agreement. Bonus points – 20. Enter the house.
Turn right to room and take money from wood desk. Go to other room across
the hall and take money from behind the table. Go to the room right of
the stairs and then go down to the basement. See a mural of 7 Buddhas. Oliver
states it’s a clue.
Money: (Thanks, Ana!) Enter the wheel room
in the boat you arrived in across the step – bridge and take the money on the crate.
There is money on top of the left mound left of the road before entering
the Gold Buddha enclosure. The raised building on the left of the path towards
the Island Buddha has money in front of the door. You have to climb a
steep stairs to get to the door. The building where the Bronze Buddha is located
has money by the door.
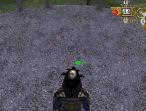
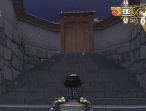
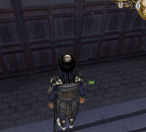
Find the seven
Buddhas:
Garden Buddha – Go
outside the house, turn right to go to back of the house. The first Buddha is in
the garden. Climb the ramp and press the block on the wall. Now follow the
direction shown by this Buddha.Giant Buddha – The next
Buddha is by a red bridge and the active arrow on the minimap is higher than the
Buddha.Go to the red bridge and drop the big wood attached to
the rope over the bridge. Go to the rope and jump up to get hold of the rope.
Move down to the top of the Buddha’s backdrop. Drop down after the circle. Left
click when the circle is lit or step
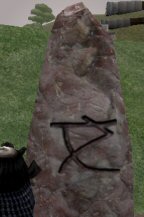
on the circle and the Big Buddha turns. Follow the direction of the Buddha.Gold Buddha – Enter an
enclosure and see a standing stone with a symbol. Note the symbol. See the
Golden Buddha. Climb to the hill across it.You have to lower the bridge to get
to the Buddha. On the ground is a set of symbols and have lines on 2 sides.
There are granites strewn around the ground with the same lines as those etched
on the ground. Locate the symbol seen on the standing stone. Mark the lines that
intersect to the symbol. Pick up the granite blocks that have those lines and
place them on the columns that flanked the bridge. If correctly done, the bridge
is lowered. Go to the Buddha and press the circle on the right post. Save
point Yokohama 6.
Island Buddha – Go to
the next Buddha. The Buddha is on an island. Is that a shark in the lake?Turn
around and take a 2 meter plank from the ground. Turn the wheel of the ferry
twice to place ferry between the 2 boulders flanking the ferry rope. Place the 2
meter plank on boulder in water. Walk across. Take 2 meter plank, turn around
and place it on boulders. Walk across. Take the 2 meter plank. Now that the
ferry is here, place the 2 meter plank on boulder and ferry. Walk to ferry. Take
2 meter plank. Place it on ferry to the boulder on the other side. Walk across.
Take 2 meter plank and place on the next 2 boulders. Pick up the 4 meter plank
from the water.Go back to the ferry wheel on the shore. Now turn the
left ferry wheel 3 more times to move it to the farther area between the 2
boulders on both sides of the ferry rope. Now do the same steps to get back
across the boulders except this time use the 4 meter plank to cross the 2
boulders that plank the ferry rope. Continue to the Buddha.At the Buddha, move the
small branch of the tree to turn the Buddha. Go back to shore using the same
moves with the 2 and 4 meter planks. On to the next Buddha.Bronze Buddha – Enter
the gate and see the Bronze Buddha. Press the knob at stand. On to the next
Buddha.Buried Buddha – See that the Buddha is buried
in the sand.To remove the sand, click the 2 ornate plunger-gates
that are on 2 side of the sand pit. Jump down when the sand is drained and press
the big brick on the wall. See the Buddha turn. Exit the pit by climbing up on
the 2 stones close to the wall. Locate the last Buddha.Last Buddha – The last
Buddha is the Buddha in the basement of San Saruto’s house. Meet Fix and he
thinks that there’s nothing in the house. Bonus points – 50. Save
point Yokohama 7. Go down to the basement. Stand close to the middle back
wall facing the fan with the 7 Buddha. Look down and step on the activated tile
at the center of the floor. A secret room opens up.
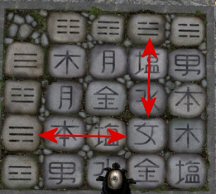
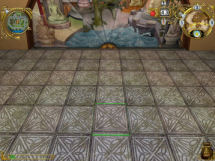
Open San Saruto’s safe:
See a metal safe at one corner of the room. Beside it are 6 levers below 6
faces. With the lever system, move the mask, orientate it following the
indications of expressions.
Play with levers to see
what happens to the faces. There are 5 settings of the levers. Look around for
clues on what expressions are needed. Turn around and look at the wood on the
wall that has curved lines. It shows curved lines like the expression of the
mouth.
Click on lever to set them to (from left to right):
Sad – one setting below the middle or second from
bottom.Very happy – 2
settings above the middle or top.Normal – no change or middle or third from bottom or
top.Happy – one setting above the middle or second from
top.Very sad – 2 settings below the middle or the bottom.
Very happy – 2
settings above the middle or top.
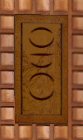
The safe opens. Bonus points – 30. Take the
Japanese letter that needs to be translated.
Go to hotel:
Save point Yokohama 8. Takeshi translates the letter. It states a plot to overthrow
the Emperor and asking an alliance with Britain. Yoko forms a plan to get the
letter to the Emperor. The Emperor cannot refuse an
ikebana. You have to make an ikebana. The Emperor’s ikebana is made of bamboo, irises and cherry blossom.
Divulge the plot to overthrow the emperor:
Form your imperial
ikebana: Exit the hotel to locate the flowers. In
inventory are lotus, wisteria and azalea.
Exchange flowers
– You have to exchange flowers for what you want. You cannot exchange for a
flower that they or you already have.Turn left from hotel,
forward and see a stall that exchanges flowers on right of road. He has all of
your 3 flowers but has bamboo. Let’s look for more floral traders.Go forward pass the
zeppelin and see stalls on the far left of the grass area.The left trader has
azalea, wisteria and cherry tree branch. Exchange your lotus for his
cherry tree branch.Go back to floral trader
by road. Exchange your cherry tree branch for his bamboo.Go back to the other
traders. The middle trader has lotus, azalea and cherry tree branch. Exchange
your wisteria for his cherry tree branch.The right trader has
wisteria, lotus and iris. Exchange your azalea for his iris. Bonus
point – 20.Automatically, an
Imperial ikebana is made and is in inventory.
Go back to Yoko:
After the discussion about costume change, see a ‘gorgeous’ Geisha in shocking
pink. That flower on top of the head is cute. This Oliver Geisha does not
run.
Emperor:
Give the Imperial ikebana to one of the guards. He will deliver it. San Saruto
comes out and talks to Oliver. Bonus points – 40 points.
Automatically get the little trinket number 3 –
Yokohama.
Go and take a ticket
to your next destination: Go to step bridge at end of the
road to the left. Climb the steps and before you cross, turn left. Go down to
customs office and buy ticket. Get a WTO transport
ticket.
Zeppelin – Leviathan
Try to avoid the delay
of your transportation: Save point – Zeppelin
1
See the Commodore:
Hear the Commodore say that there will be delay of 3 days due to avoidance
of flocks of birds. Exit cabin 408, turn right and go forward until the front
part. Press the green button to open the metal door. Go down and move the lever
to slide forward the slider carrier to the bridge of the zeppelin. Climb up to
the bridge. Listen to the discussion of bird watching. The 3-dimensional radar
is broken. Mister Bunsby is enamored with Rose, the Irish young lady.
Repair the 3-dimensional radar: Go down the steps and go to the left
side of the stairs. See the radar. Click on the active part and realized that it
is made by Uncle Matthew and it is missing parts.
Ask for instructions
from Uncle Matthew: Go down the steps. Move lever to go
back to passenger compartments. Exit and go forward until the stairs. Note that
the levels of the deck are written on the base of the walls of the stairs landing.
Go down 2 flights to level 2, go forward and down one more set of stairs. Go
forward to front part to message booth. Pay for a message. The message arrives
with only the last part readable. Turn around and listen to the message using
the machine – respect an angle 0 and the components of the radar are fragile and
usually kept at a safe room.
You need and find the
missing parts to repair the airship’s radar: Go back to
the bridge area via the slider carrier. Go up the stairs and talk to Mister
Bunsby. He states that the parts are in one of the sailor’s cabin and he gives
the key. Go back via the slider carrier. Enter the middle room on the
left by using the key. Open the chest on the floor and take the radar piece
and radar dial.
Go back to the radar.
Click on radar to take off the broken radar piece from the top bar.
Place the radar dial on round central stand. Change the setting to zero.
Bonus points – 20. Save point – Zeppelin 2.
Flock
of birds:
Block the commodore
on upper bridge: Mr. Bunsby wants Rose to see the birds by
blocking the commodore on upper bridge and steer the airship to the flock of
birds. See the commodore go up the lift on far wall. Go to lift and place the
broken piece of radar on the gear.
Go and open the
sluices in the engine room: Go back to passenger area
using the slider carrier. Go forward to stairs, down 3 levels of stairs to level
1 and enter the metal door to engine room. Turn the 2 big wheels on the engine
room. ‘Open’! Go down one more level and turn the 2 wheels on either side of the
engines.
Take the control of
the Leviathan: Go back to bridge and climb up to the
bridge. Click on steering wheel-rudder. Save point Zeppelin 3. Move the
airship out of the way of the birds using the right, left and forward keys or
arrow keys, until the game stop. Bonus points – 30 points.
Unblock the rudder:
Go to the lift and take the broken piece of radar from the gear of the lift.
Save point Zeppelin 4.
Help
the GPAK members to disguise the airship as giant kilts:
Go see the GPAK
members: Hear the knock. Open door to be told that GPAK
member wants you at room 103. You can tip the sailor if you want. Go to room
103. Talk to Mac Fly. The Commodore is upset and Mac Fly wants the plans of the
airship. The plans are in the Commodore’s room 504. Mac Fashion caused the
Commodore’s upset.
Bring the airship
plan to the GPAK member: Go to room 504 to find it closed.
Find the passkey to
open door: Go to the sailor’s room where you got the
radar’s parts on the fourth floor middle room. Use the key given by Bunsby.
Take the master key from under the manly magazines.
Go back to
Commodore’s room and use the master key to open door: Take money from
couch. Take plan of airship from desk. Save point – Zeppelin 5. Exit the
room and talk to Bunsby.
Prevent Bunsby to do
a silly act: Try to enter Bunsby’s room and stop him from
committing suicide. Knock on door.
Find another way to
get in Bunsby’s cabin: Go down 2 levels to level 2 and
exit through right side door with fan etched on it. Turn left to open the wall to a room with a big fan and
the airshaft. Climb up and enter the airshaft. See a ladder. Climb down metal
steps. Go forward through shaft facing you when you climbed down ladder and see
another ladder – do not climb. Go forward to another shaft. Climb this ladder
and enter the passage. Turn right and see a grill to a room. It should be Bunsby’s room. Click on grill. Bonus point 20. Save point – Zeppelin
6.
Go back to Mac Fly at
room 103: Give the plan to Mac Fly. Bonus point 20.
Go on the roof and
install the Scot’s flag: Take the tartan –
Scottish clothing from bunk bed. Exit the room and go to Captain’s bridge.
Use the lift to upper bridge. Enter through metal door. Place the Scottish
clothing on the big tube on right side of the stairs railing. Climb up to the
very top and see 6 levers. Find the correct levers to get the Scottish
clothing completely around the Zeppelin. Use the A-D keys or the side arrow keys
to move Oliver to other levers. From left to right: pull 1, 4 and 6. Bonus
point – 30. Kilt is cool!
Save
the zeron:
Reach Bunsby in upper
bridge: Hear a knock on your door again. Save point –
Zeppelin 7. Open door to get the message that Bunsby wants you. You can tip
the sailor if you want. Use the lift to get to upper bridge. Talk to Bunsby.
Watch Rose and the Commodore.
Help John bring back
the zeron for Rose: Go back to passenger area 4th level
stairs. Take the door on the right while facing the stairs and go forward to end
of the left wing. Push lever to activate the button on the door to outside. Push
button and Oh Gee! The door opens to nothing. Help!
Go outside. Turn right and try over and over and over
to jump to the ledge. I now have acrophobia! Walk the ledge until you see a
ladder. Climb the ladder. Move forwards to the center of the airship. Crouch
down (X key) to get through the overhang. After the overhang, see a post that
has 3 ropes coming out of it. Jump up the right rope that
goes to the zeron. Move towards the zeron and automatically place it in
inventory. Use the S and W key to back up or move forward. Once back on a partly
stable floor, jump down. Go back and automatically meet Bunsby and Rose.
Rose takes the message
attached to the zeron. It is from Cyrus Smith to Uncle Matthew. Matthew will
turn 23 before the 80 days are over. He definitely should not be married before
his 23rd year. Bonus points – 30.
Transfer calciphedre from one airship to another: Save point- Zeppelin 8.
Go see the commodore:
The airship has slowed down again. Go to the bridge and talk to the Commodore
and Bunsby. Listen to their plan.
Connect the hoses
between the 2 airships and open the floods to transfer the calciphedre to the
Behemoth: Go back to passenger area 4th level stairs. Take
the door on the right while facing the stairs and go forward to end of the left
wing. Pull the lever on the Leviathan and then pull the lever of the Behemoths
and see the pipes connected. Connected!
Repair the Behemoth’s
radar: Go to the similar sailor’s room at the middle of
the 4th level of Behemoth. Use the master key to enter. Take the radar piece
and radar dial from the chest on the floor. Go to radar at Captain’s
bridge. Place the radar piece and dial on radar. Change the setting to zero.
Bonus points – 20.
Go back to Leviathan:
Disconnect the fuel
connection: Go back to Leviathan after repairing the radar. On
the way, overhear that the sailors will reverse the pumps to steal the calciphedre that is suppose to be given to Leviathan. Go back to the wing. Pull
the lever to separate the pumps.
Go back to Leviathan:
Turn around to the walkway and push the button of the elevator on the right.
Automatically be in a small airship. Drive the airship to the left side of the
Leviathan. Slowly dock the small airship on the empty space at left of the pad.
Use the spacebar to lower the small airship and forward arrow + shift keys to go
up. (Thanks, dadguy!) Save point – Zeppelin 9.
See the Commodore:
Talk to the commodore at 2nd level at the library meeting area.
Listen to Rose’s plan to steal an airship for her and John’s honeymoon. Learn
about Cyrus Smith. Bonus points – 40.
San
Francisco
Go to your hotel:
Save point – San Francisco 1. The transport ticket booth is on the right
and the rent a car transport is on the left. Go to your hotel by following the minimap. Go
forward and pass by Big Billy Bob Burgers booths or stands where you can buy
food to supplement your energy. Note the funny
placards around. Turn left after the Indian Worlds Theme Park placard on the
corner.
Go to the hotel. The hotel with the uniformed man states that it is only
for artist and smart people. Go left and enter the Royal Palace DeLuxe. Pay
money to the receptionist. Note Sherlock Holmes on the wall. Get Uncle Matthew’s
message. Turn around and play the message on the machine. He wants you to get
the government 1876 authorization to install his invention, the alternated
circulation.
Money: Monies can be possibly
found at the end of the cable car track beside a clothing store. 2 places at the
Amusement park have monies, one by the door of the Scotch Shop and one by the
draped rug at the teepee area. There is possibly monies at the table at Fix’
office later. (Thanks, Ana!)
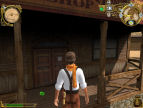
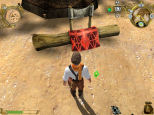
Find a kind engineer
to help you find your uncle’s document: Exit the hotel and
meet a GPAK member, Mac Donald. He wants you to distribute-sell 5 Nouvelle Vague
kilts to 5 clothing stores in the city. He will help you find the Abel,
engineer and a real estate entrepreneur. Use the minimap to find the
clothing stores. Click a kilt from inventory on the ladies standing outside and
see if she will buy it. If she does, you get 10 pounds – money. Note Fix
spy agency posters and placards all over the city.
Bring cash made from
kilt sales back to Mac Donald: Go back to the hotel area and
talk to Mac Donald. He takes the kilt monies. Abel is in one of his sky scratcher.
Find Abel’s working
site: Follow the minimap. Enter the green fenced in B. Abel Tower
Inc. construction area. Climb up the double level observation tower and talk to Abel. His
construction project is running behind. The workers are complaining about the
heights already – 6 floors. There’s an Indian tribe nearby that can work.
Bonus points – 30.
Hire workers for
Abel: Go to Western Theme Park by following the minimap.
The gate will open after completing the puzzle on the left or you can jump in
using a rented car and the ramp.
Teepee puzzle – The object of the puzzle is to
make the inverted triangle to an upright in 3
moves
See the inverted
triangle on the left and the upright triangle.Move bottom point to
top point.Move top
corners to bottom corners.Bonus point – 30.
XX X
XX X X X X
X
XX X X X X
XX X
XSave point – San Francisco 2. The gate opens. Enter
and veer right to Potatoes City Shooting Range. Talk to Indian Chief. Before you
can talk to Chief, you have to undergo trial by fire.Trial by fire:
Buy some potatoes for ammunition. Then click on potato machine gun with potatoes
seen in open inventory; to get a close up of the thrower, numbers to hits and
the target characters. Win 3
consecutive matches by hitting 6 bad targets per match. Do not hit Indians,
dancing girls or pink bunnies. You get 25 20 caliber spuds to get 18 baddies. Use
space bar only or shift and space bar to shoot. Aim the machine gun using the mouse.Talk to Chief Giraffe,
Oxford graduate.
Bonus point – 20. Save point – San Francisco 3.Return to Abel:
Go back to Abel at the green fenced in construction area.Restore energy to Abel’s
deactivated working site: Talk to locked in Abel at the hut
left of wall. Note: While going around, find money at back of the
building being constructed.Wiring puzzle – Connect the right line
to all the boxes. The colors of the cables will help you.Take note of the colors
of the cable on the panel and the colors of the cable that goes underground.Connect all the cables
starting from a hot cable colored black to end on a grounded black.
One solution to this
puzzle is:
Location of fuse box Far corner of the yard behind the
building under constructionRight of gate Far left corner from Abel’s hut By observation building Left of Abel’s hut Color of panel cable black blue blue red red Color of underground cable red red green green black | / / Abel says that Matthew’s
document is at City Archives. You need
authorization to get in the archives. Bonus points – 30. Save point –
San Francisco 4.Go to town archives to
find your uncle’s files: Go to City Library. They
are open during daylight hours only. Go to sleep at the
hotel if it is nighttime on your gameplay. Enter the archives and be told that access is for journalist and
authorized people only.Steal a press card to
enter archives: Exit the library turn left and enter
through the side door. Creep down (X key) forward and turn right. Turn right
again and
take money from bench. Turn right twice and turn left to last cubicle.
Take the press card from floor. Exit and then enter the library and archives. No need
to show your card.Archives:
Talk to the Mrs. Mac Ewing, the Big Billy Bob Burgers owner. She recommends to
search for your uncle’s files under 1870-1880.Look in the files from
1870-1880 for the files about your uncle: Take the elevator to
go up to the top bookshelves. Note that there are only 3 labels: 1730, 1740 and 1900.
Count off the decade from 1900 and see a book that is highlighted. It is a
file from 1884. Now, do some library rearranging. Count off the bookshelves to
get to 1880 – the bookcase on the right of this one. Take the highlighted book
and automatically replace it with the 1884 file. This is 1803 file. Go to
the book shelf that is left of the elevator when you’re facing the wall. The
replaced book is file of 1687.Take the elevator down and go to the 1680’s shelves
that are left of the Mrs. Mac Ewing. Note that there
are 2 decades in each book shelf – below and above the thick shelf. Press the lever to call the
central lift. Climb up and press button. Place the 1687
book. Get a file without date 16–Find the proper place to
put the file without date 16–: Go to the book shelves left of
the elevator. Press lever to call lift. Climb up and press button. Place the no
date file and get file of 1523. Go to lever at right of entrance and pull
it. Climb the lift and place 1523 file. Get Uncle’s File – it’s empty.
Recover stolen certificate:
Find who has stolen
the file’s contents: Exit the archives and learn that your
uncle’s file is popular today. On the way out overhear a man on the phone say
‘he didn’t find…" Save point – San Francisco 5.Outside meet Fix.
Automatically, meet Chief Giraffe. Oliver is changed to an Indian brave. Chief
will get his Haglala Braves to get info about Fix. Look for them during your
travels or use the minimap. The Braves have weird names – Mole, Mislaid Contents… Call
Giraffe, Gigi.Go and search Fix’
Office: Meet an Indian Brave at the corner. Ah, eh I think
you’re Jumping Scarf. Fix is tailed by Tired Koala. Find Depressed Stallion.
Depressed Stallion at the corner tells you where bad white man Fix’s office is
located. Fix’s office is at 7th floor. Bonus point – 20. Save point –
San Francisco 6.Go forward and enter the
alley just before Fix’s office building. Automatically change clothes back to
your normal adventurer outfit. Climb the crates. On the second crate, move back
to the edge and jump to climb to the fire escape. Since Fix is at 7th floor,
click on the lever to release the fire escape ladder. Climb up and do another
ladder.At third floor, enter
the building through the door. Climb to the fourth floor using the stairs inside
the building. Enter the service door
close to the fire escape door on the left at the end of the corridor. Click on
the maid’s uniform. Hahahahahahaha! See Oliver in his new outfit. This lady
doesn’t run either. Exit through the fire escape door and use the fire escape
ladders to get to the top – 7th floor. Enter door to 7th floor.Enter Fix office at the
end of the corridor guarded by a cowboy. Take stethoscope from desk. Save point – San
Francisco 7. Go to safe.Open this safe: Click
stethoscope on safe and Oliver states that the good cog makes a different noise.Turn right (bottom arrow) to 1 and Oliver will say you
got the first number. Turn left (top arrow) to 11 and then right (bottom arrow)
to 21. Open! Hmmm.Another puzzle is seen.
Use the reverse of the safe number 1211. Hurrah! Take the Little trinket #4 –
San Francisco and the personal record of Fix roll.Listen to Fix’s record
roll. He states that Matthew is a con. Well done. Bonus points – 40 points.Go back to the 4th floor
service room via the fire escape. Change clothes automatically. Go down one
floor using the inside stairs and then go to the fire escape. Go down to the ground
level.
And
now leave town:Go left from crates and
forward to the station further down at right of road. The place is crawling with Fix’s cowboys. Talk to Mac
Maniac by the Burger stand behind the rental cars. Save point – San Francisco
8.Find 6 GPAK members:
Use the minimap to locate the 6 GPAK members.Go and take ticket for your next destination: Automatically be in front of
station. Go to the booth left of the cowboys. Walk the far wall and
around to the booth while the GPAK members distract the cowboys. Buy a ticket
for train transport. Get a WTO ticket. Bonus points – 30.
Save point – San Francisco 9.Find another place to
board your transport: Go to Indian Amusement Park. Veer
left and climb the building – Stepmother Killer on the left. Jump in first rail
car. Click on money bags when the railcar is active. This will start the train.Take your train:
When you get close to the wall – jump.Watch the San Francisco
production number. Watch Oliver jump to the real train.
Train – Part 2
Try to
avoid delay of your transportation: Save point – train
combo start.Go see the Commodore:
Talk to Mac Maniac and Aouda. Aouda was offered a part in a big budget
production by Mr.
Steven Steelburg. The Commodore saw a herd of Bison and wants to get a hunting
party going. Mac Mania wants to stop it.Try to prevent
hunting party: Listen to the Commodore at the dining car. Go
forward to the engineer car and enter the door on the left. Go through another
door. Press the button by the door to lower the lift to the roof. Enter and
press button to get to the roof. Go forward to the smoke stack at forward right.
Click on smoke stack. Oliver wants to divert the smoke to the coach train so that no one sees the
bison herd.Go back inside and
forward to the kitchen. Take the kitchen hood from the corner. Go up and
forward to the back of the train. Pick up the loudspeaker from the floor. I
wonder where he kept those big items. Go back to front of the train and smoke stack up on the roof. Place the kitchen hood over the smoke stack and then
place the loudspeaker on the kitchen hood. See that the smoke is diverted down to the train.
Bonus point – 30. Save point – train combo 1.Go back and see the
Commodore: Go back down and see that it is very smoky inside
the train. Talk to the Commodore at the dining car. Was that a dare? Bison hugger.Speed up the train:
Talk to Aouda and Mac Maniac. Mac Maniac will go with you and Aouda will
distract the Commodore. Mac Maniac tries to speed up the OOOPS! The
Commodore comes in and states that the train cannot stop. There’s problem ahead,
the train will crash
and decides that you have to separate the passenger car from the locomotive.
Save point – train combo 2.Be a hero and unhook
the locomotive: Go to top of train again. Go to the back of the
train. Climb down and see big cables between the cars. You have to break the
cables. Look down and open the metal hatch on the floor. Climb down and get the
axe attached to the wall. Climb back up. Use the axe on the 3 metal
connectors of the big cables. Go down the hatch again. Click on both levers to
separate the train cars. Bonus point – 50.
Zeppelin – Leviathan Part 2
Watch as Rose and John
Bunsby in their small airship rescue Oliver. Save point – Zeppelin 10.Oliver is delivered to
the Leviathan while the small airship refuels. A storm is coming and the Captain
decides to land.Avoid
the crash of the airship:Go to the Commodore. On the way to the Commodore, talk to a GPAK member. He tells of a Cloud Killer or Storm Stopper
machine that can stop the storm so that they can get going again.Find 4 of GPAK
members: Find one member at the 4th level meeting area.
One is outside at the right wing. The other is at the library at end of level 2.
Another one is up on the roof of the airship. Get to him using the
carrier to the bridge, use elevator and climb to the end of the ship. Go back to
the engine room. Watch the cloud killer in action as well as the pedaling power
of the kilt brothers. Bonus points – 30.Go see the Commodore:
Go to the bridge. Save point – Zeppelin 11. Fix
has sabotage your plans. You are now imprisoned.Find a way to escape:
You are in your room. Jump on the bed (forward and then
spacebar). Click on air vent. Go forward to the shaft. Go down one level and
enter the shaft. You should be at 2nd level. Go to 4th level and outside to left
wing. Use the far elevator to get to the small airship of Rose and John. They
sighted a cruise ship and will drop Oliver down. Bonus points 40.
Cruise Ship Part 2
Watch Oliver get dropped
on the cruise ship. Save point – boat combo 1.Play the stowaway as best as you can:
Find out the
destination of the ship: Talk to Scheherazade aka Sher and
Pookie Poo aka Otto, the archeologist. Find out that the ship is going to
London. It seems that Pookie Poo is not happy with his circumstance. Give a
kidney, pleasant stroke… Hehehehe!Find a place to sleep: Check
if your old cabin is available. Go to second level at rear decks. Enter through
any side door and go down to second level. Enter the room. Bonus point – 20.
Save point – boat combo 2.Go to London as fast as you can:
Go and see the Commodore:
Hear the Commodore say that there’s an accident and will divert. Exit room, turn right and go up
to the main deck. Go to the Captain’s bridge at front decks. Just below the
bridge, Mac Clean calls you. It seems Sher’s reputation is the cause of
the ship’s quarantine. Mac Clean wants you to take one of the ship’s sloops to
get to London.Take down the steamer’s sloop:
Go to the top outer deck of the rear decks. Look down the balcony to the stern of
the ship and see a nice sloop. There are 2 control panels on either side of this
deck that holds the sloop.Reactivate the control device:
Right Control panel – Star and Balls puzzle:
Enter the right one while facing the rear. See a star and balls puzzle.The object of the game is to place all 8 balls on the
slots. The balls have to be placed in order.The ball is held in the slot if 2 actions are done:
place the ball in the slot ahead of where you want it to be and then click on
the slot you want it to go. So think ahead where you want a ball to go. If the
second action is not done, the ball goes back on the side.The balls must be permanently placed adjacent to the previous
balls.
One possible solution:
Place
ball at 10 o’clock position.Move
it to 5 o’clock.Place
ball at 2 o’clock.Move
it to 10 o’clock.Place
ball at 7 o’clock.Move
it to 2 o’clock.Place
ball at 11o’clock.Move
it to 7 o’clock.
Place
ball at 4 o’clock.Move
it to 11 o’clock.Place
ball at 8 o’clock.Move
it to 4 o’clock.Place
ball at 1 o’clock.Move
it to 8 o’clock.Place
ball at 1 o’clock.
Save point – boat combo 3.
Left Control Panel – Reproduce the right keyboard
puzzle: Go to the other control panel at left corner of
the deck.This is a random puzzle. You can move out and go back to
the puzzle to get an easier one.You have to reproduce the left keyboard on the right
keyboard.
Actions of the keys:Center pad affects itself and the 4 pads: top, bottom,
right and left pads surrounding it.Corner pads affect the 3 pads that surround it.
Middle side pads affect all the pads on that side.
Good luck!
Unstuck the sloop: The sloop
is lowered down. The right side crane is stuck. Go down to main deck and click
on axe on the floor at the corner. It’s not enough. Talk to Scheherazade at
other end of the railing. Uh Oh! Scheherazade caught a cold and lost her
voice.Find a way to heal Scheherazade:
Go to front decks and down to the bar. Talk to Baltimore. Get an Atomic
Baltimore. Go to the boiler room at door left of the stairs at middle deck.
Best way to get here is to use the ramp from front decks to middle decks area.At the engine room, go down one level and forward to
the 3 big tubes filled with liquid. Look at the right connecting pipe of the
middle big tube. Click Atomic Baltimore on pipe to get Armageddon cocktail.Go back to Scheherazade. Give her the Armageddon
cocktail. Bonus point – 40. AHHHHHHHHHHHHHHHHHH! Watch the
sloop get unstuck.Sail back to England on steamer sloop: Save point – boat combo
4. Timed puzzle coming! Left click to skip the dialogs. Open the furnace and
note that fuel is down. Immediately go to the back and take the axe between the
drum and crates. Use axe on anything highlighted to get planks. Immediately place them in furnace. Best to get the close active wood first and
place them in the furnace. Then you have more time to get the farther ones. Do
this 5-6 times and see Motherland. Bonus points – 80.
Oliver is placed in jail. Uncle Matthew arrives to
give (after some prodding) an explanation. Bundelkund… Let us all bow.
This
document may not be distributed without express written permission of the author
and the content may not be altered in any way.For
Questions or Comments on this Walkthrough,
Write to:
MaGtRo
Copyright © 12/2005
MaGtRo